Chapter 7. Photosynthesis
Objectives
By the end of the period, students will be able to:
- understand how plants and other producers “capture” the energy of sunlight and use that energy to make simple sugars.
- understand one way that photosynthesis can be measured.
- perform an experiment that investigates one or more variables that affects the rate of photosynthesis.
- compare and understand the equations for photosynthesis and cellular respiration.
- understand the structure of chloroplasts and what spongy mesophyll is.
Modified from a Lab Written by Kim Foglia and Brad Williamson. Used with Permission.
Introduction
One of the most important natural processes that occurs in the world is photosynthesis. All organisms including people depend on plants as well as certain protists and bacteria for oxygen, one of the products of photosynthesis. In addition, the process of photosynthesis “fixes” carbon. That means that plants and protists take carbon in the form of CO2 from the atmosphere and convert it into organic compounds that are the building blocks of all organisms. The process of photosynthesis is the means by which plants get and store energy. All organisms that feed themselves in this way are called producers or autotrophs. The term autotroph literally means “self-feeding.”
Organisms that derive their energy from eating plants or other organisms are called consumers, or heterotrophs. Consumers include herbivores as well as decomposers, predators, and scavengers.
What is photosynthesis? We can examine this question by reviewing the general equations for photosynthesis and respiration.
In photosynthesis, plants and other producers “tie up” solar energy (sunlight) by using it to make energy-rich simple sugars (including glucose). A by-product of the reaction is the production of molecular oxygen (O2). The general chemical reaction of photosynthesis is:
Notice that in this reaction, carbon dioxide (CO2) is combined with water to make simple sugars. To do this requires energy and that energy comes from light.
A more detailed reaction equation for photosynthesis is:
By looking at this equation we can determine the rate of photosynthesis by measuring either:
—the production of oxygen.
—or the consumption of carbon dioxide.
What has happened to the solar energy that was put into the left side of the equation? The energy tied up in the bonds of glucose or other organic molecules cannot be used directly by cells of plants or animals to drive cellular processes. Instead, cells must make ATP that can be used as an immediate source of energy to help push energy-requiring chemical reactions along. This process of making ATP is called cellular respiration.
In respiration, organic molecules (including carbohydrates such as glucose) react with oxygen indirectly. Enzymes control the rate at which this reaction occurs. When carbohydrates are broken down, there is a release of energy. The energy that is released in this process can be used to make ATP. Then, ATP can be used in cells to drive all energy-requiring cellular processes. Notice that in respiration, oxygen is consumed (used up) and CO2 is produced.
The equation for cellular respiration is:
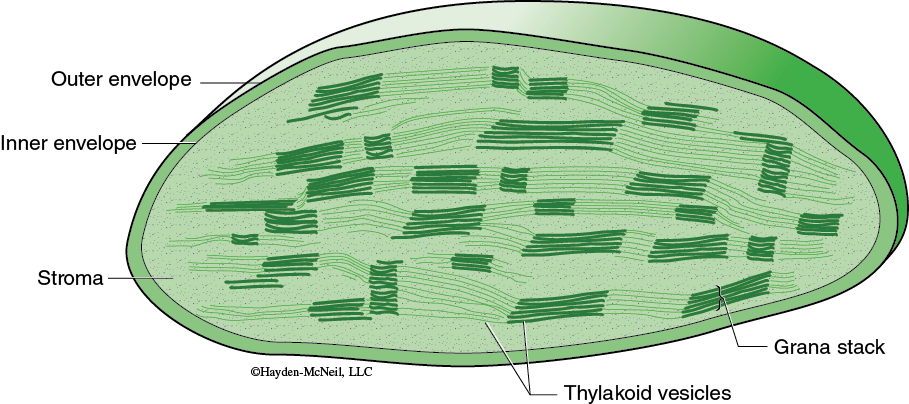
The specific reactions of photosynthesis are divided into two parts: the light-dependent reactions and the light-independent reactions. In eukaryotes, each set of reactions occurs in a different part of the chloroplast (Figure 7.1). The light-dependent reactions obviously require light and occur in association with the thylakoids. The light-independent reactions are where the carbon fixation occurs; this happens in the stroma. Use your text to review the structure and organization of chloroplasts as well as the details of the light-dependent reactions and the light-independent reactions.
LIGHT-DEPENDENT REACTIONS
These reactions begin as chlorophyll pigments capture light energy (in the thylakoids, see Figure 7.1), causing one of the electrons in the chlorophyll to move to a higher energy state. The energized electron is transferred to an acceptor molecule and is replaced with an electron from a water molecule. This causes the water molecule to split, and molecular oxygen is produced. Some of the energy from the energized electron changes ADP to ATP. In addition, the coenzyme NADP+ is reduced and forms NADPH. Thus, the products of the light-dependent reactions are ATP and NADPH and oxygen. The ATP and NADPH produced in the light-dependent reactions are well suited to transfer chemical energy but they are not suited for long-term storage of chemical energy.
LIGHT-INDEPENDENT REACTIONS OR THE CARBON FIXATION REACTIONS
Carbon fixation occurs in the stroma of the chloroplast (again, see Figure 7.1). Although these are sometimes called the “dark reactions,” they do not require darkness but can proceed whenever there are products from the light-dependent reactions. In carbon fixation, the energy of ATP and NADPH is used in the formation of organic molecules from CO2. Many plants use a sequence of reactions known as the Calvin cycle in the fixing of CO2.
PLANT CELLS IN LEAVES
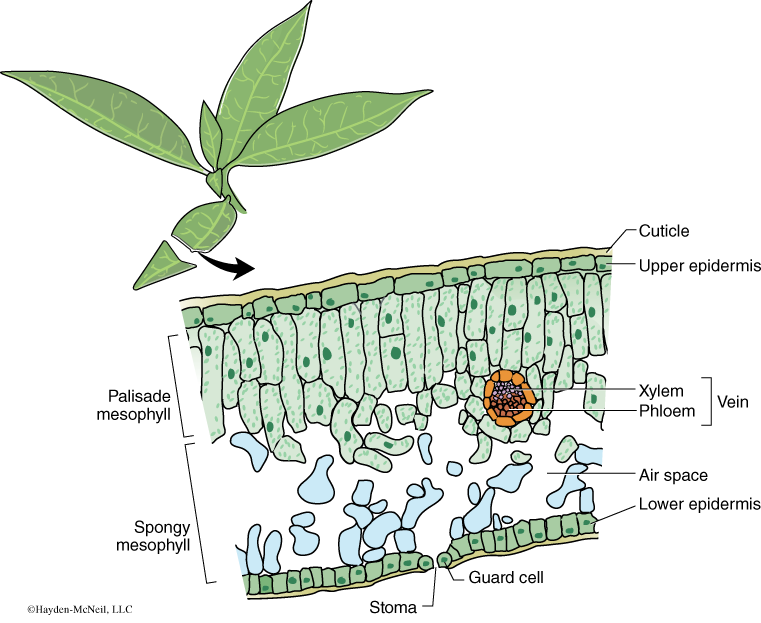
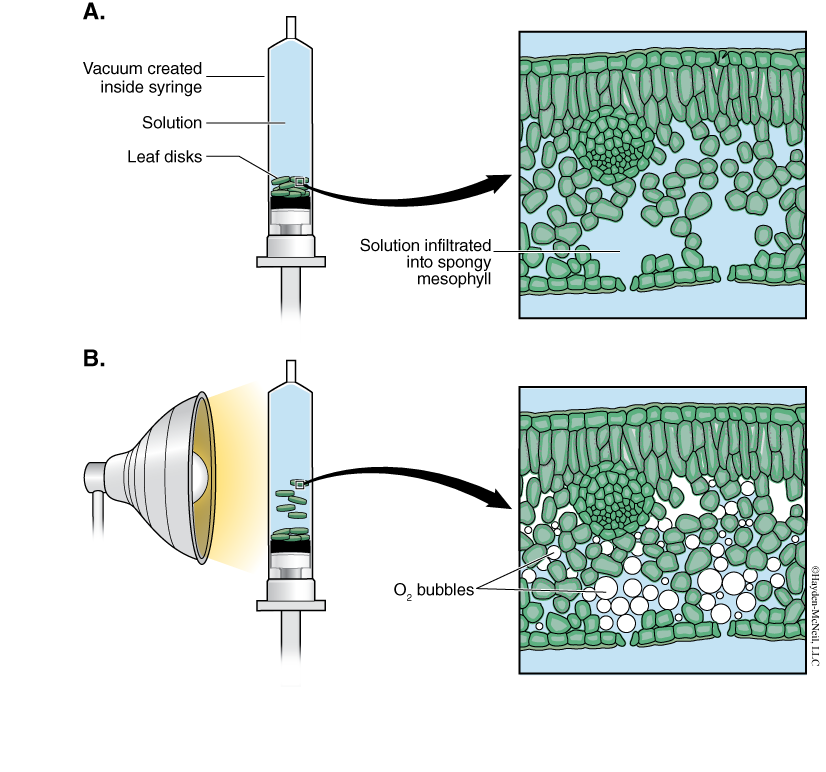
A cross section of a leaf shows an outer waxy layer of cells and inner region that is “spongy.” The cells in this inner spongy mesophyll have lots of chloroplasts and lots of spaces between cells (Figure 7.2). Because the spongy mesophyll layer of leaves is normally infused with gases (O2 and CO2), leaves—or disks cuts from leaves—normally float in water. If the gases are drawn from the spongy mesophyll layer by using a vacuum and replaced with an aqueous solution with a small amount of bicarbonate, then the density of the leaf disk will increase, and the leaf disk will sink in water.
We will be using small disks from spinach leaves to do an experiment on the rate of photosynthesis. And, we will use bicarbonate as an alternate source of carbon dioxide so that photosynthesis can occur in a sunken leaf disk. As photosynthesis proceeds, oxygen accumulates in the air spaces of the spongy mesophyll and the leaf disk will once again become buoyant and rise in a column of water. Therefore, the rate of photosynthesis can be indirectly measured by the rate of rise of the leaf disks.
However, there’s more going on in the leaf than that! You must also remember that cellular respiration is taking place at the same time as photosynthesis in plant leaves (remember plant cells have mitochondria, too!). Aerobic respiration will consume oxygen that has accumulated in spongy mesophyll. Consequently, the two processes counter each other with respect to the accumulation of oxygen in the air spaces of the spongy mesophyll. So now we have a more robust measurement tool—the buoyancy of the leaf disks is actually an indirect measurement of the net rate of photosynthesis occurring in the leaf tissue.
Light and Its Measurement
One of the key ingredients for photosynthesis to occur is light. Visible light is a portion of the electomagnetic spectrum (shown on the back cover of your lab manual) and includes the wavelengths of energy that are visible to us. Roughly speaking, we can see wavelengths from about 400–700 nm. The visible spectrum can be subdivided by wavelength into the visible colors—violet or blue have relatively short wavelength, while reds have longer wavelengths.
We will measure the intensity of visible light by using a light meter that measures in footcandles or fc. A foot-candle is a measure of light that is equivalent to one lumen per square foot, or the amount of light put out by one candle measured at one foot. One foot-candle is barely enough light to read by.
Each lab will have several light meters that will be shared between groups. The light meter has a flat sensor that must be pointing toward the light source to be measured.
Procedure for measuring light
- Turn the light meter on.
- Place the sensor in the direction of the light source at the distance you want to measure.
- Place the range switch to 200.0 fc and read the value. You can hold the value by switching the data switch to “hold.”
- If the meter overages, switch to the next setting or 2000 fc.
You should use the lowest setting possible to get the most accurate numbers.
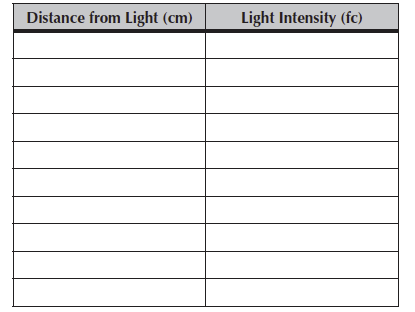
How does light intensity change as a function of distance from a light source? Using the light at your table, make at least 10 measures at different distances from the light. Tools: one fluorescent light, light meter, meter stick. Measure the distance carefully.
Please recopy these data onto your Hand-In for today’s lab.
Table 7.1. Measures of light intensity as a function of distance from a light source.
What can you say about how light intensity changes with distance? How careful do you need to be to get an accurate measurement?
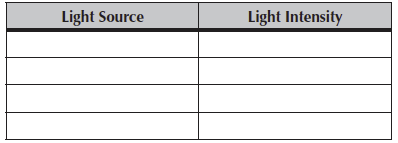
What measure do you get if you measure sunlight? What about indirect light from the windows? Sometime during the lab period make additional measurements of light intensity from several different sources.
Table 7.2. Measures of light intensity from various sources.
WHAT IS THE EFFECT OF LIGHT INTENSITY ON THE RATE OF PHOTOSYNTHESIS?
Refer back to the equation for photosynthesis. Remember, we can determine the rate of photosynthesis by measuring either the production of oxygen or the consumption of carbon dioxide. The main part of lab today will be to do an experiment to investigate the effects of light intensity on the rate of photosynthesis in spinach. We will measure the production of oxygen and thus are measuring the light-dependent reactions.
Will the rate of photosynthesis increase with increasing light? One may be tempted to say “of course.” But, is it possible that some plants may be adapted to photosynthesize maximally at lower light levels than full sunlight? We can’t know without running the experiment.
Since a plant may be photosynthesizing and respiring at the same time, we need to be aware that what we measure will be a product of both processes. Why would this work?
Respiration (R) involves consumption of oxygen and organic matter and the production of carbon dioxide.
Gross photosynthesis (GP) is the amount of measured photosynthesis, not taking into account losses by cellular respiration.
Net photosynthesis (NP) is the actual amount of photosynthesis after taking into account losses by cellular respiration.
Procedure
In this part of the lab, you will be introduced to the floating disk measurement technique. It is important for you to develop a few skills during this part of the investigation in order to carry out your own experiment. For the floating disk technique, the most challenging skill is getting the disks to sink. Don’t just watch someone do this; make sure you can get the disks to sink as well. You will be working in teams of 4 students.
MATERIALS
- Baking soda (sodium bicarbonate), premixed
- Plastic syringes (no needles!) 10 cc or larger
- Living healthy leaves (spinach)
- Hole punch
- Clear plastic cups, labeled
- Timer
- Lights
Each team will have a different number of lights, with one group putting their disks into total dark. Each student will be responsible for recording the data from one cup.
- We will provide premixed 0.2% bicarbonate solution. (Note that smaller amounts may be prepared by dissolving 1/8 teaspoon of baking soda in 300 ml of water.) The bicarbonate will serve as a source of carbon dioxide for the leaf disks while they are in the solution.
- Pour the bicarbonate solution into a clear plastic cup to a depth of about 3 cm. Label this cup “With CO2.” Fill a second cup with only water to be used as a control group. Label this cup “Without CO2.” Throughout the rest of the procedure you will be preparing material for both cups, so do everything in parallel to prepare material for both cups simultaneously.
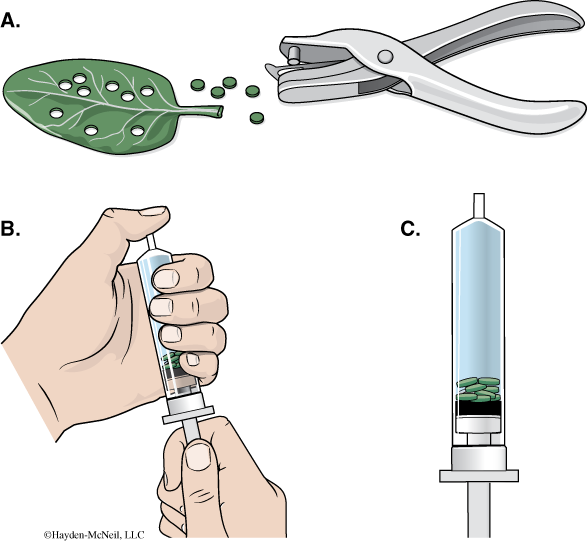
- Using a hole punch, cut 10 or more uniform leaf disks for each cup. Avoid major leaf veins. (The choice of plant material is perhaps the most critical aspect of this procedure. The leaf surface should be smooth and not too thick, therefore, leaves with hairy surfaces must be avoided. We will be using spinach for this.)
- You must now draw the gases out of the spongy mesophyll tissue and infiltrate the leaves with the sodium bicarbonate solution. To do this:
- Remove the piston or plunger from both syringes. Place the 10 leaf disks into each syringe barrel.
- Replace the plunger but be careful not to crush the leaf disks. Push in the plunger until only a small volume of air and leaf disk remain in the barrel (<10%).
- Pull a small volume (5 cc) of sodium bicarbonate solution into one syringe and a small volume of water into the other syringe. Tap the syringe to suspend the leaf disks in the solution.
- You now want to create a vacuum in the plunger to draw the air out of the leaf tissue. Create the vacuum by holding a finger over the narrow syringe opening while drawing back the plunger. Hold this vacuum for about 10 seconds. While holding the vacuum, swirl the leaf disks to suspend them in the solution. Now release the vacuum by letting the plunger spring back. The solution will infiltrate the air spaces in the leaf disk, causing the leaf disks to sink in the syringe. If the plunger does not spring back, you did not have a good vacuum, and you may need a different syringe. You will probably have to repeat this procedure 2–3 times in order to get the disks to sink (if you are still having trouble, ask your TA for help). Placing the disks under vacuum more than three times can damage the disks.
- Pour the disks and the solution from the syringe into the appropriate clear plastic cup. Disks infiltrated with the bicarbonate solution go in the “With CO2” cup, and disks infiltrated with the water go in the “Without CO2” cup.
- Measure the light intensity of your group’s treatment. Be sure to hold the light meter at the same distance that your disks will be from the light.
- Place both cups under the light source and start the timer. At the end of each minute, record the number of floating disks. Then swirl the disks to dislodge any that stuck against the side of the cups. Continue until all of the disks are floating in the cup with the bicarbonate solution. Note that each team will have a different number of lights.
- Repeated testing of this procedure has shown that the point at which 50% of the leaf disks are floating (the median) should be used as the point of reference for this assay when comparing different experimental treatments. The 50% point, or ET50, provides a greater degree of reliability and repeatability for this procedure. We can then calculate 1/ET50 to give us the rate of photosynthesis.
- Within each team of 4, one cup should be with water and the other three should be with bicarbonate. Thus, each team will have a water control and three replicates for the disks in the bicarbonate. Each team will be working with a specific number of lights. Each student will complete the table in their Hand-In for their own data, and record the class data.