Previewing
Previewing involves taking a first look at your assigned reading before you really tackle the content. Think of previewing as browsing in a newly remodeled store. You locate the pharmacy and grocery areas. You get a feel for the locations of the men’s, women’s, and children’s clothing departments; housewares; and electronics. You pinpoint the restrooms and checkout areas. You get a sense for where things are in relation to each other and compared to where they used to be. You identify where to find the items that you buy most often, whether they are diapers, milk, school supplies, or prescriptions. You get oriented.
Previewing a chapter in your textbook or other assigned reading is similar. The purpose is to get the big picture, to understand the main ideas covered in what you are about to read and how those ideas connect both with what you already know and with the material the instructor covers in class. Here’s how you do it:
- Begin by reading the title of the chapter. Ask yourself: What do I already know about this subject?
- Next, quickly read through the learning objectives, if the chapter has them, or the introductory paragraphs. Learning objectives are the main ideas or skills that students are expected to learn from reading the chapter.
- Then turn to the end of the chapter and read the summary, if there is one. A summary highlights the most important ideas in the chapter.
- Finally, take a few minutes to skim the chapter, looking at the headings, subheadings, key terms, tables, and figures. You should also look at the end-of-chapter exercises.
As you preview, note how many pages the chapter contains. It’s a good idea to decide in advance how many pages you can reasonably expect to cover in your first study session. This can help build your concentration as you work toward your goal of reading a specific number of pages. Before long, you’ll know how many pages are practical for you to read in one sitting.
Previewing might require some time up front, but it will save you time later. As you preview the text material, look for connections between the text and the related lecture material. Remember the related terms and concepts in your notes from the lecture. Use these strategies to warm up. Ask yourself: Why am I reading this? What do I want to know?
Keep in mind that different types of textbooks can require more or less time to read. For example, depending on your interests and previous knowledge, you might be able to read a psychology text more quickly than a biology text that includes many scientific words that might be unfamiliar to you. Ask for help from your instructor, another student, or a tutor at your institution’s learning assistance center.
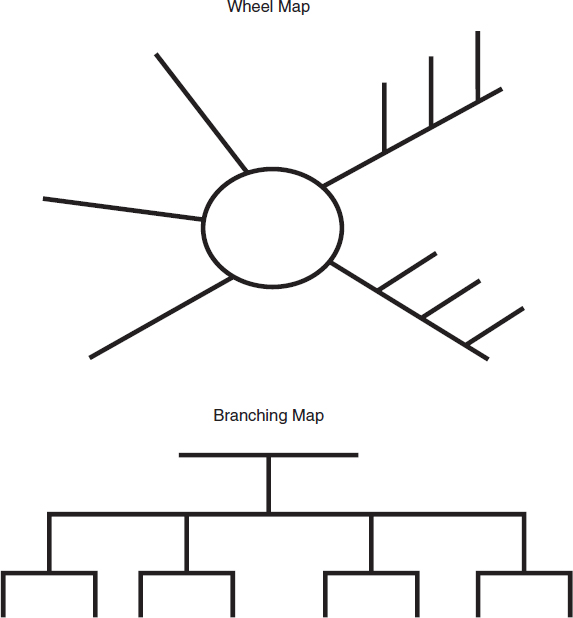
Mapping Mapping is a preview strategy in which you draw a wheel or branching structure to show relationships between main ideas and secondary ideas and how different concepts and terms fit together; it also helps you make connections to what you already know about the subject (see Figure 6.1). Mapping the chapter during the previewing process provides a visual guide for how different chapter ideas work together. Because many students identify themselves as visual learners, visual mapping is an excellent learning tool, not only for reading, but also for test preparation.
In the wheel structure, place the central idea of the chapter in the circle. The central idea should be in the chapter introduction; it might even be in the chapter title. Place secondary ideas on the lines connected to the circle, and place offshoots of those ideas on the lines attached to the main lines. In the branching map, the main idea goes at the top, followed by supporting ideas on the second tier, and so forth. Fill in the title first. Then, as you skim the chapter, use the headings and subheadings to fill in the key ideas.

FIGURE 6.1  Wheel and Branching Maps
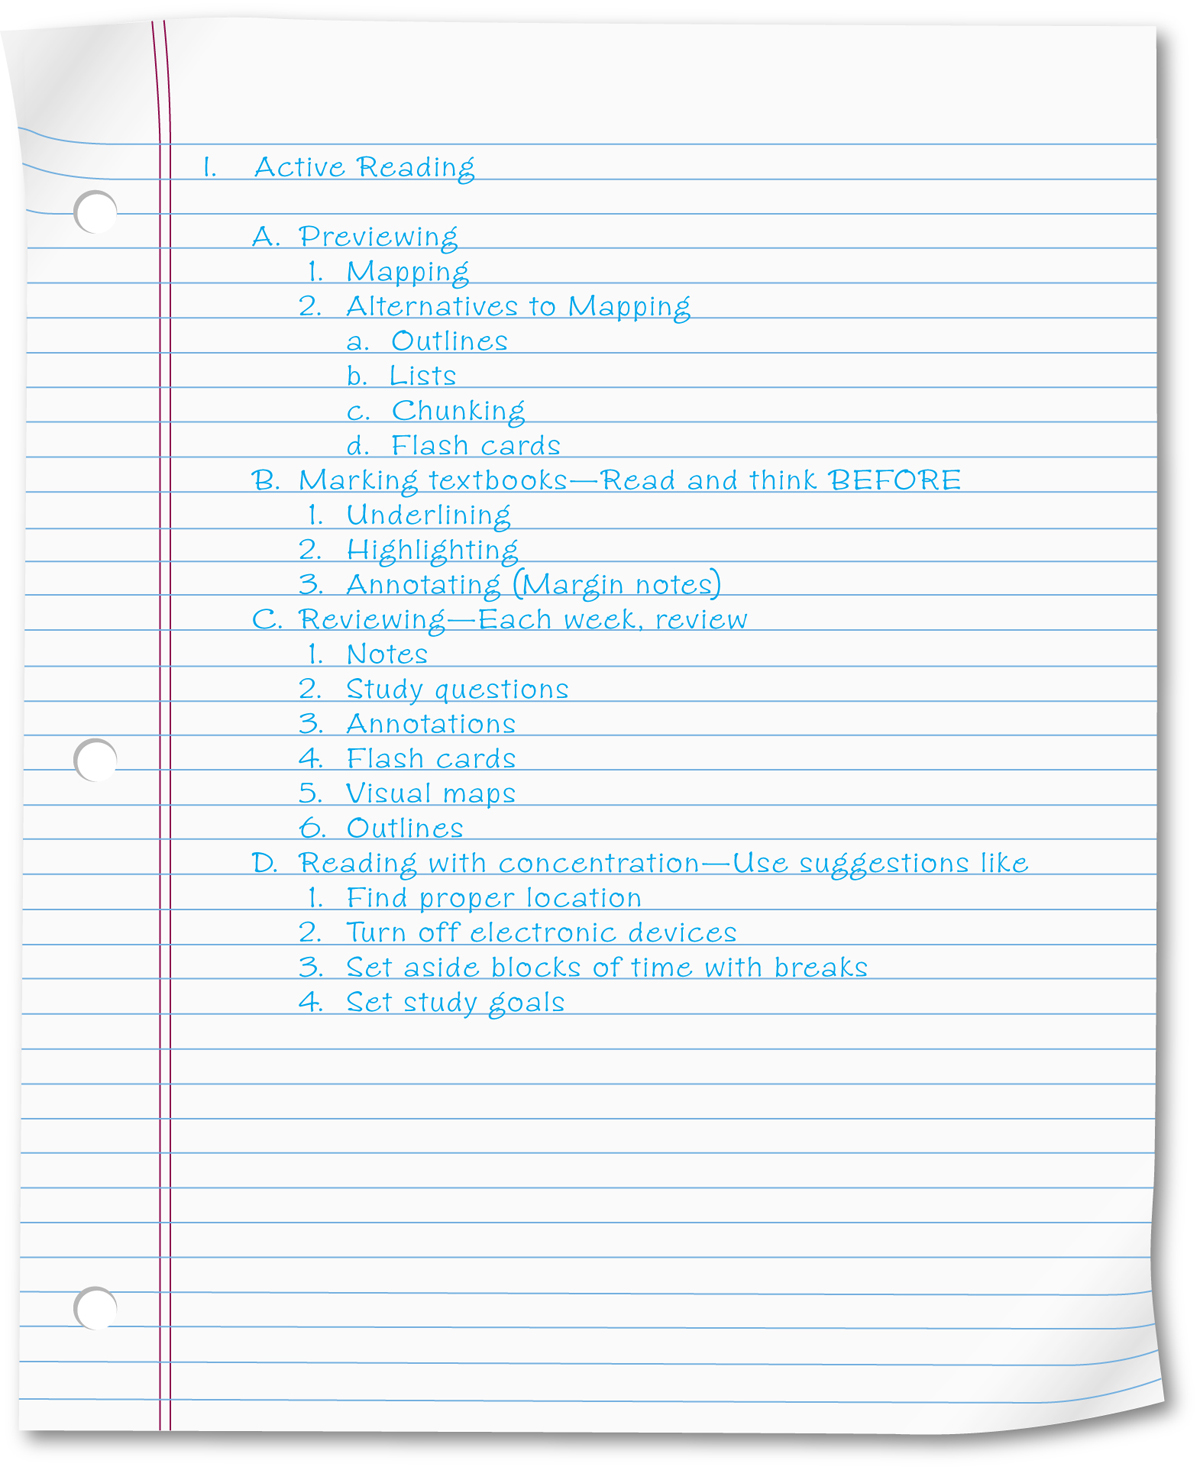
Outlining or Listing Perhaps you are more of a read/write learner than a visual learner and prefer a more step-by-step visual image. If so, consider making an outline of the headings and subheadings in the chapter. You can usually identify the text’s main topics, subtopics, and specific terms within each subtopic by the size of the print. Notice, also, that the different levels of headings in a textbook look different. In a textbook, headings are designed to show relationships among topics and subtopics covered within a section. Flip through this textbook to see how the headings are designed. See a sample outline of this chapter in Figure 6.2. (Review the chapter “Getting the Most from Class” for more on outlining.)
To save time when you are outlining, don’t write full sentences. Rather, include clear explanations of new technical terms and symbols. Pay special attention to topics that the instructor covered in class. If you aren’t sure whether your outlines contain too much or too little detail, compare them with the outlines your classmates or members of your study group have made. You can also ask your instructor to check your outlines during office hours. In preparing for a test, review your chapter outlines so you can see how everything fits together.

FIGURE 6.2  Sample Outline
Here is how an outline of the first section of this chapter might look.
Another previewing technique is listing. A list can be effective when you are dealing with a text that introduces many new terms and their definitions. Set up the list with the terms in the left column, and fill in definitions, descriptions, and examples on the right as you read or reread. Divide the terms on your list into groups of five, seven, or nine, and leave white space between the clusters so that you can visualize each group in your mind. This practice is known as chunking. Research has shown that we learn material best when it is presented in chunks of five, seven, or nine.
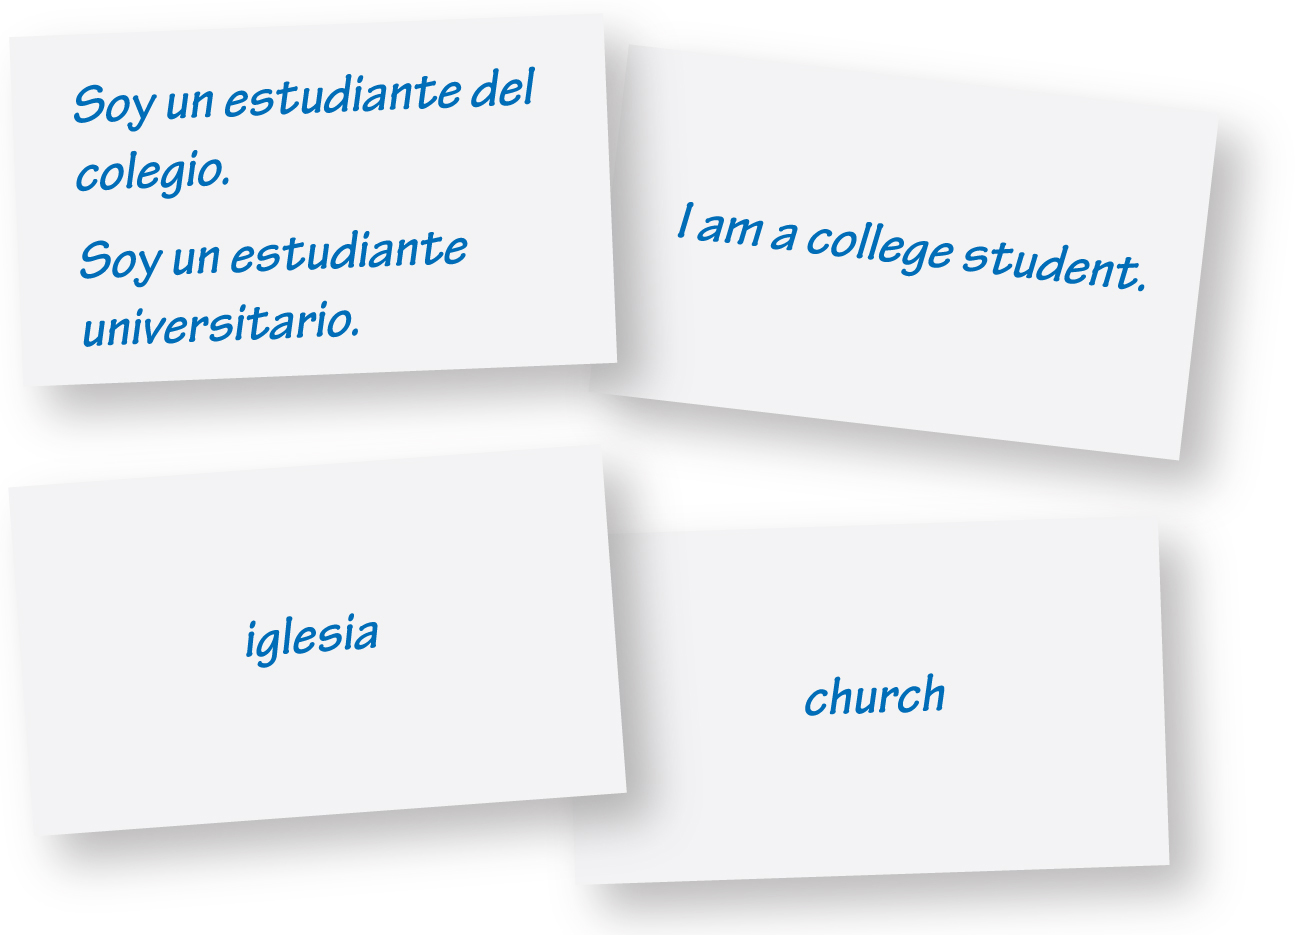
Creating Flash Cards Flash cards are like portable test questions—you write a question or term on the front of a small card and the answer or definition on the back. In a course that requires you to memorize dates, like American history, you might write a key date on one side of the card and the event that correlates to that date on the other. To study chemistry, you would write a chemical formula on one side and the ionic compound on the other. You might use flash cards to learn vocabulary words or practice simple sentences for a language course. (See Figure 6.3.) Creating the cards from your readings and using them to prepare for exams are great ways to retain information, and they are especially helpful for visual and kinesthetic learners. Some apps, such as Flashcardlet and Chegg Flashcards, enable you to create flash cards on your electronic devices.

FIGURE 6.3  Examples of Flash Cards