Chapter 1. Synthesis of Nanoparticles: Ferrofluids
Safety Precautions
- Chemical splash goggles, gloves, and apron must be worn at all times.
- Magnetite solutions permanently stain clothing. Avoid contact of chemicals with clothing and skin.
- Acid and base solutions are caustic and corrosive. Immediately wash all spills with excess water and inform the teaching assistant.
- Nd2Fe12B magnets strongly attract to metal surfaces and other magnets. Placing one magnet on top of another is not recommended and poses a pinching hazard.
Materials List
- iron(III) chloride, FeCl3
- iron(II) chloride tetrahydrate, FeCl2∙4 H2O
- 10 M ammonia, NH3
- cyclohexane, C6H12
- 13,000 Gauss Nd2Fe12B magnets
Objectives
After completing this project, you will be able to:
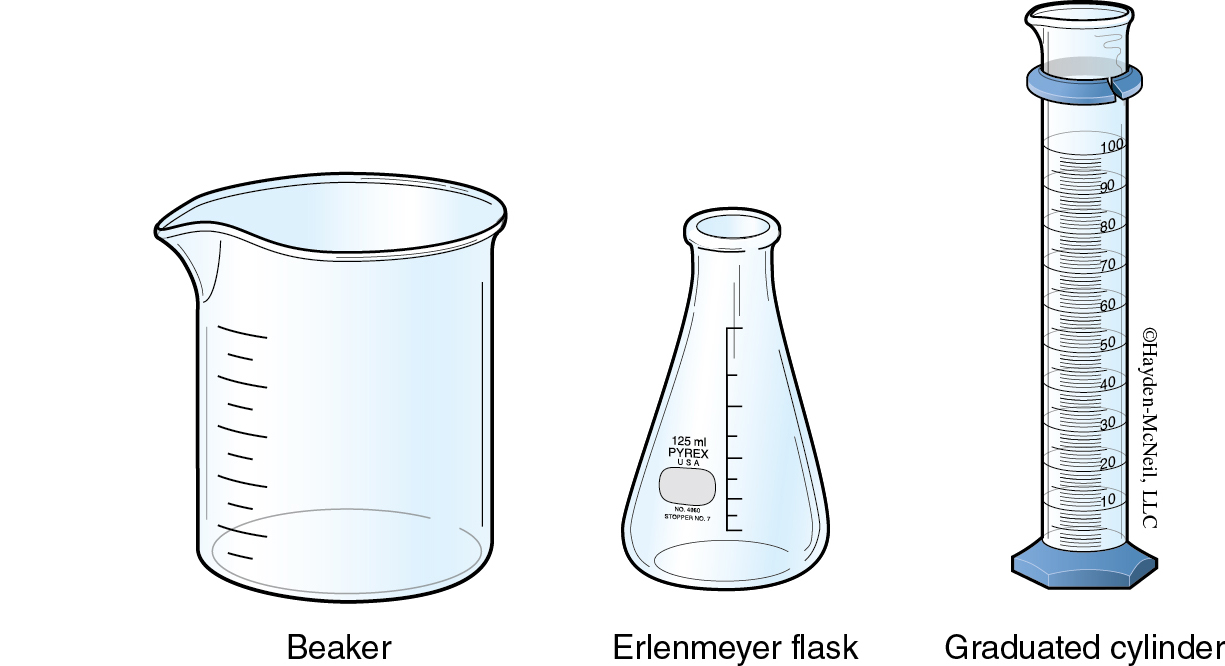
- identify the following basic laboratory equipment and demonstrate their proper use: beaker, Erlenmeyer flask, graduated cylinder, pipet, electronic balance
- properly conduct the following basic laboratory methods: measurement of liquid volume, measurement of sample mass, centrifugation, decantation, gravity filtration
Introduction
During this procedure you will synthesize magnetite (Fe3O4) particles.1 The balanced equation for formation of the magnetite (Fe3O4) product is shown in (1).
As a mineral, magnetite is a black, magnetic rock. The magnetite created here, however, is in the form of nanoscale particles with a diameter of approximately 10 nm. Rather than being a solid, the particles are small enough to be suspended in an aqueous solution. The result is unique: a liquid that has the fluid properties of water and the magnetic properties of magnetite—a magnetic liquid, or ferrofluid!
The properties of the ferrofluid are extremely sensitive to the care and precision with which the procedure is followed. Using the wrong amount of a reactant, or adding the ammonia solution too quickly, will ruin the product. The quality of your work during this experiment will be demonstrated in the ferromagnetic properties of your final product.
1 Procedure modified from Berger, P.; Adelman, N. B.; Beckman, K. J.; Campbell, D. J.; Ellis, A. B.; Lisensky, G. C. J. Chem. Educ. 1999, 76, 943–948.
Scientific Background
Mass Measurement (Weighing)
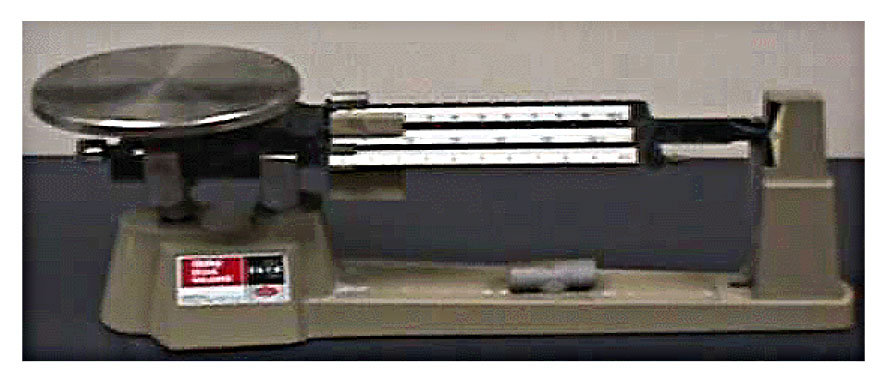
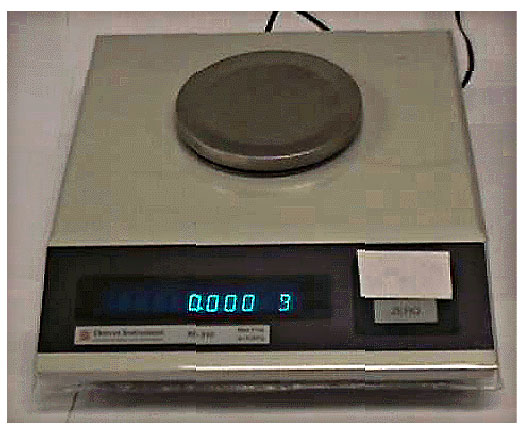
Two types of balances will be used in this experiment. The single pan triple-beam balance, shown in Figure 1.1, can weigh objects up to several hundred grams with a minimum precision of ±0.01 g. The electronic balance, shown in Figure 1.2, can weigh objects up to 310.000 g with a precision of ±1 mg (±0.001 g).
To minimize errors inherent in the balance, always use the same balance when weighing. Because masses are often obtained by difference, any errors in the balance will be subtracted out when obtaining the difference. Never weigh objects when warm; always allow the object to cool to room temperature before weighing. Warm objects weigh less than cool objects due to convection currents.


Fill in the blank: A can weigh objects up to several hundred grams with a precision of ±0.01 g, whereas a can weigh objects up to 310.000 g with a precision of ±1 mg.
Using the Triple-Beam Balance: Be certain that the balance pan, beams, and stand are clean and dry. Place the three sliding weights at the left-hand end of the range. The second (100 g) and third (10 g) slides should catch in the dents at the left which are marked with a zero. Check to see that the balance swings freely, with the center of the pointer swings at the center of the scale marks. If this condition is not attained, have the laboratory teaching assistant adjust the balance.
Place the object to be weighed on the pan and move the 100 g slide first, leaving it in the dent position just short of over-balance. Over-balance occurs when the arm points below the center of the scale indicating that too much weight is on the slides. Next adjust the 10 g slide in the same way. Finally, adjust the small slide until an exact balance is attained. Read the value position of the three slides and add these values together to obtain the object’s mass. NOTE: The 1 g slide arm is marked in increments of 0.1 g; as a result, the second decimal can be estimated. For example, if the 1 g slide falls about 4/10 of the way between 1.2 g and 1.3 g, the second decimal is estimated and the mass reading reported as 1.24 g.
Using the Electronic Balance: The electronic balance is an expensive, precision piece of laboratory equipment and must be treated with care. Listed in the table below are the proper procedures to be followed when using the electronic balance. Your laboratory assistant will instruct you on how to use the balance. If difficulty arises in using the electronic balance, ask your laboratory teaching assistant for additional help.
Handling items to be weighed with bare hands can alter the results.
| A. |
| B. |
Before placing a sample on the electronic balance, press the zero button. Automatically, the balance reading will go to 0.000 g. If not, call your laboratory teaching assistant. Place the container into which you will be weighing your chemical on the center pan of the electronic balance. NOTE: When weighing chemicals, always use a container. The balance weighs automatically. Read and record the mass of the empty container. At your laboratory desk or on the triple-beam balance, add the proper amount of chemical to the weighed container. Return to the same electronic balance, press the zero button again, and read and record the mass of the container plus chemical. Subtract the mass of the empty container from the mass of container plus chemical to obtain the mass of the chemical. This process is referred to as “weighing by difference.” Your teaching assistant will demonstrate the process of weighing by difference before you begin this experiment.
Measure Liquid Volume with a Graduated Cylinder

Variable liquid volumes are commonly measured and delivered using a graduated cylinder, not a beaker or Erlenmeyer flask. The gradation marks on beakers and flasks are approximate, and cannot be used to precisely measure volumes. Pour your liquid into an appropriately-sized graduated cylinder until the bottom of the liquid’s meniscus reaches the desired volume. The lowest portion of the curved liquid surface (meniscus) is used as the reference point at which the volume measurement is taken. Your eyes should be held at the same level as the meniscus to avoid parallax error. If necessary, a dropper may be used to remove or add small amounts of liquid to reach the desired volume.
It is important not to write down too many or too few significant figures as the result of a measurement. One of the most common sources of error in experimental data is that due to the uncertainty of estimating fractional parts between scale divisions. Usually one and only one estimated figure is retained and it is regarded as a significant figure. Figure 1-4 serves to illustrate this point. The 10 mL graduated cylinder is marked in increments of 0.1 mL. The bottom of the meniscus lies over 5.7 mL but under the 5.8 mL mark. The second decimal is estimated and the volume recorded as 5.78 mL. What volume of liquid is in the 100 mL graduated cylinder?
Use of a Stirring Hot Plate
A magnet attached to a motor is under the surface of the stirring hot plate. When the stir dial is turned on, the motor spins the magnet. Stir bars also contain magnets, within a chemicallyinert Teflon coating. To stir solutions, place a stir bar inside a container such as a beaker, place it on a stir plate, and turn the stir dial to the lowest setting. Gradually increase the speed of the stirring to avoid splashing the liquid. The spinning magnet inside the stir plate will induce the stir bar to spin within the solution. Be careful not to turn on the heat dial unless you intend to heat your solution, too.
Gravity Filtration
Using a clamp, mount a funnel in a vertical position on a ring stand. The bottom of the funnel stem should touch the inside of the vessel in which the filtrate is to be collected, about two centimeters below the rim.
Fold a piece of filter paper along its diameter. Fold again along the radius at right angles to the original fold. Tear off a small piece of the top corner of one side. The tear helps the filter paper fit better in the funnel. Place the paper in the funnel with the tear on the outside, against the glass. Wet the paper with distilled water. With your fingers, press the top edge of the paper into the funnel so that no air can pass. Test the filter by filling it with distilled water. The water should soon fill the stem completely, forming a continuous column of liquid that produces a gentle suction promoting filtration, by its hydrostatic pressure. If a continuous column of liquid does not result, air bubbles are present between the funnel and the paper. These bubbles must be dislodged by pressing the paper firmly against the walls of the funnel.
Filter the suspension by pouring the supernatant liquid down a glass rod held vertically with the lower end resting against the side of the paper in the funnel. Pouring in this way helps to prevent splashing. However, be careful not to punch a hole in the filter paper with the stirring rod. Be patient while filtering. Do not pour too much liquid into the filter paper. The liquid and the precipitate should always be lower than 1/4 inch from the top of the filter paper. Keep the precipitate in the beaker as long as possible, and then pour the suspension down the stirring rod and into the filter. Use water from your distilled water bottle to wash all of the precipitate out of the beaker and into the filter paper. Wash your precipitate at least twice with small amounts of distilled water.
Pipet
A pipet is used to deliver a fixed volume of solution. Before using the pipet it should be cleaned and then rinsed with two small portions (~1 mL) of the liquid to be pipetted. Place a pipet pump on the end of your pipet so that the pump is easy to remove. Turn the pipet pump’s wheel to its lowest setting. Using the wheel, draw liquid into the barrel of the pipet until ca. 1 inch above the mark for the volume of liquid required.
![]() Never pipet by mouth; always use a pipet pump.
Never pipet by mouth; always use a pipet pump.
While filling the pipet, the pipet tip should be kept under the surface of the liquid; otherwise, air will be drawn into the pipet. To deliver liquid from the pipet, remove the pipet pump while instantaneously placing your index finger over the top of the pipet. The flow rate of liquid can then be controlled with your finger. Conversely, liquid can be delivered by keeping the pipet pump in place and turning the wheel, although this is not recommended (heavily used pipet pumps do not form adequate seals). Allow liquid to flow out and into a waste container until the bottom of the meniscus is at the desired volume mark. Drain the rest of the liquid (the desired amount) into your apparatus. Your pipet is made To Deliver (TD); thus, it must be allowed to drain completely on its own without blowing out the last drop.
Decant
After standing a few minutes, a precipitate (solid) will often settle to the bottom of a solution, leaving a transparent liquid on top. This liquid is referred to as the supernatant liquid. Remove the supernatant liquid by gently pouring it off or by withdrawing it with a medicine dropper leaving most of the solid behind. Take care not to swirl or jostle the liquid, as this may result in the precipitate being resuspended in the supernatant liquid. This separation procedure is referred to as decantation. Wash the precipitate twice by 1) adding 1 mL of distilled water, 2) stirring with a stirring rod, 3) allowing to settle for a few minutes, and 4) decanting and removing the supernatant liquid.
Centrifuge
Place the test tube containing your sample in one slot of the centrifuge and record the number of that slot (so you know which test tube is yours). Balance the centrifuge by placing a test tube containing an equal volume of water directly opposite your sample.
![]() The centrifuge must be balanced. An unbalanced centrifuge is dangerous because it may wobble and fall from the benchtop.
The centrifuge must be balanced. An unbalanced centrifuge is dangerous because it may wobble and fall from the benchtop.
Turn on the centrifuge for one minute. Allow the centrifuge to come to a stop of its own accord (do not stop it with your hand or any other object), and then remove the test tubes. Remove the supernatant liquid by pouring it off or by withdrawing it with a medicine dropper. Wash the solid twice by 1) adding 1 mL of distilled water, 2) stirring with a stirring rod, and 3) centrifuging and removing the supernatant liquid.
Self Assessment
1.
To properly use a pipette, the first step is to make sure the pipette is . Next any liquid. the pipette three times with your solution, then the aliquot and the tip. the meniscus. the aliquot with the pipette vertical and the flask at a 30 degree angle. the sides of the flask.
2.
The process of separating two liquids is referred to as decantation.
| A. |
| B. |
3.
After preparing a test tube with your sample, you are ready to centrifuge it. You place it in one slot of the centrifuge and record the number of that slot. Now, you should:
| A. |
| B. |
| C. |
| D. |