Transitions and Cuts
Throughout this chapter and book, and indeed throughout the filmmaking universe, the terms cut to describe edits and cutting to describe the discipline of editing in general have been commonplace. However, to be precise, those terms are also somewhat misleading.
Editing is more specifically about transitions—how to move from one thing to another thing most efficiently by joining shots. In that context, cuts are but one kind of a film-editing transition method, albeit the most ubiquitous method. To be fully accurate, cuts are actually no more than the physical or digital splicing of two different shots or pieces of shots together to make a seamless transition between the images. The term obviously comes from the original, analog process of physically cutting film pieces with razors and then taping them together with clear strips of tape on a flatbed film-editing platform—the way things were done for generations until the digital era came along. The method switched from physical media to digital, but the concept of “cutting” into shots and then connecting them remains.
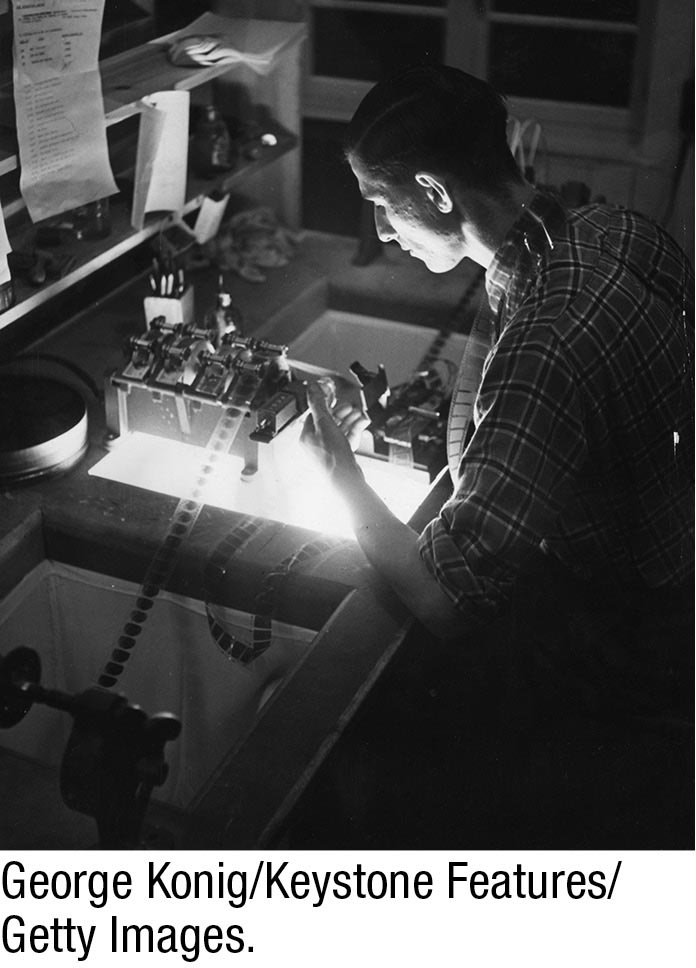
The original, analog editing process involved physically cutting pieces of film and taping them together. This was quite literally “cut and paste.”
There are literally dozens of different kinds of basic cuts and variations of cuts for you to learn about, and in the next section we will detail the most important ones. Before we do that, however, it’s important to learn about the other ways to make a transition that do not involve making a cut, per se. In digital filmmaking, these other transition forms, like basic cuts, are all executed using digital editing software.
 WATCH THE FACES
As you cull through your takes, analyze facial expressions and the movement of the eyes. That will help you determine how long to linger on one actor or how soon to switch to a particularly expressive reaction on the face of another actor.
Keep in mind that whatever transition methods you employ, you need to use the right kinds of elements for that method—elements that, hopefully, you captured during production as part of your larger strategic plan. Inserts and cutaways, for example, are elements that editors frequently use in continuity editing (see Chapter 7). Therefore, during production, you should have considered that fact for key scenes that would benefit from such shots.
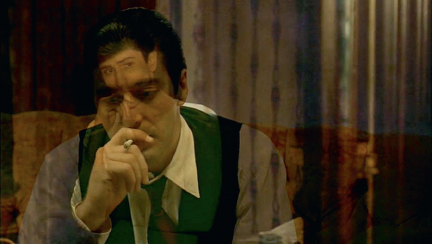
This dissolve in The Godfather Part II (1974) indicates a time passage of two decades.
Types of Transitions
One quick word of caution: because the following transition methods were born out of special-effects techniques during the analog era, they tend to call attention to themselves. The dissolving of a shot or a burst of stars or the shrinking of an image down to a small oval are, by their nature, things you are going to notice when you watch them. Therefore, as we have urged throughout this chapter, it is crucial that you only use them when you have a good reason for doing so; otherwise, the viewer’s focus on your story will be disrupted. And even when you find them useful, you should not be using them constantly. If you are, you likely have a shortcoming somewhere in your editing plan or in your material itself. Unless you are making an experimental or avant-garde film, there is no good reason for dozens of dissolves or wipes under typical circumstances.
CHECK YOUR RUNNING TIME
Keep in mind that there is a good reason that many Hollywood feature films run around 90 to 120 minutes—it is hard to hold an audience’s attention for too long. For this reason, you want your first cut to check in at not much more than two hours.
With that said, here is a rundown of the most basic transition approaches that do not involve cuts:
 Dissolves. The most common, dissolves are sometimes referred to as “overlapping.” They happen when you strategically replace one shot with another—one fading out as the other fades in. For a brief time, they might overlap, but they are traditionally used to indicate the passage of time or a change in location. Dissolves can last as long or as short as you want, with the duration impacting how the audience reacts to it. Obviously, short dissolves are used when the pace is faster, and longer ones are used when the pace is slower.
-
Fades. Essentially a kind of dissolve, a fade is used to mark the beginning or end of a scene or a film itself. Often, filmmakers will fade not to another shot but to a color, usually black. Hence, the famous expression “fade to black.” Depending on when the fade is used, editors will fade out of or fade in to a scene. Fade-outs are usually used at the end of a movie or scene, whereas fade-ins start with a solid color and eventually dissolve into an image from the start of the picture or scene.
-
Wipes. This transition method is more forceful. Rather than dissolving one image into another, a wipe essentially involves one image pushing another image off the screen. The direction could be vertical, horizontal, or diagonal, but in any case, there is a visible line between the images where one pushes in as the other departs. In some types of filmmaking, editors might also turn the image into a shape, such as a star, or digital blinds that turn from one image to another, slide-show style. Or they might use a particle wipe, in which the picture turns into dots or bubbles before it reassembles with different images. Typically, wipes are used to emphasize action, but in some cases, they are used almost like curtains in a theater, to illustrate one section ending and another beginning.
-
Iris or iris wipe. This is an old-fashioned technique that was popular in early films and cartoons. The iris (iris wipe) is no more than the reduction of a full image down to a circular mask or oval showing part of the remaining image, forcing audience attention to what is in the center of the oval, while the rest of the screen is masked by black. Digital editing tools can now create irises in all sorts of shapes, not just circles, but they are not popularly used much in major feature films anymore.
-
Light flash. A light flash involves rapidly dissolving the screen to white for a very short time so that it evokes a camera flash before switching to another image. Flashes are usually used for over-the-top emphasis and, as such, are not popular in major films. Family videos, slide shows, and the like use them routinely.
-
Superimposition. This method involves combining two or more images but not, as with the dissolve, for the purpose of moving from one scene to another. As such, a superimposition is not technically a transition but a way to introduce another element or subjective or emotional concept from the one you started from. Traditionally, it might place a graphic over a picture or bring two characters together. In the analog era, it involved exposing more than one image on a filmstrip. With today’s digital tools, of course, it is simpler to achieve if it fits your creative needs.
-
SHOW, DON’T TELL
When it makes sense, even if you have marvelous dialogue and wonderful performances, in most cases you are better off showing or illustrating an event or a major point rather than having your characters spend too much time pontificating about it. Your goal after all is to create a motion picture, not a radio show.
Morph. The term morph can refer to a visual effect (see Chapter 13), but in editing, you can use it as a dissolve of sorts. Rather than blending two shots together, you would digitally reshape the primary object or image within the frame and transform it into something else to begin a new scene. For example, you could morph a child’s face as you transition from your prologue into the face of that child as an adult when your primary story begins.
Types of Cuts
Now that we have examined other transitions, let’s look at the myriad of cuts you can use to help tell your story. Whatever choices you make, remember to make them as fast as is feasible within your creative framework, and as efficiently as possible. Your cuts are, for the most part, your preferred method of telling your story, and so they will determine the pace and therefore the connection your audience will make, or not make, to your material.
Keep your approach as basic as possible—not boring or mechanical, but no more than you need to make the point or evoke the emotion you are striving for. It’s common for beginning editors to overuse different kinds of flashier cuts in an effort to illustrate creativity and energy, but this is a fine line. Fundamental cutting techniques are still the principal way to edit most scenes. Only resort to something that may call attention to itself for creative reasons, not style or ego reasons. If you use flashy transitions repeatedly over the course of your film, you will call attention to your editing and away from your story, which is the last thing an editor wants to do.
 IDENTIFY THE CUTS
Pick a favorite classic film from any era and take notes while you watch it. Identify the basic editing style or approach, then call out at least 8–10 transitions in the movie. Name the scene and the transition or specific kind of cut used. As a bonus, offer up a couple of paragraphs analyzing the filmmaker’s editing approach, and mention a couple of alternatives—different types of transitions you might have liked to have seen tried in a particular scene or sequence.
Here are the basic kinds of cuts you should consider:
-
Straight cut or hard cut. This is a basic cut. In a straight (hard) cut, one shot ends and another shot begins, without any fancy effects, time distortions, and so on.
-
Contrast cut. A contrast cut involves using your cut to juxtapose two people or elements—cutting from a man sleeping peacefully in bed, for example, to his alarm ringing loudly and chaos ensuing all around him.
-
Cross cut or parallel cut. We have already discussed parallel editing, and it is with that methodology that you would use a cross (parallel) cut. This form of cutting (also called intercutting) essentially alternates images from two or more parallel plot lines.
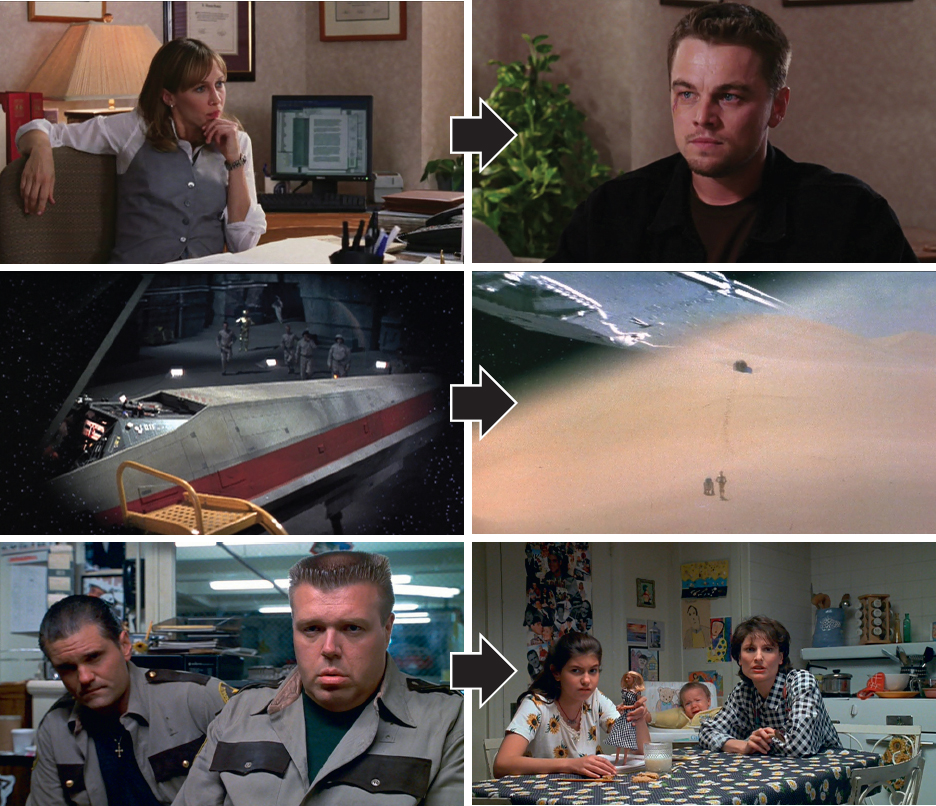
Top to bottom: A straight cut in The Departed (2006), wipes in Star Wars (1977), a form cut in The Truman Show (1998).
-
Form cut. As the name suggests, a form cut puts together two images that are of similar shape or in similar positions. For example, if you were showing a piece of newsreel footage on a movie screen and you wanted to illustrate that other people were watching the same footage on a different screen, you could use a form cut between the two movie screens.
-
Match cut. This type of cut also joins similar shapes or elements together, but a match cut does not let the audience comprehend that there was an edit there to begin with.
-
Cut-in/cutaway. A cut-in involves an instant transition from a distant view of an image to a close view of that same image, and a cutaway is the exact opposite—a move from close to far away.
-
L cut or split edit. An L cut (split edit) is a technique in which your edit results in a shot’s audio and visual components occurring at slightly different times to achieve dramatic or emotional impact. For example, you might cut a horror sequence so that the audience hears a woman’s scream a beat or two before they see the woman who is screaming, or the other way around. It is called an L cut because, in the analog era, editors had to make an L-shaped cut on the film itself to splice in a different piece of film with the audio track in the appropriate position.
-
Jump cut. A jump cut is typically to be avoided in traditional filmmaking because it is only used if there is an error in continuity in your available footage and you have no other choice. It is essentially an elliptical cut because it makes clear that some amount of time has passed—a single shot is being changed or interrupted in some way. Jump cuts are avoided by most major filmmakers but are used in avant-garde filmmaking and music videos.
-
Cheat cut. A cheat cut involves deliberately matching shots that are intended to be continuous even though some element within the shot—a background element, a wall, a piece of wardrobe—is mismatched, with the goal of executing the cut so efficiently that the difference can’t be noticed. It is typically done when the dramatic or emotional impact of the cut outweighs the reality of the mismatched elements, or to compensate for some other element that is lacking, to hide a blemish or difference in height between actors, and so forth.
-
Reverse cut. As noted earlier, a reverse cut involves crossing the axis line during a conversation scene, thus deliberately violating the 180-degree rule. You want to do it rarely, but when you have a good reason, the reverse cut can be a powerful storytelling tool.
Editor’s Emergency Kit

 Copies of Walter Murch’s In the Blink of an Eye and Edward Dmytryk’s On Film Editing
-
Subscriptions to CineMontage magazine and Cinema Editor magazine for deep insight into how today’s working editors get their work done
-
Notebook and audio recorder for taking notes and keeping track of ideas
-
Patience and an open mind