Digital Cameras
A digital camera is one kind of image capture device. Light comes through the lens, but instead of hitting and exposing film, it hits an optical sensor. The sensor translates the light to ones and zeros, and then that information is recorded to a hard drive, memory card, or similar device. The big variable with digital cameras is in how the information is sensed and how it is recorded. In order to understand that, first you need to understand how light turns into numbers.
 RAW VS. UNCOMPRESSED
RAW or well-done? You may see a setting on your camera for RAW image capture. RAW means just what you think—the image information hasn’t been processed, or “cooked.” When you keep your data in RAW format, you maintain the ability to process it—to cook it or transform it—later, in the editing stage. So is RAW the same as uncompressed? Not entirely. Some cameras compress visual information when the visual information enters the lens; others compress the data simply by putting it into the RAW format. But RAW is as uncooked as you can get.
How Digital Cameras Work
In a digital ecosystem, everything is expressed with a one or a zero. Each one or zero is called a bit. Groups of eight bits become bytes; the small, single points from which an image is displayed are called pixels. The quality of a pixel’s color is determined by the number of its bits. This is the bit rate, the number of bits per pixel. More bits make it possible to create more subtle and diverse color representations. Optical sensors differ in the number of bits they can sense. The more professional the camera, the more bits it sees, providing you with the ability to capture more visual information.
Because the number of pixels per frame (and therefore bits per frame) is immense, digital image information is frequently compressed when it is recorded in digital video. Compression means that the recording software doesn’t record every bit of every pixel for every frame. Instead, it records only new information, skipping any repeated information. The software for doing this is a compression code, and you can think of it as a translation program that turns the uncompressed information into a new compressed language. Of course, to understand the information, to read it back again, you need to translate it back with a decompression code. The term for this whole translation process is codec (from compressor, decompressor), and different systems use different codecs.
Since you will want to have as much freedom as possible in the editing room, you want to capture as much visual information as you can, which means uncompressed information is more desirable than compressed information. Of course, the problem is that uncompressed information takes up massive amounts of digital storage space that will impact every department that uses the uncompressed images as they have similar storage issues. Every production needs to figure out how to address this issue, which entails decisions regarding cost, physical space, set size, weight limitations, the quantity of lights needed, power requirements, and the need for air conditioning. The production management team (along with the cinematographer) will undertake a cost-benefit analysis in order to come to a decision. They will also evaluate how much information they can afford to capture, as more information usually means less decision making on the set but increases the amount of decision making that will need to be made during editing.
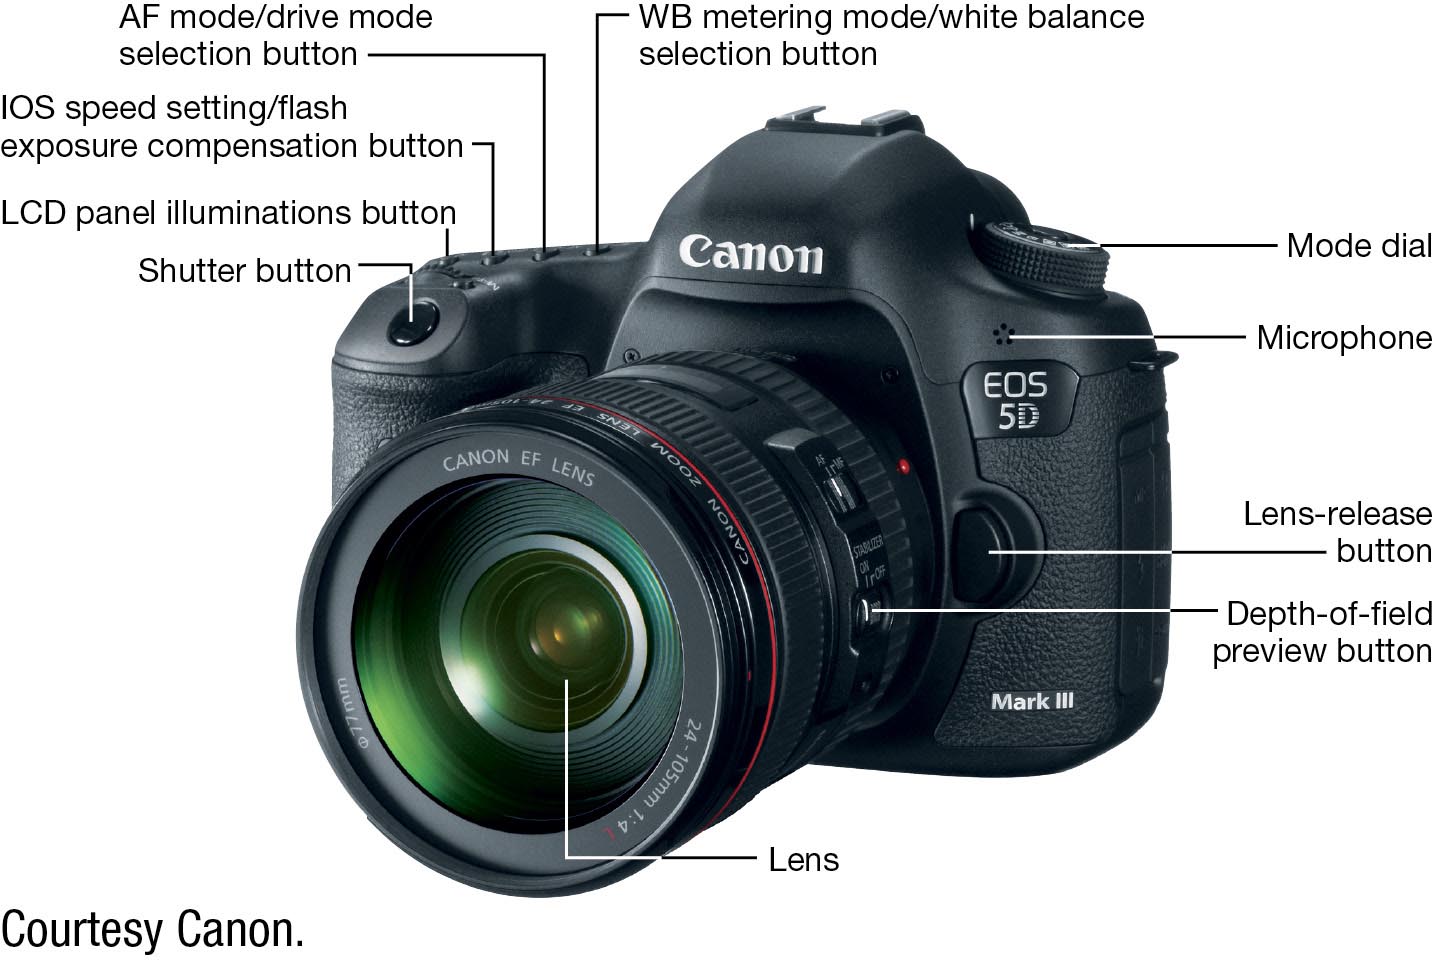
Canon digital camera
Of greatest concern now, though, is how the image will appear. Digital cameras are often advertised with their number of megapixels (one million pixels). That number is determined by multiplying the number of pixels wide by the number of pixels high. For example, an iPhone with 8 megapixels is 3264 pixels across by 2448 pixels high (3264 pixels × 2448 pixels = 7.99 million pixels = approximately 8 megapixels). However, just because a camera has more megapixels does not mean it produces better-quality images. There are technical differences in the way optical sensors operate.
The best way to evaluate how an image will really look is to shoot something with the camera and look at it on a calibrated, or properly standardized, digital screen. The human eye is incredibly discerning. On professional shoots, various camera tests are done before production begins, as different digital sensors or different film stocks will produce different images under the exact same lighting conditions.
FOCUS UP
The right way to focus: With your camera and zoom lens on a tripod and your subject stationary, zoom in as close as possible. Adjust the focus until it is sharp. Now pull back on the zoom to the framing you want. Your subject will now be in focus whether you are zoomed in close or zoomed out wide—unless you change the distance from the subject to the camera, in which case you will need to refocus.
Types of Digital Cameras
Beyond varying numbers of megapixels, digital cameras come in three categories: consumer, professional, and prosumer, which is a hybrid of the first two. In recent years, the distinction between consumer and prosumer cameras has diminished because some professional technologies have become cheaper, and now many consumer cameras have near-professional features.
There are, however, significant differences between consumer and professional cameras, with prosumer models having several cost-saving compromises in their design. The most important differences are the quality of the lenses and the ability to change them (consumer models have a single non-changeable zoom lens, whereas prosumer DSLR cameras and professional cameras allow you to change lenses), the bit rate amounts, the ability to record data in a compressed or non-compressed format, and the number and sophistication of manual controls, which are the camera functions you can change yourself. (Examples of functions that can be automatic or manual include setting a camera’s focus and exposure, concepts we’ll explore later in the chapter.)
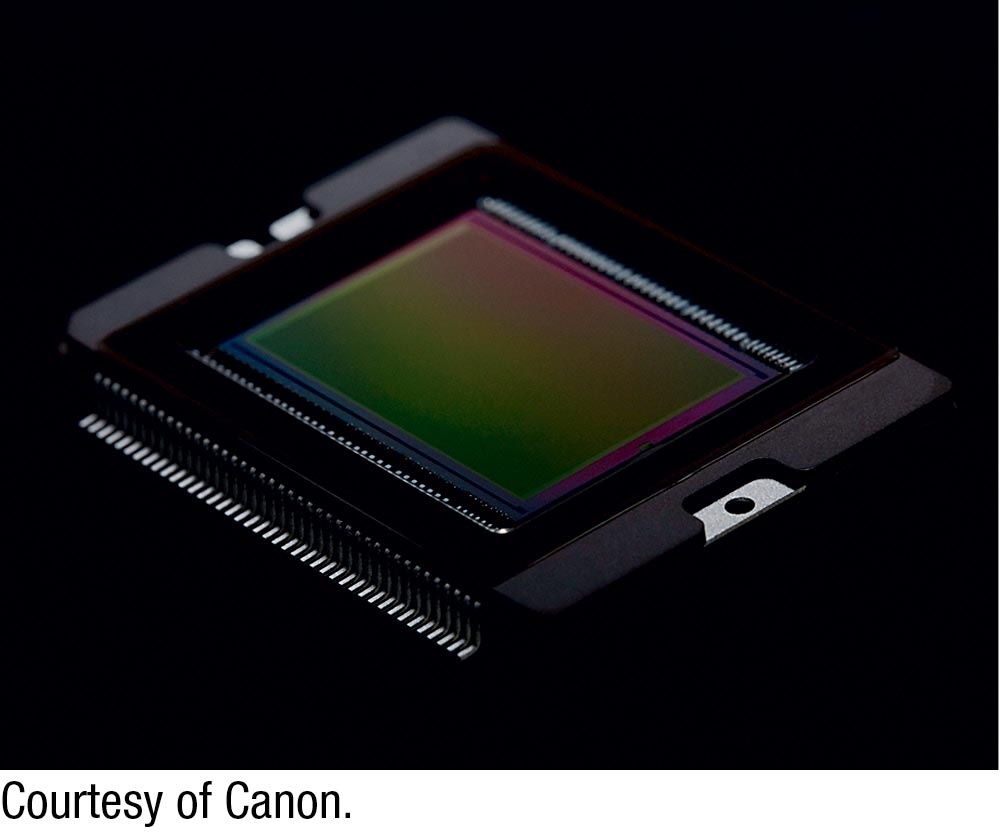
Optical sensor
 USING YOUR CAMERA
Even if you’ve been using a camera for some time, you probably haven’t had to do it exclusively with the automatic controls turned off. Choose a very simple scene—perhaps just shooting outside on the campus quad—and shoot some practice runs. Practice an even pan across the scene; a slow, controlled zoom to an object or a person; a fast but steady zoom; a tracking or handheld shot in which you go from interior to exterior locations and the reverse. Try each with a variety of ISO, aperture, and shutter-speed settings, and make note of how they affect the lighting and focus when you look at the material you’ve shot.
Although almost all consumer cameras have manual controls, most people don’t take the time to learn how to use them. However, learning how to use manual controls is the single most important (and fun) thing you can do. When your camera is on automatic mode, the camera’s internal software makes decisions for you about how each image will look. These are the very elements you want to control, as they are important storytelling tools you do not want to leave to chance. (See Action Steps: Using Your Digital Camera, below.)
The future of digital cameras is smaller size, with modern small and inexpensive GoPro cameras as prime examples of where this trend is heading. Even professional cameras are shrinking, with the RED Epic now weighing only five pounds and able to be held with one hand.
ACTION STEPS
Using Your Digital Camera
You may already feel comfortable with a digital camera by your side, but in the time-pressured experience of shooting a movie, sometimes even the most familiar activities seem complicated. Using this checklist will ensure that you don’t forget anything and that you’re ready to shoot.
 Slide the tripod mount into the base.
 Turn the camera on with the power button.
 Insert the SD memory card.
 Plug in the microphone cable.
 Position the view screen so you can see it easily.
 Using the menu, disable automatic controls. You’ll learn how to use the camera best if you experiment with the manual adjustments.
 Set the aperture, ISO, and shutter speed (see here, here, and here, respectively, for more information on these variables).
 Focus on your subject.
 Zoom in or out as needed.
 Check your framing, and begin shooting by pressing the start/stop switch. Stop shooting by pressing it again.