Chapter 2. LAB 1.5 Laboratory Skills 1: Compound Microscope SALI
Strategic Approach to Learning Instrumentation (SALI)
You should prepare a SALI before any lab where you will use a laboratory instrument. You will be tested on all lab instruments during the Lab 12 Competency Exam. To get an idea of what is expected, read Parts 1 and 2 of Lab 12 now.
- Use the information in Appendix B to create a SALI (Table B.1) in your lab notebook for your assigned lab instrument—prepare to explain it to your classmates during the appropriate lab.
- Refresh your knowledge of chemical solution terminology and calculations (see Appendix B). On the exam you will be asked to calculate the amount of stock solution and solvent needed to make a specific volume of a specific dilution in moles and percents.
- Refresh your knowledge of metric units (see Appendix C). Can you easily convert millimeters to micrometers? Grams to milligrams or micrograms?
- Refresh your knowledge of basic math (see Appendix C and other available resources). Do you know how many significant digits there are in a measurement taken with a simple ruler? Are you comfortable with logarithms? Do you remember how to write numbers in scientific notation?
2.1 Compound Microscope SALI
All BIO 204 students are required to complete a SALI on the compound microscope.
Prior to Visiting the Biology Learning Center (BLC)
- Prior to your visit to the Biology Learning Center (BLC), start on your SALI. If you do not prepare prior to using your tool you might break the tool or cause injury to yourself.
- Download the Word copy of the SALI from Blackboard so that you can type directly into the template.
- Read the information in Appendix B on the compound microscope. You will not attempt oil immersion during your practice time, but you should be familiar with it.
- View the Alphaphot2 microscope video to familiarize yourself with the parts of the compound micro- scope and their function and the step-by-step procedure on how to use the microscope.
- Fill in the SALI based on this information for the “Curiosity—Orientation” and “Caution—Safety” sections of the SALI based on the information from the lab manual and video.
During Your BLC Visit
- You may want to work with a peer as you explore the use of the compound microscope. This will allow you to help each other and quiz each other on its use.
- Open the Alphaphot2 video on the BLC computer or your laptop to the segment entitled “Operation.”
- Check that the microscope is in its reset position.
- The 4X objective lens is in place over the stage
- The stage is in its most downward position
- The diaphragm is completely open
- The condenser lens is positioned approximately 1 mm from the stage opening
- Retrieve the letter “e” as your demo slide. Use it to walk through the “Operation” part of the video.
- Practice the workings of the microscope by viewing the following three slides with the 4X, 10X, and 40X objective lenses. Write down what you observe and include drawings and/or pictures at each magnification in your lab notebook.
- Letter “e”: How does the image appear through the microscope lenses (i.e., image inversion and reversal)? How does the field of view change as the magnification increases?
- Colored threads: Can I focus on all three threads at once (depth of field)? Which thread is on top under the 403 objective lens? What does this tell me about viewing three-dimensional specimens?
- Allium root: How many cells are present at 4003 magnification? How does a drawing of the cells at 1003 magnification compare to a drawing of the cells at 4003 magnification?

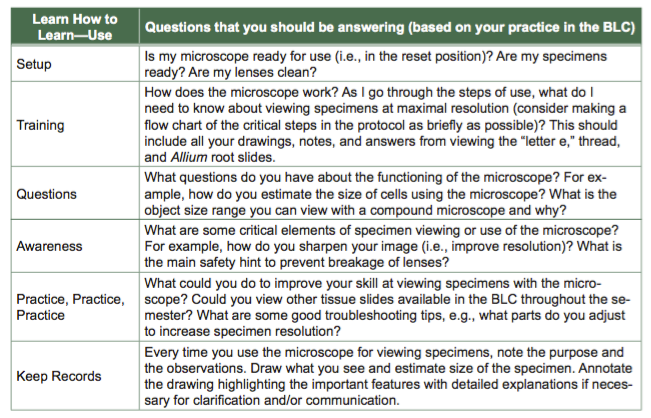
- Complete the “Learn How to Learn” part of the SALI now that you have practiced with the microscope.
- Ensure you understand the term “depth of field” using the colored thread slide (LM p. 203).
- View a slide of Allium root at 400X total magnification and count the number of cells in your field of view.
- Complete the “Learn How to Learn” section of the SALI once you have practiced with the tool. Although this section is given as statements, you should complete it by stating the following:
2.2 Tools Lab and Assigned Tool SALI
Each group member will be assigned a tool for which to prepare a SALI prior to the Tools lab.
Although your assigned tool is due during the Tools lab, you are welcome to start practicing with tools prior to that time. You should orient yourself to your tool by reviewing the section called “Instrument Orientation.” When it is time to complete your SALI for your tool, follow similar steps as those listed for the compound microscope. Directions for use of every tool are present in Appendix B.
Instrument Orientation
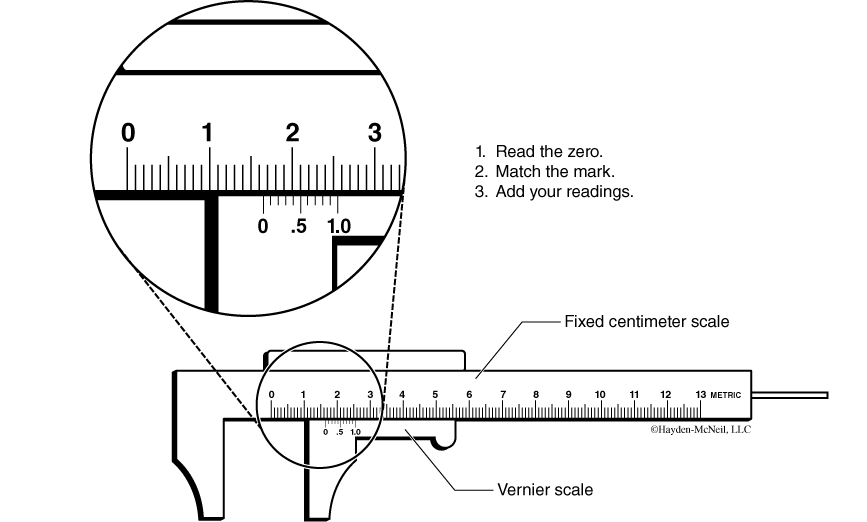
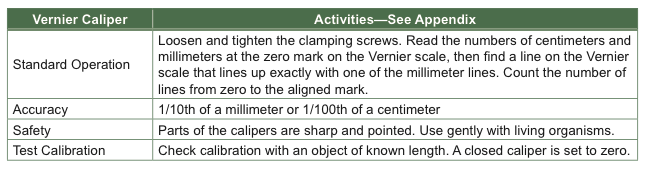
Vernier Calipers
- Label the important components of the Vernier caliper diagram and how they are related to obtain fine measurements
- What makes the Vernier scale different from the metric scale and why does it enable us to measure tenths of a millimeter (or hundredths of a centimeter)? How many decimal places can you use for recording your measurements using the calipers?
- How are these calipers used to measure outside, inside, and depth dimensions?
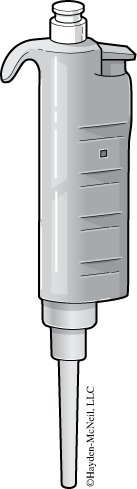
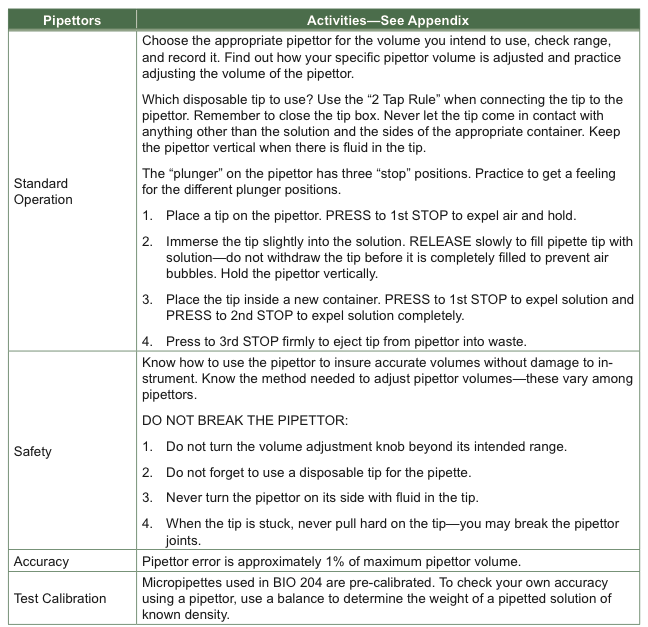
2.3 Pipettors
- Use the right pipettor for the volume you need. How will you know which pipettor to use?
- Label the important components of the pipettor diagram.
- Make note of the position of the decimal point in the reading window for each kind of pipettor.
- The “plunger” on the pipettor has three “stop” positions. Practice using the pipettor and get a feeling for the different plunger positions.
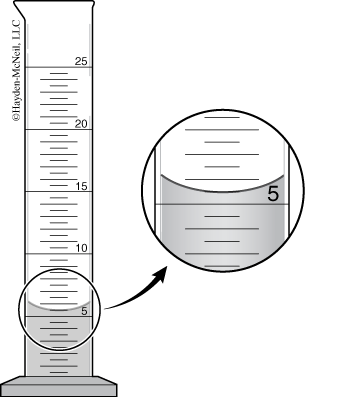
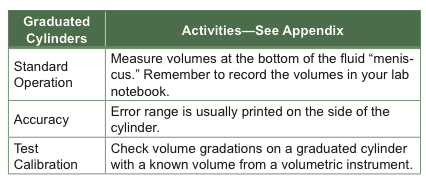
2.4 Graduated Cylinders
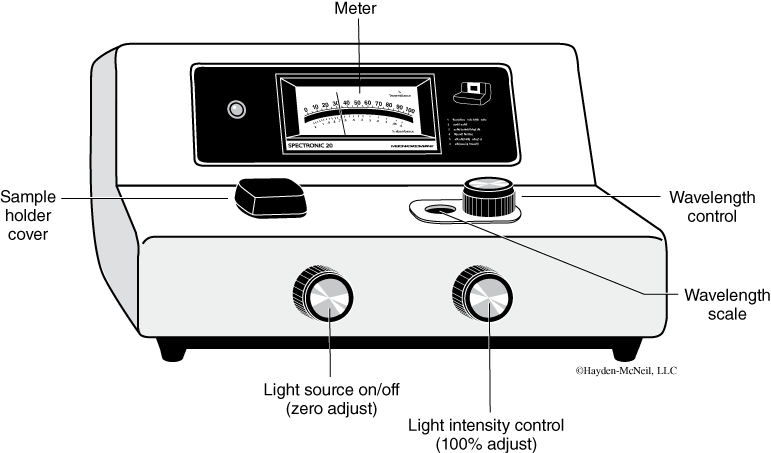
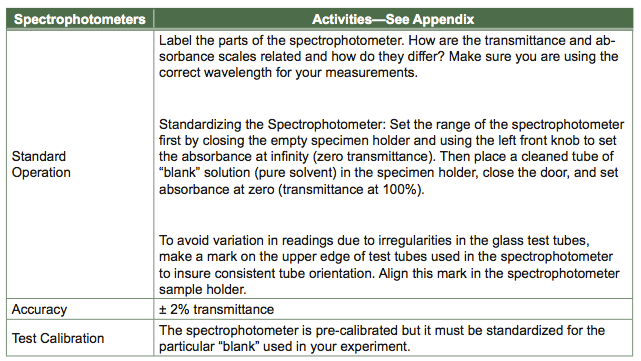
2.5 Spectrophotometers
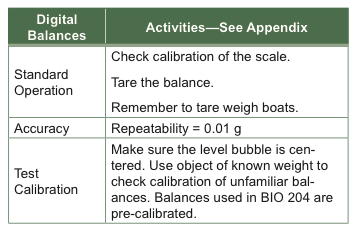
2.6 Digital Balances

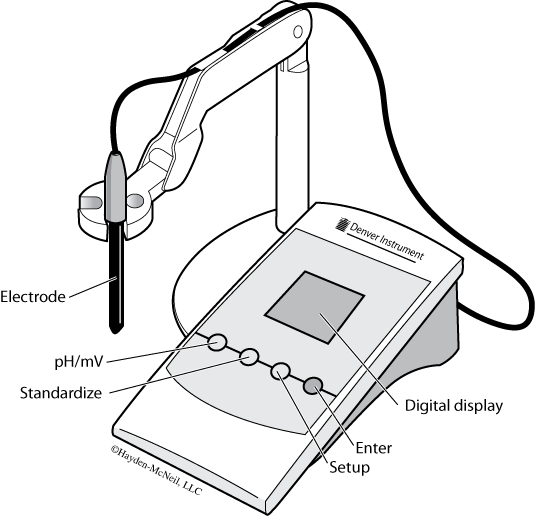
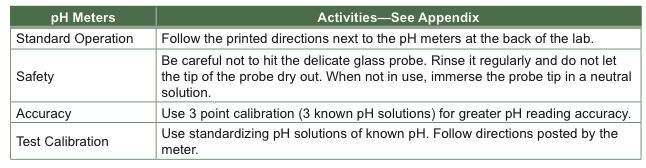
2.7 pH Meters