Planning an Oral Argument
The work you do to plan your presentation is as important as the presentation itself. Here is some advice to consider as you plan your oral argument:
207
Choose your topic wisely. Select a topic that is somewhat controversial so listeners will want to hear your views. You can create interest in a topic, but it is easier to appeal to listeners if they are already interested in what you have to say. In addition, try to choose a topic that you know something about. Even though you will probably do some research, the process will be much easier if you are already familiar with the basic issues.
Know your audience. Consider your audience and its needs before you begin to plan your presentation. For example, how much do listeners already know about your topic? Are they well informed, or do they know little about it? If listeners are unfamiliar with your topic, you will have to supply background information and definitions of key terms. If they already know a lot, you can dispense with this material and discuss your subject in more depth. Also, assess your audience members’ likely response to your presentation. Will they be receptive? Hostile? Neutral? The answers to these questions will help you decide which arguments will most likely be effective (and which will not).
Know your time limit. Most oral presentations have a time limit. If you run over your allotted time, you risk boring or annoying your listeners. If you finish too soon, it will seem as if you don’t know much about your subject. As you prepare your argument, include all the information that you can cover within your time limit. Keep in mind that you will not be able to go into as much detail in a short speech as you will in a long speech, so plan accordingly.
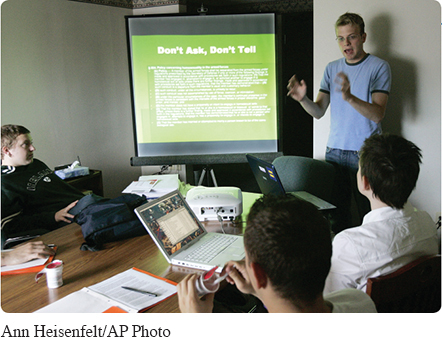 Visual aids can help listeners follow an oral presentation.Ann Heisenfelt/AP Photo
208
Identify your thesis statement. Like a written argument, an oral argument should have a debatable thesis statement. Keep this statement simple, and make sure that it clearly conveys your position. Remember that in an oral argument, your listeners have to understand your thesis the first time they hear it. (See Chapter 7 for more on developing a thesis statement.)
Gather support for your thesis. Assume that your listeners are skeptical, that is, that they are not easily convinced. Even if you think that your audience is friendly, you still need to make a persuasive case. Don’t make the mistake of thinking that listeners will automatically accept all your ideas just because they agree with your main point. For this reason, you need to support your thesis with compelling evidence if you expect listeners to conclude that your position is valid. Supporting evidence can be in the form of facts, observations, expert opinion, or statistics. Some of your support can come from your own experiences, but most will come from your research.
Acknowledge your sources. Remember that all of the information you get from your research needs to be acknowledged. As you deliver your presentation, let listeners know where the information you are using comes from—
for example, “According to a 2015 editorial in the New York Times …” or “As Kenneth Davis says in his book America’s Hidden History….” This strategy enhances your credibility by showing that you are well informed about your topic. (Including source information also helps you protect yourself from unintentional plagiarism. See Chapter 11.) Prepare your speaking notes. Effective speakers do not read their speeches. Instead, they prepare speaking notes—often on index cards—
that list the points they want to make. (Microsoft’s PowerPoint, as well as some other presentation software packages, has a section on each slide for speaking notes. Although the notes are displayed on the computer screen, they are not visible to the audience.) These notes guide you as you speak, so you should make sure that there are not too many of them and that they contain just key information. (If you use note cards, it is a good idea to number them so that you can be sure that they are in the correct order.) Prepare visual aids. Visual aids help you to communicate your thesis and your supporting points more effectively. Visuals increase interest in your presentation, and they also strengthen your argument by reinforcing your points and making them easier for listeners to follow and to understand. In addition, visuals can help establish your credibility and thus improve the persuasiveness of your argument.
209
You can use the following types of visual aids in your presentations:
 In order moving clockwise from top left: © deomis/
Shutterstock.com; © Peter Vaclavek/ Shutterstock.com; © Tarapong Siri/ Shutterstock.com; © deomis/ Shutterstock.com Diagrams
Photographs
Slides
Smartboards, flip charts
Overhead transparencies
Document cameras
Handouts, objects
In addition to these kinds of visual aids, you can also use presentation software, such as Microsoft’s PowerPoint or the Web-
based application Prezi (Prezi.com). With presentation software, you can easily create visually appealing and persuasive slides. You can insert scanned photographs or drawings into slides, or you can cut and paste charts, graphs, and tables into them. You can even include YouTube videos and MP3 files. Keep in mind, however, that the images, videos, or sound files that you use must support your thesis; if they are irrelevant, they will distract or confuse your listeners. (See An Argument in Support of the Gap Year for examples of PowerPoint slides.) Practice your presentation. As a general rule, you should spend as much time rehearsing your speech as you do preparing it. In other words, practice, practice, practice. Be sure you know the order in which you will present your points and when you will move from one visual to another. Rehearse your speech aloud with just your speaking notes and your visuals until you are confident that you can get through your presentation effectively. Try to anticipate any problems that may arise with your visuals, and solve them at this stage of the process. If possible, practice your speech in the room in which you will actually deliver it. Bring along a friend, and ask for feedback. Finally, cut or add material as needed until you are certain that you can stay within your time limit.
CHECKLIST
Designing and Displaying Visuals
Use images that are large enough for your audience to see and that will reproduce clearly.
210
Make lettering large enough for your audience to see. Use 40-
to 50- point type for titles, 25- to 30- point type for major points, and 20- to 25- point type for less important points. Use bulleted lists, not full sentences or paragraphs.
Put no more than three or four points on a single visual.
Make sure there is a clear contrast between your lettering and the background.
Don’t show your listeners the visual before you begin to speak about it. Display the visual only when you discuss it.
Face your listeners when you discuss a visual. Even if you point to the screen, always look at your listeners. Never turn your back on your audience.
Introduce and discuss each visual. Don’t simply show or read the visual to your audience. Always tell listeners more than they can read or see for themselves.
Don’t use elaborate visuals or special effects that will distract your audience.
EXERCISE 6.5
Look through the table of contents of this book, and select three At Issue topics that interest you. Imagine that you are planning to deliver an oral argument to a group of college students on each of these topics. For each topic, list three visual aids you could use to enhance your presentation.