Preparing the Presentation
Printed Page 579-597
Preparing the Presentation
When you see an excellent 20-minute presentation, you are seeing only the last 20 minutes of a process that took many hours. Experts recommend devoting 20 to 60 minutes of preparation time for each minute of the finished presentation (Nienow, 2013). That means that the average 20-minute presentation might take more than 13 hours to prepare. Obviously, there are many variables, including your knowledge of the subject and your experience creating graphics and giving presentations on that subject. But the point is that good presentations don’t just happen.
As you start to prepare a presentation, think about ways to enlist others to help you prepare and deliver it. If possible, you should rehearse the presentation in front of others. You can also call on others to help you think about your audience and purpose, the organization of the information, the types of graphics to use, appropriate designs for slides, and so forth. The more extensively you work with other people as you plan, assemble, and rehearse, the more successful the presentation is likely to be.
Preparing an oral presentation requires five steps:
- analyzing the speaking situation
- organizing and developing the presentation
- preparing presentation graphics
- choosing effective language
- rehearsing the presentation
First, analyze your audience and purpose. Then determine how much information you can deliver in the allotted time.
Analyzing Your Audience and Purpose In planning an oral presentation, consider audience and purpose, just as you would in writing a document.
- Audience. What does the audience know about your subject? Your answer will help you determine the level of technical vocabulary and concepts you will use, as well as the types of graphics. Why are audience members listening to your presentation? Are they likely to be hostile, enthusiastic, or neutral? A presentation on the benefits of free trade, for instance, will be received one way by conservative economists and another way by U.S. steelworkers. Does your audience include nonnative speakers of English? If so, prepare to slow down the pace of the delivery and use simple vocabulary.
- Purpose. Are you attempting to inform or to both inform and persuade? If you are explaining how wind-turbine farms work, you will describe a process. If you are explaining why your company’s wind turbines are an economical way to generate power, you will compare them with other power sources.
| TABLE 21.1 Time Allotment for a 20-Minute Presentation | |
| TASK | TIME (MINUTES) |
| • Introduction | 2 |
| • Body | |
– First Major Point |
4 |
– Second Major Point |
4 |
– Third Major Point |
4 |
| • Conclusion | 2 |
| • Questions | 4 |
Your analysis of your audience and purpose will affect the content and the form of your presentation. For example, you might have to emphasize some aspects of your subject and ignore others altogether. Or you might have to arrange topics to accommodate an audience’s needs.
Budgeting Your Time At most professional meetings, each speaker is given a maximum time, such as 20 minutes. If the question-and-answer period is part of your allotted time, plan accordingly. Even for an informal presentation, you will probably have to work within an unstated time limit that you must determine from the speaking situation. If you take more than your time, eventually your listeners will resent you or simply stop paying attention.
For a 20-minute presentation, the time allotment shown in Table 21.1 is typical. For scripted presentations, most speakers need a little over a minute to deliver a double-spaced page of text effectively.
For more about organizational patterns, see Ch. 7.
The speaking situation will help you decide how to organize and develop the information you will present.
Start by considering the organizational patterns used typically in technical communication. One of them might fit the speaking situation. For instance, if you are a quality-assurance engineer for a computer-chip manufacturer and must address your technical colleagues on why one of the company’s products is experiencing a higher-than-normal failure rate, think in terms of cause and effect: the high failure rate is the effect, but what is the cause? Or think in terms of problem-method-solution: the high failure rate is the problem; the research you conducted to determine its cause is the method; your recommended action is the solution. Of course, you can combine and adapt several organizational patterns.
As you create an effective organizational pattern for your presentation, note the kinds of information you will need for each section of the presentation. Some of this information will be data; some of it will be graphics that you can use in your presentation; some might be objects that you want to pass around in the audience.
Some presenters like to outline their presentations on paper or in a word-processing document. However, more and more, people are outlining with their presentation software.
As you organize your presentation, you will want to plan the introduction and the conclusion.
Planning the Introduction Like an introduction to a written document, an introduction to an oral presentation helps your audience understand what you are going to say, why you are going to say it, and how you are going to say it.
Introducing the Presentation

In introducing a presentation, consider these five suggestions.
- Introduce yourself. Unless you are speaking to colleagues you work with every day, begin with an introduction: “Good morning. My name is Omar Castillo, and I’m the Director of Facilities here at United.” If you are using slides, include your name and position on the title slide.
- State the title of your presentation. Like all titles, titles of presentations should name the subject and purpose, such as “Replacing the HVAC System in Building 3: Findings from the Feasibility Study.” Include the title of your presentation on your title slide.
- Explain the purpose of the presentation. This explanation can be brief: “My purpose today is to present the results of the feasibility study carried out by the Facilities Group. As you may recall, last quarter we were charged with determining whether it would be wise to replace the HVAC system in Building 3.”
- State your main point. An explicit statement can help your audience understand the rest of the presentation: “Our main finding is that the HVAC system should be replaced as soon as possible. Replacing it would cost approximately $120,000. The payback period would be 2.5 years. We recommend that we start soliciting bids now, for an installation date in the third week of November.”
- Provide an advance organizer. Listeners need an advance organizer that specifically states where you are going: “First, I’d like to describe our present system, highlighting the recent problems we have experienced. Next, I’d like to …. Then, I’d like to …. Finally, I’d like to invite your questions.”
Planning the Conclusion Like all conclusions, a conclusion to an oral presentation reinforces what you have said and looks to the future.
Concluding the Presentation
In concluding a presentation, consider these four suggestions.
- Announce that you are concluding. For example, “At this point, I’d like to conclude my talk with ….” This statement helps the audience focus on your conclusions.
- Summarize the main points. Because listeners cannot replay what you have said, you should briefly summarize your main points. If you are using slides, you should present a slide that lists each of your main points in one short phrase.
- Look to the future. If appropriate, speak briefly about what you think (or hope) will happen next: “If the president accepts our recommendation, you can expect the renovation to begin in late November. After a few hectic weeks, we’ll have the ability to control our environment much more precisely than we can now—and start to reduce our expenses and our carbon footprint.”
- Invite questions politely. You want to invite questions because they help you clarify what you said or communicate information that you did not present in the formal presentation. You want to ask politely to encourage people to speak up.
Graphics clarify or highlight important ideas or facts. Statistical data, in particular, lend themselves to graphical presentation, as do abstract relationships and descriptions of equipment or processes. Researchers have known for decades that audiences remember information better if it is presented to them verbally and visually rather than only verbally (see, for instance, Fleming and Levie, 1978). Research reported by speaking coach Terry C. Smith (1991) indicates that presentations that include graphics are judged more professional, persuasive, and credible than those that do not. In addition, Smith notes, audiences remember the information better:
| RETENTION AFTER | ||
| 3 HOURS | 3 DAYS | |
| Without graphics | 70% | 10% |
| With graphics | 85% | 65% |
One other advantage of using presentation graphics is that the audience is not always looking at you. Giving the audience another visual focus can reduce your nervousness.
For more about creating graphics, see Ch. 12.
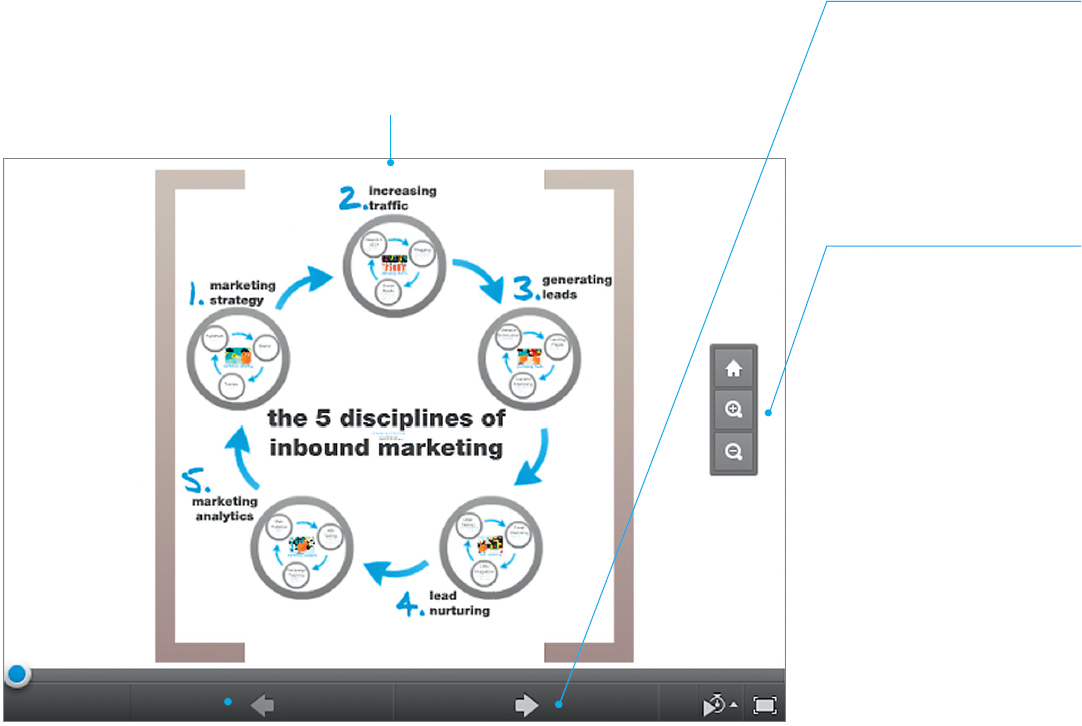
Most speakers use presentation software to develop graphics. By far the most-popular program is PowerPoint, but other programs are becoming popular as well. One that has gained a lot of attention is Prezi, which takes a different approach from PowerPoint. Whereas PowerPoint uses a linear organization—the speaker presents each slide in sequence—Prezi uses a network or web pattern of organization. Figure 21.1 shows an example of a Prezi slide.
The free version of Prezi is cloud-based; that is, you have to be connected to the Internet to use it. This feature means that you can deliver your Prezi presentation from any computer with an Internet connection, that your team members can collaborate from remote locations, and that your presentation is stored in the cloud. However, your presentation is visible to all who visit the Prezi site, so you should be sure that it contains no confidential information or information you do not wish to share with those beyond your original audience.
Although the speaker can present each slide in sequence using the arrows at the bottom of the screen, Prezi makes it simple for the speaker to create a new sequence each time he or she delivers the presentation or to come back to a particular slide or set of slides during the questionand- answer period.
When the speaker clicks on any object on this overview slide, the software zooms in to reveal more objects within or next to that object. After discussing an object, the speaker can zoom out to the overview or zoom in to another object.
This capability of Prezi not only makes it easy for the speaker to navigate within the presentation but also helps audience members remember the big picture because they see the overview graphic frequently as the speaker moves from point to point. Whereas PowerPoint is linear like a book—page 6 always precedes page 7—Prezi is more like a website in that the speaker can easily jump from one object to another.
 To watch a tutorial on preparing presentation slides, go to Ch. 21 > Additional Resources > Tutorials: macmillanhighered.com/launchpad/techcomm11e.
Characteristics of an Effective Slide An effective presentation graphic has five characteristics:
-
It presents a clear, well-supported claim. In a presentation slide, the best way to present a claim and to support it is to put the claim in the headline section of the slide and the support in the body of the slide. Engineering professor and presentation specialist Michael Alley (2007) recommends the structure shown in Figure 21.2.
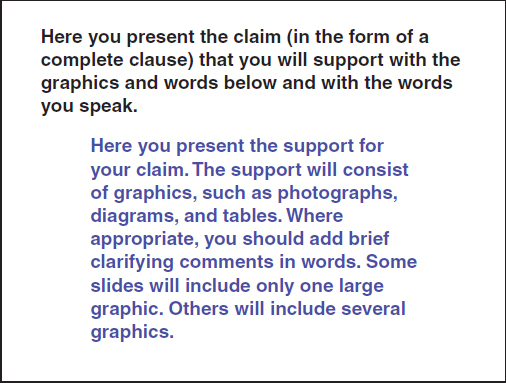 Figure 21.2a. The structure of a typical slide
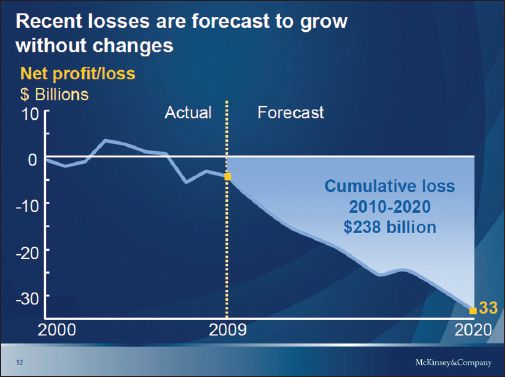 Figure 21.2b. A slide with a claim and a single large graphicMichael Alley’s Claim-and-Support Structure for Presentation Graphics
 Figure 21.2c. A slide with a claim, several graphics, and textual calloutsIn this slide, the headline functions as an advance organizer, introducing the three main options. Each option has its own graphic and its own key term, presented in yellow.Source: McKinsey & Company, 2010: www.usps.com/strategicplanning/_pdf/McKinsey_March_2nd_Presentation2.pdf.
 -
It is easy to see. The most common problem with presentation graphics is that they are too small. In general, text has to be in 24-point type or larger to be visible on a screen. Figure 21.3 shows a slide that contains so much information that most of it is too small to see easily.
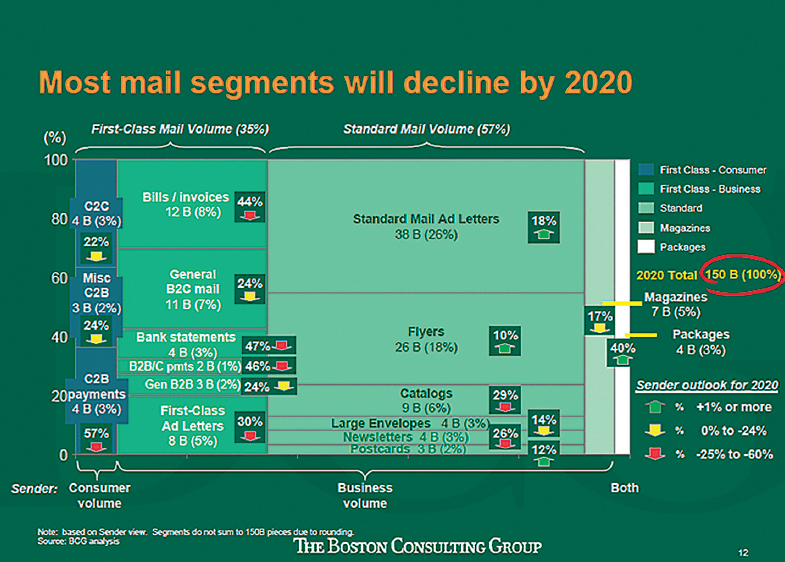 Figure 21.3 Too Much Information on a SlideSource: Boston Group, 2010: www.usps.com/strategicplanning/_pdf/BCG_Detailed presentation.pdf.
Read more about typefaces in Ch. 11.
Read more about using color in graphics in Ch. 12.
- It is easy to read. Use clear, legible lines for drawings and diagrams; black on white works best. Use legible typefaces for text; a boldface sans-serif typeface such as Arial or Helvetica is effective because it reproduces clearly on a screen. Avoid shadowed and outlined letters.
- It is simple. Text and drawings must be simple. Each graphic should present only one idea. Your listeners have not seen the graphic before and will not be able to linger over it.
- It is correct. Proofread your graphics carefully. Everyone makes mistakes in grammar, punctuation, or spelling, but mistakes are particularly embarrassing when they are 10 inches tall on a screen.
See a Tech Tip on creating a master page design in PowerPoint.
When you use presentation software to create a set of graphics for a presentation, avoid the templates, many of which violate basic design principles. Instead, create a simple design. In PowerPoint, use the Slide Master feature. In Prezi, select “Start blank Prezi” on the “Choose your template” page.
Presentation software programs contain many fancy animation effects. For example, you can set the software so that when a new slide appears, it is accompanied by the sound of applause or of breaking glass, and the heading text spins around like a pinwheel. Do not use animation effects that are unrelated to your subject. They undercut your professionalism and quickly become tiresome.
However, one animation effect in PowerPoint, sometimes called appear and dim, is useful. When you create a bulleted list, you can set the software to show just the first bullet item and then make the next bullet item appear when you click the mouse. When you do so, the previous bullet item dims. This feature is useful because it focuses the audience’s attention on the bullet item you are discussing.
See a Tech Tip on setting list items to appear and dim during a presentation.
Regardless of whether you are using the appear-and-dim feature, set the software so that you use the mouse (or a colleague does) to advance from one graphic to the next. If you set the software so that the graphics advance automatically at a specified interval, such as 60 seconds, you will have to speed up or slow down your presentation to keep up with the graphics.
One more point: you cannot use copyrighted material—images, text, music, video, or other material—in your presentation without written permission to do so. (Your presentations in class, however, do not require permission because they are covered by the fair-use exemption.)
To watch a tutorial on audio recording and editing, go to Ch. 21 > Additional Resources > Tutorials: macmillanhighered.com/launchpad/techcomm11e.
Graphics and the Speaking Situation To plan your graphics, analyze four aspects of the speaking situation:
- Length of the presentation. How many slides should you have? Smith (1991) suggests showing a different slide approximately every 30 seconds of the presentation. This figure is only a guideline; base your decision on your subject and audience. Still, the general point is valid: it is far better to have a series of simple slides than to have one complicated one that stays on the screen for five minutes.
- Audience aptitude and experience. What kinds of graphics can your audience understand easily? You don’t want to present scatter graphs, for example, if your audience does not know how to interpret them.
- Size and layout of the room. Graphics to be used in a small meeting room differ from those suitable for a 500-seat auditorium. Think first about the size of the images, then about the layout of the room. For instance, will a window create glare that you will have to consider as you plan the type or placement of the graphics?
- Equipment. Find out what kind of equipment will be available in the presentation room. Ask about backups in case of equipment failure. If possible, bring your own equipment—then you can be confident that the equipment works and you know how to use it. Some speakers bring graphics in two media just in case; that is, they have slides, but they also have transparencies of the same graphics. If your presentation is going to be recorded to be made available on a website or as a podcast, try to arrange to have the recording technicians visit the site beforehand to see if there are any problems they will need to solve.
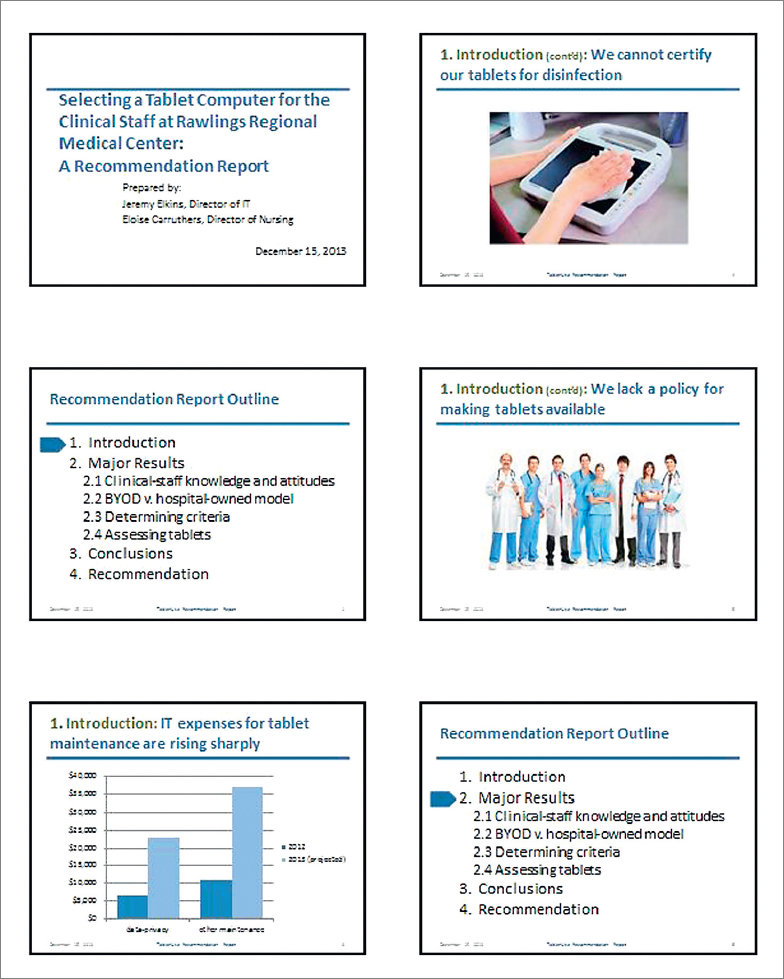
Using Graphics To Signal the Organization of a Presentation Used effectively, graphics can help you communicate how your presentation is organized. For example, you can use the transition from one graphic to the next to indicate the transition from one point to the next. Figure 21.4 shows the slides for a presentation that accompanied the report in Chapter 18 on tablet computer use at Rawlings Regional Medical Center.
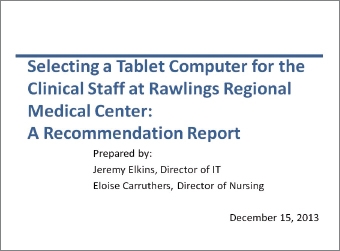
The title slide shows the title of the presentation and the name and affiliation of each speaker. You might also want to include the date of the presentation.
|
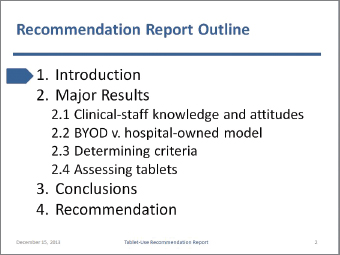
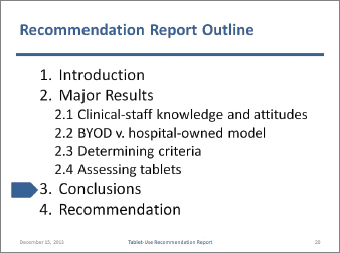
The next slide presents an overview, which outlines the presentation. The arrow identifies the point the speaker is addressing.
At the bottom of each slide in the body of the presentation is a footer with the date, the title of the presentation, and the number of the slide. The slide number gives audience members a way to refer to the slide when they ask questions.
|
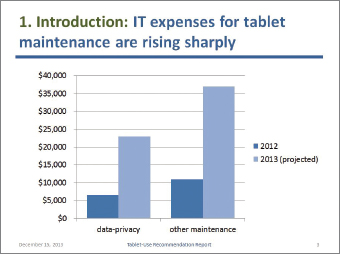
This slide uses a simple bar graph created in PowerPoint. Don’t try to present a lot of information on a single slide.
The title of this slide uses the numbering system introduced in the previous slide. This cue helps the audience understand the structure of the presentation. Following the colon is an independent clause that presents the claim that will be supported in the slide.
|

If the images in your presentation are your own intellectual property or are clip art that comes with the software, you can legally display them anywhere. If they are not, you need to cite their sources and obtain written permission. You have three choices for placing the source statements: at the bottom of the appropriate slides, in a sources slide that you show at the end of the presentation, or on a paper handout that you distribute at the end of the presentation.
Mobile Clinical Assistant: Courtesy of Panasonic Corporation.
|

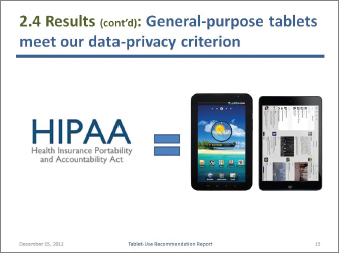
For second and subsequent slides within the same section of the presentation, use the “continued” abbreviation shown here. Notice that the speakers use one color for the generic term (“Introduction”) and a different color for the claim.
Photo: kurhan/Shutterstock.
|
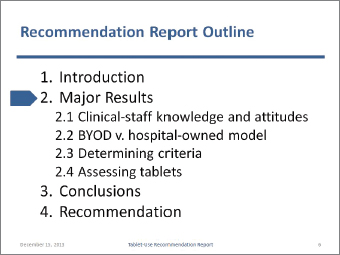
This slide is identical to Slide 2, except that the arrow has moved. Use this organizing slide to help your audience remember the overall organization of your presentation. Don’t overdo it; if you presented this organizing slide just a few slides ago, don’t use it again until you make the transition to the next major unit in the presentation.
|
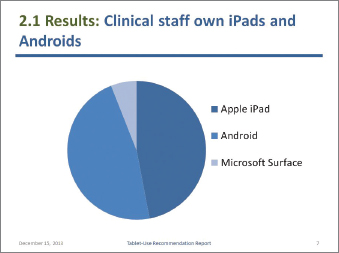
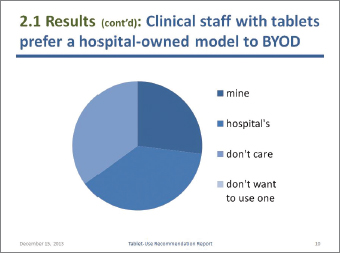
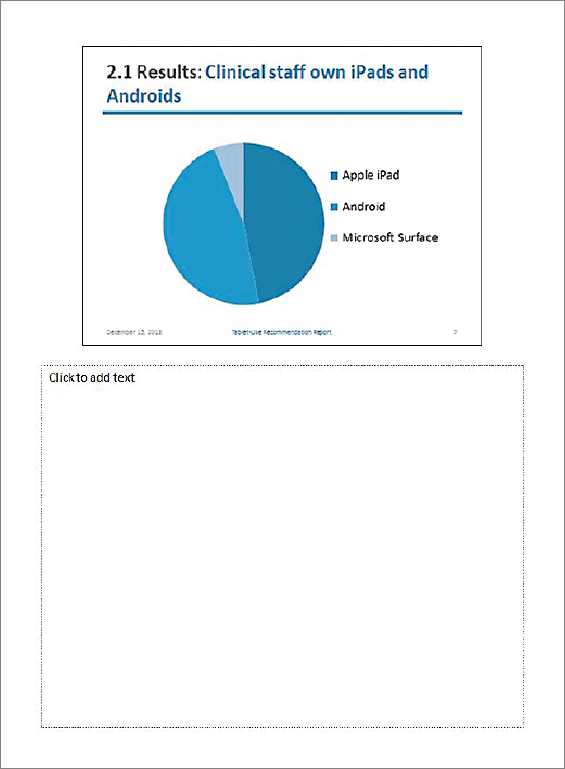
A pie chart is a logical choice for representing a small number of components (usually, seven or fewer) that add up to 100 percent.
Note that the speakers use conservative blues for all their graphics on the slide set. You don’t need a rainbow full of colors. You need just enough difference so that the audience can distinguish between the different slices.
|

Slides work best if the text is brief. The speaker will explain that here are the responses to the statement “I consider myself an expert user of my tablet.”
|

|
|
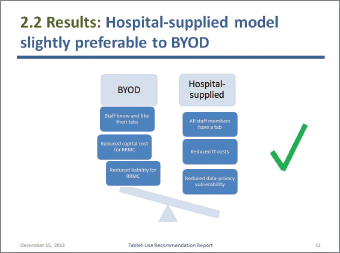
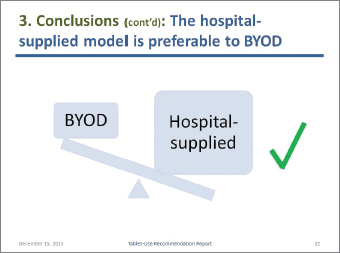
This slide was made using SmartArt graphics, which are part of PowerPoint. SmartArt graphics help you show logical relationships. Here, the relationship is that the hospital-supplied model is “heavier”—that is, has more to recommend it—than the BYOD model.
The speakers added the checkmark to emphasize that the hospital-supplied model is preferable to the BYOD model.
|
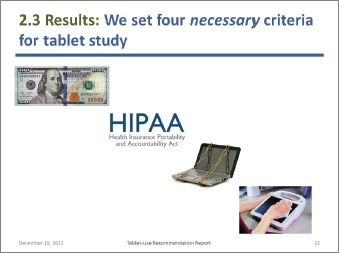
If the images you show are not your own intellectual property, you can legally display them in a college classroom because they are covered by the fair-use provisions of U.S. copyright law. However, if you display them in a business presentation, you would need formal written permission from the copyright holders. See Ch. 2, "Your Legal Obligations," for more information.
Money: Bureau of Engraving and Printing. Chains on laptop: Elnur/Shutterstock. Mobile Clinical Assistant: Courtesy of Panasonic Corporation.
|
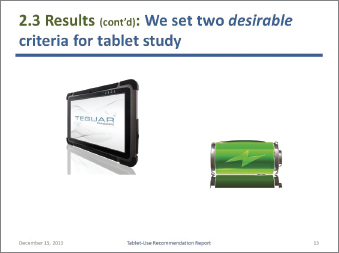
The speakers used the “appear” animation to display first the picture of the tablet and then the picture of the battery. This feature lets the speakers display on the screen only what they are discussing so that the audience is not distracted by other images.
TMT-1830-10 MEDICAL TABLET PC: Courtesy Teguar Corporation. Battery: oxanaart/Shutterstock.
|

Money: Bureau of Engraving and Printing. Photo of Motion C5: Courtesy Motion Computing.
|
HootSuite App for iPod: Courtesy of HootSuite. Verizon Wireless Samsung Galaxy Tab: PRNewsFoto/Verizon Wireless.
|
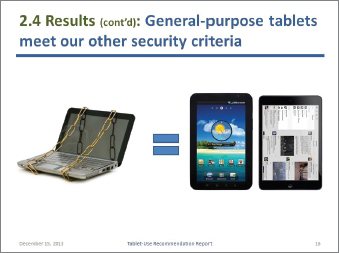
Chains on laptop: Elnur/Shutterstock. HootSuite App for iPad: Courtesy of HootSuite. Verizon Wireless Samsung Galaxy Tab: PRNewsFoto/Verizon Wireless.
|
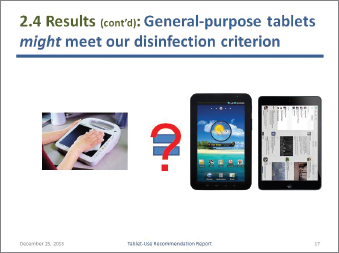
The formatting that appears throughout the slide set—the background color, the horizontal rule, and the footer—is created in the Slide-Master view. This formatting appears in every slide unless you modify or delete it for that slide.
Note that the speakers use color—sparingly—for emphasis.
Mobile Clinical Assistant: Courtesy of Panasonic Corporation. HootSuite App for iPad: Courtesy of HootSuite. Verizon Wireless Samsung Galaxy tab: PRNewsFoto/Verizon Wireless.
|
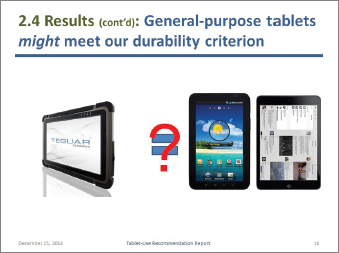
TMT-1830-10 MEDICAL TABLET PC: Courtesy Teguar Corporation. HootSuite App for iPad: Courtesy of HootSuite. Verizon Wireless Samsung Galaxy tab: PRNewsFoto/Verizon Wireless.
|
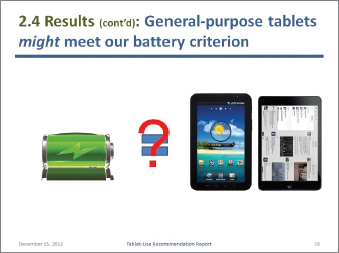
Battery: oxanaart/Shutterstock. HootSuite App for iPad: Courtesy of HootSuite. Verizon Wireless Samsung Galaxy Tab: PRNewsFoto/Verizon Wireless.
|
|

As discussed in Ch. 18, conclusions are inferences you draw from results.
Photo: kurhan/Shutterstock.
|
|
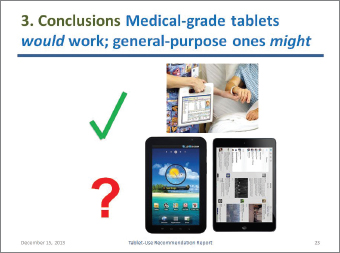
Photo of Motion C5: Courtesy Motion Computing. HootSuite App for iPad: Courtesy of HootSuite. Verizon Wireless Samsung Galaxy Tab: PRNewsFoto/Verizon Wireless.
|
|

|
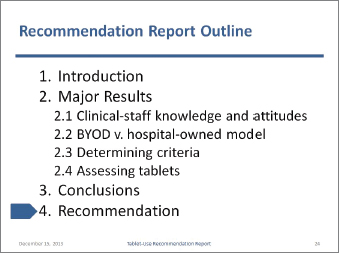
As discussed in Ch. 19, recommendations are statements about what you think should be done next. Some speakers like to make a final slide with the word “Questions?” on it to signal the end of the presentation. You can also display contact information (such as your email address) to encourage audience members to get in touch with you. Photo of Motion C5: Courtesy Motion Computing. HootSuite App for iPad: Courtesy of HootSuite. Verizon Wireless Samsung Galaxy Tab: PRNewsFoto/Verizon Wireless. |
|
Figure 21.4 Sample PowerPoint Presentation
Presentation software allows you to create two other kinds of documents—speaking notes and handouts—that can enhance a presentation. Figure 21.5 shows a page of speaking notes. Figure 21.6 shows a page from a handout created from PowerPoint slides.
To create speaking notes for each slide, type the notes in the box under the picture of the slide, and then print the notes pages. You can print the slides on your notes pages in color or black and white.
The problem with using speaking notes is that you cannot read your notes and maintain eye contact at the same time.
Delivering an oral presentation is more challenging than writing a document for two reasons:
- Listeners can’t reread something they didn’t understand.
- Because you are speaking live, you must maintain your listeners’ attention, even if they are hungry or tired or the room is too hot.
Using language effectively helps you meet these two challenges.
Using Language To Signal Advance Organizers, Summaries, and Transitions Even if you use graphics effectively, listeners cannot “see” the organization of a presentation as well as readers can. For this reason, use language to alert your listeners to advance organizers, summaries, and transitions.
- Advance organizers. Use an advance organizer (a statement that tells the listener what you are about to say) in the introduction. In addition, use advance organizers when you introduce main ideas in the body of the presentation.
- Summaries. The major summary is in the conclusion, but you might also summarize at strategic points in the body of the presentation. For instance, after a three- to four-minute discussion of a major point, you might summarize it in one sentence before going on to the next major point. Here is a sample summary from a conclusion:
Let me conclude by summarizing my three main points about the implications of the new RCRA regulations on the long-range waste-management strategy for Radnor Township. The first point is . . . . The second point is . . . . The third point is . . . . I hope this presentation will give you some ideas as you think about the challenges of implementing the RCRA.
- Transitions. As you move from one point to the next, signal the transition clearly. Summarize the previous point, and then announce that you are moving to the next point:
- It is clear, then, that the federal government has issued regulations without indicating how it expects county governments to comply with them. I’d like to turn now to my second main point. . . .
Using Memorable Language Effective presentations require memorable language.
Using Memorable Language in Oral Presentations
Draw on these three techniques to help make a lasting impression on your audience.
- Involve the audience. People are more interested in their own concerns than in yours. Talk to the audience about their problems and their solutions. In the introduction, establish a link between your topic and the audience’s interests. For instance, a presentation to a city council about waste management might begin like this:
Picture yourself on the Radnor Township Council two years from now. After exhaustive hearings, proposals, and feasibility studies, you still don’t have a waste-management plan that meets federal regulations. What you do have is a mounting debt: the township is being fined $1,000 per day until you implement an acceptable plan.
- Refer to people, not to abstractions. People remember specifics; they forget abstractions. To make a point memorable, describe it in human terms:
What could you do with that $365,000 every year? In each computer lab in each school in the township, you could replace each laptop every three years instead of every four years. Or you could expand your school-lunch program to feed every needy child in the township. Or you could extend your after-school programs to cover an additional 3,000 students.
- Use interesting facts, figures, and quotations. Search the Internet for interesting information about your subject. For instance, you might find a brief quotation from an authoritative figure in the field or a famous person not generally associated with the field (for example, Theodore Roosevelt on waste management and the environment).
A note about humor: only a few hundred people in the United States make a good living being funny. Don’t plan to tell a joke. If something happens during the presentation that provides an opening for a witty remark and you are good at making witty remarks, fine. But don’t prepare to be funny.
Even the most gifted speakers need to rehearse. It is a good idea to set aside enough time to rehearse your speech thoroughly.
Rehearsing the Extemporaneous Presentation Rehearse your extemporaneous presentation at least three times.
- First rehearsal. Don’t worry about posture or voice projection. Just deliver your presentation aloud with your presentation slides. Your goal is to see if the speech makes sense—if you can explain all the points and create effective transitions. If you have trouble, stop and try to figure out the problem. If you need more information, get it. If you need a better transition, create one. You are likely to learn that you need to revise the order of your slides. Pick up where you left off and continue the rehearsal, stopping again where necessary to revise.
- Second rehearsal. This time, the presentation should flow more easily. Make any necessary changes to the slides. When you have complete control over the organization and flow, check to see if you are within the time limit.
- Third rehearsal. After a satisfactory second rehearsal, try the presentation under more realistic circumstances—if possible, in front of others. The listeners might offer questions or constructive advice about your speaking style. If people aren’t available, record a video of the presentation on your computer or phone, and then evaluate your own delivery. If you can visit the site of the presentation to rehearse there, you will find giving the actual speech a little easier.
Rehearse again until you are satisfied with your presentation, but don’t try to memorize it.
Rehearsing the Scripted Presentation Rehearsing a scripted presentation is a combination of revising and editing the text and rehearsing your delivery. As you revise, read the script aloud to hear how it sounds. Once you think the presentation says what you want to say, try recording yourself with an audio or video recorder as you read. Revise the presentation until you are satisfied, and then rehearse in front of real people. Do not memorize the presentation. There is no need to; you will have your script in front of you on the podium.