VFX Overview
There was a time when visual effects were naturally limited in the greater filmmaking workflow because they were difficult, expensive, and time-
 UNDERSTAND REALITY
Leading visual effects professionals say the best animators are those who have an organic understanding of real-world physics, textures, and movements—how waves break on a beach, what rocks feel like, how sand blows in the wind. Similarly, they recommend taking art, photography, life drawing, and acting lessons to further one’s visual effects education.
All that has changed with the CGI revolution. Computer animation, character animation, performance capture, and digital composition have taken over and improved the tasks that were once handled optically in a laboratory. Of course, this has generated a whole new set of complications for you to eventually understand as you move further into your education—
Meanwhile, let’s focus on the basic processes of crafting visual effects. It all starts with marking up the script and planning how to use visual effects in your film.
Planning Visual Effects
Before you can get to work on a single visual effects shot, evaluate your script in detail and make hard choices. First, assess with a dispassionate eye what effects, if any, you really need, what your resources are, and what compromises you are willing to make in order to balance visual effects needs with economic and scheduling realities. All the while, have a conviction about what you want your selected final shots to look like.
But you should be decisive earlier rather than later. Many leading visual effects professionals caution against putting off hard decisions on visual effects needs. Do not rely on a general assumption that you can add or change things quickly and smoothly in postproduction. Famed Industrial Light & Magic visual effects supervisor John Knoll, in fact, urges filmmakers at any level, as they evaluate scripts, to aggressively “question assumptions” when it comes to potential effects shots, as “a lot of what they think they can do later turns out to be harder, more time-consuming, or more expensive to accomplish than they think.”3 (See Producer Smarts: Affording Visual Effects, below.)
Therefore, as you evaluate your script, some basic things will quickly become obvious—namely, that there will be some things you won’t be able to do. You may not have the funds to build, for instance, an entirely digital city or a period background. In these cases, you might choose to adjust your script; alternatively, you might turn to some of the 2D alternatives discussed later in this chapter or to the strategic use of sound and editing to weave your way past shots you can’t fully build with visual effects.
GO ANALOG
CGI should not necessarily be the first technique you turn to. Although certain older analog techniques are not used as frequently on the professional level anymore, don’t be afraid to use proven techniques, such as the use of things like hanging miniatures and glass paintings, which may be useful and viable on student projects. The trade-off is that they may take up more time during image capture, but cost you less in the end. Consider all possibilities when pondering what techniques to use. Bottom line: bring the right “tool” to the job.
In any case, you will need to do the following:
 Go through the script and make a rough count of the effects shots it calls for. Strategically eliminate any you think your movie can survive without.
-
Take stock of the tools and manpower you have available. Do you have multiple workstations or just one? professional software or freeware? colleagues or fellow students with skills to help with some of this work, or are you on your own?
-
Categorize shots based on degree of difficulty of the effect and what tools you will likely need to accomplish them. Plan on starting the difficult shots early in your schedule to allow the time needed to create each shot.
-
Make plans for simple effects and fixes—wire erasures and the like (see here)—which are largely things you can accomplish with some practice and with off-the-shelf computer software in some cases.
-
Evaluate where digital matte paintings (see here) or digital set extensions (see here) may allow you to create much broader environments or sets than you can afford to build practically.
-
Create hand-drawn or digital storyboards or previsualization reels to illustrate the basic needs of the effect (see below). These will help you figure out the length and choreography of each shot and allow you to more completely understand what resources you will need to execute them.
Storyboards and Previsualization
Your ability to plan shots, solve creative questions, estimate costs, and figure out options sharpens if you have a road map for your visual effects work—a visual idea of how you want shots and elements to look and move: their design, timing, blocking, shot length, and so forth. Since the dawn of filmmaking, some form of previsualization has been routinely used to figure out the basics of shots before committing to them. Even today, hand-drawn storyboards are the starting point for achieving this.
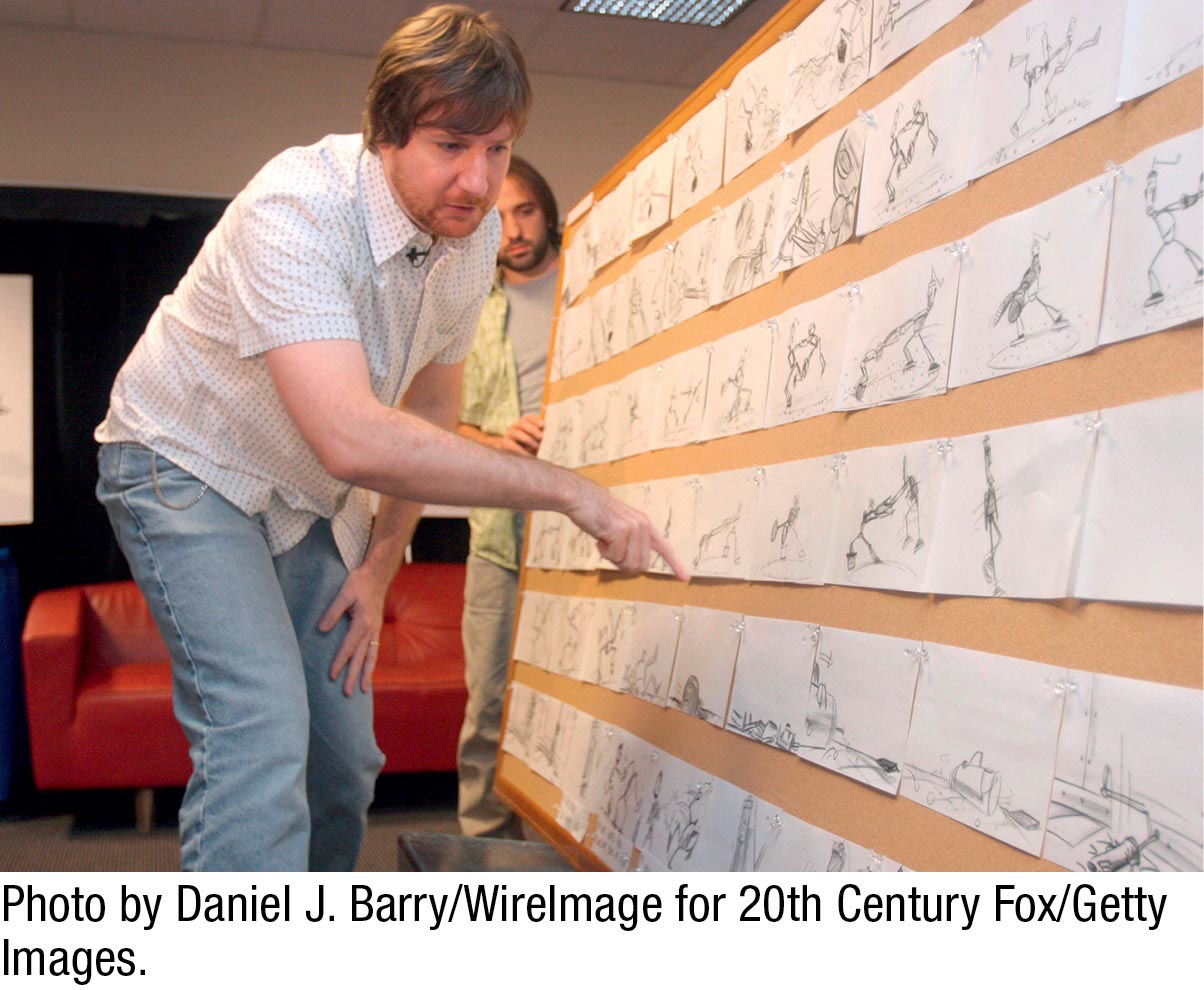
Hand-drawn storyboards for the computer-animated film Robots (2005).
As you learned in Chapter 4, storyboards and other previsualization techniques are frequently used for planning entire films. But they are of particular importance in figuring out the animation and visual effects processes—indeed, the very tools used for previs today are, for the most part, CGI tools. For modern animated features or effects-heavy movies, storyboards for visual effects look similar to those for any project—a sequence of drawings of one type or another that frequently include dialogue, directions, and notes about each shot. On today’s fully animated movies, storyboard artists are effectively becoming cowriters of your story in the sense that their concept drawings will help the filmmaker answer nuanced or detailed questions: Will the character crouch or stand erect in the rainstorm? Will the wind be blowing? Most important, what is their emotional motivation and are they thinking?
Affording Visual Effects

On major productions, visual effects producers typically handle planning and budgeting chores, working with the director and visual effects supervisor. They rely on complex formulas based on time estimates, typical labor and overtime costs, rendering time, and hardware costs for each shot. Based on those estimates, they budget what they can afford per shot, get bids from various visual effects facilities, and make the best deals possible for their project.
You, however, will likely have a slim or nonexistent budget for visual effects work, no visual effects producer, and no supervisor. You will be handling those jobs yourself and looking for ways around spending money you don’t have. And yet you will need some effects shots to achieve your creative goals. How do you figure out how far down the visual effects road you can go? First, think like a visual effects producer and remember that at any level, uncontrollable costs for shots can often be traced directly to poor planning or poor execution during the image capture phase or during the process of executing visual effects shots. To avoid pitfalls, remember the following:
-
Understand the process of calculating what shots cost, even if you have no significant money to spend. Figuring out costs and options will lead you to solutions. Therefore, assign an average cost to shots based on the amount of personnel or time you think you will need, the amount of computer-rendering infrastructure you think they will require (a major limiting factor), whether you think you can do the work yourself or will need help, and so on. Keep in mind that capturing elements for visual effects shots can often slow down your production shoot and increase your budget during image capture, so consider those potential costs, as well. A good guideline is that a significant effects shot in major movies these days can typically cost five figures to execute at major facilities—anywhere from $10,000 to $50,000. At the professional level, such estimates include careful calculations for overhead and profits for facilities or artists. For a student, do away with all that and think only about time and materials to concoct estimates.
-
Discuss these estimates with whomever your advisers are—director, classmate, professor, facility representative, supervisor, friend, or parent. Revise and refine the numbers. Drop some shots. Find out who can help you, and barter labor and equipment with fellow students. Strategize your workarounds for other shots, as mentioned earlier.
-
Because modern tools are often affordable off-the-shelf, you will in many cases have the technology to get basic shots done. But will you have the time? Plan a detailed schedule for yourself and whoever is helping you each day, and be sure to stick to it. Keep in mind that work on visual effects is often done concurrently with image capture and editing, so plan accordingly.
-
You likely won’t have funds to enlist a facility or professional artists, but conceptually, the idea is the same—you should figure out what you can realistically afford to do yourself. Estimate as best you can based on research, guidance from professors, and a highly conservative approach to picking the digital shots you really need to make your story work.
-
The basic concept is this: the more complicated the shot is, the more difficult it will be to execute in terms of both capturing the elements you need and the postproduction process required to put it all together. For example, a human actor being assaulted by an alien creature on a digital spaceship, using real props and computer-generated backgrounds in the windows, will logically be more layered, and thus more complicated, than a shot of a human actor being menaced by a shadowy creature, sounds of an attack and screams, and then a sharp cutaway edit showing the aftermath.
LEARN ALL STAGES
Although many visual effects facilities want artists to specialize, learn as much as you can about all stages of computer animation. You will be a better visual effects artist or character animator if you know how the model should be lit, a better compositor if you understand the nature of the elements you are working with, especially light, and so on through the many stages.
These tiny details are not always in the script and, at some point, need to be figured out. Typically, at the concept stage, where storyboards come in, you will begin the process of answering these questions. On animated features, storyboard artists present entire sequences to the director for approval, and frequently, competing imagery will be tried out in storyboard form to finalize concepts. An editor will often cut approved sketches or panels together into a video sequence—complete with temporary voices, sound effects, and music—called a story reel, which can be viewed on a big screen. Thus, you effectively make a rough template of the film before you even start shooting or animating.
What has changed in recent years is the ability to create not just still images for storyboards or story reels but also rough animations—previsualizations, as discussed in Chapter 4. In today’s film industry, there are entire companies that do nothing but previsualization for major projects, particularly for visual effects work. However, the beauty of the concept is that you can make it as sophisticated or as simple as your goals and resources allow.
So if you don’t have time or money for sophisticated animation sequences, you can simply film your hand-drawn storyboards and edit them together as a story reel, much like an old-fashioned flip book. You can also use low-end software to create simple animation—even stick figures will do. With off-the-shelf editing tools, you can combine in an evolving story reel all of these things—previs animation, still photos, paintings, and even rough photography from tests or other movies.
In other words, there is no specific rule for previsualizations beyond the simple notion that they be designed to guide you to finding creative, financial, and technical solutions. In animated films, such techniques are priceless, because the basic nature, amount, rhythm, and flow of all shots in the movie will be approved off the previs reel, often called an animatic, leaving less room for errors and changes along the way. In live-action films, a particularly complex effects shot that might take until the very end of production to produce and cut into the final movie correctly can be seen, known, and understood by filmmakers while they put other elements together. Like a construction blueprint, animated features and sequences can now be fully digested by those making them in advance of their actual creation—a particularly handy tool in the visual effects world.
Typical Visual Effects
Throughout this chapter, we refer to visual effects, digital effects, and special effects. In earlier years, the term visual effects was used interchangeably with special effects in the sense of referring to the photochemical/optical processes that were used before the advent of CGI. Today, however, the terms visual effects and digital effects are used interchangeably, whereas special effects and practical effects are used interchangeably to describe the manufacture of elements outside the computer in the real world. Let’s discuss digital effects specifically in the context of their most common modern uses. Here’s a look at some of the basic types of effects you can achieve with CGI:
 CONCEIVE AN EFFECT
Conceive a short movie sequence that takes place somewhere you most assuredly cannot shoot—an alien landscape, the bottom of the sea, the top of a mountain, and so on. Compile a list of detailed bullet points explaining what the shot is and precisely how you would propose affording and executing it on a student filmmaker’s budget and timeline. Will you be able to previsualize it or create your own storyboards? Will you be able to shoot your actors in front of a green screen and composite them together with a digital background, or will you use stock footage or tiled photographs? Describe the sequence, your plan, and how you would allocate resources to achieve your creative goal.
-
Natural phenomena. Rarely will filmmakers be able to shoot exclusively in the weather that their script happens to call for at every particular moment. Digital effects are thus frequently used to create rain, snow, wind, smoke, tornadoes, landslides, tidal waves, and so on. Classic examples of digitally created major environmental effects would be Jan de Bont’s Twister (1996) and Wolfgang Petersen’s The Perfect Storm (2000)—two movies where digitally created environmental effects were at the center of the plot. On smaller projects, such as Snow Falling on Cedars (1999), filmmakers used digital effects more subtly to sprinkle snow on the landscape, since there was no snow at the location where they shot the film. Keep in mind that you can effectively use digital technology to make subtler enhancements to weather phenomena in this way.
-
Fire and explosions. When scripts call for fire or explosions on a scale that is simply too dangerous, expensive, or time-consuming to film, a wide range of digital techniques exists to create photo-realistic equivalents. Sometimes the fire is entirely digital, sometimes a small fire element is filmed on a special stage and then digitally cloned and enhanced to grow in scale, and sometimes significant pyrotechnic effects are used and then enhanced or tweaked in the computer, where the effect is simulated through complicated simulations.
-
Creatures and characters. Digital technology has allowed filmmakers to create creatures, monsters, robots, animals, and aliens for years, but there is a distinction to be made between digital creatures and digital characters, an art we discuss later in this chapter (see here). In 1993, Jurassic Park’s dinosaurs brought creature work to new heights with stunning, photo-realistic movement, and the industry has built on that work ever since. Then, believable characters, featuring the central element of character animation—emotion—in combination with realistic movement, the character developing empathy from the viewer, rose to the fore with breakthroughs like Stuart Little in 1999 and, of course, the incorporation of motion-capture techniques into the paradigm for 2001’s The Lord of the Rings: The Fellowship of the Ring. Next, James Cameron used performance capture techniques to animate photo-realistic characters for an entire feature film in 2009’s Avatar, and now, creatures and characters are so commonplace that creature work and character animation have become crucial parts of modern filmmaking.
-
Backgrounds/environments. The use of digital environments and backgrounds in live-action films is even more prevalent. This capability, and the wide range of techniques for executing it, can be seen in a large swath of today’s motion pictures. Sometimes the background is for particular shots or sequences, sometimes digital environments are used to establish or enhance a point, and sometimes digital backgrounds have been used for entire live-action movies. The methods for achieving these backgrounds—from the creation of all computer-animated environments to the combination of CGI with real environments to the use of matted or tiled photographs—are continually evolving and are a rich area of advancement in digital effects today.
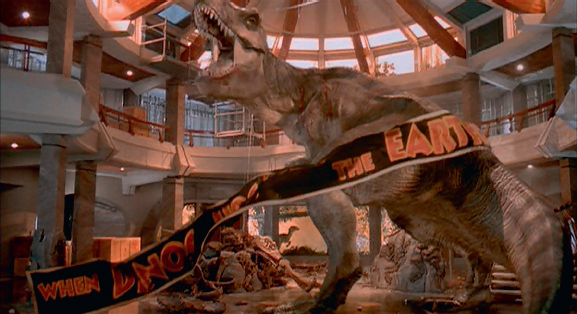
Jurassic Park (1993) pioneered a new generation of VFX, seamlessly combining CGI and animatronic dinosaurs.
-
Set extensions. This is a technique now routinely used even by filmmakers who largely focus on non-effects-oriented dramas, such as Martin Scorsese, Clint Eastwood, and Ron Howard. The technique is particularly useful for period films, or for any movie in which an entire realistic set or location cannot be used for shooting. Filmmakers simply shoot on whatever set or portion of a set or a location they have available, and/or against a green screen, and task their visual effects department with “extending” the location. That might mean taking out modern buildings or wires or environmental factors captured on the photographic plate, or building computer-generated continuations of sets or buildings in which photography took place. This method is frequently cost-effective in that it reduces the need to build elaborate sets or travel to far-flung locations.
-
Digital makeup. This technique involves the ability in postproduction to digitally create, fix, or adjust wrinkles or spots or wounds on the flesh of real human actors or animals to replace or enhance real-world makeup. Also, younger actors playing older characters, and vice versa, benefit—check out The Curious Case of Benjamin Button (2008) for a radical example. With the introduction of increasingly higher definition cameras capturing more detail, this technique is becoming a large part of work of “invisible” effects.
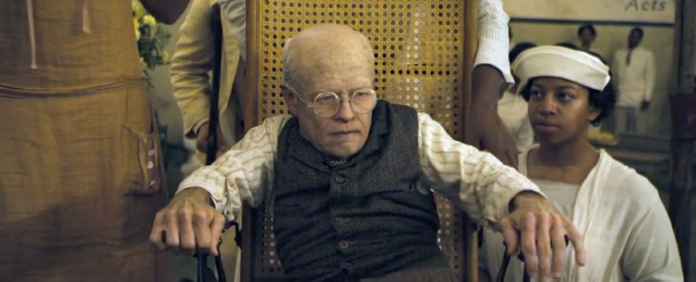
The Curious Case of Benjamin Button (2008)
-
Wire removal and motion blur. The ability to use computer graphics to fix real-world photographic plates by removing or adding photographic anomalies is a time-honored tradition. Wire removal simply refers to the fact that elaborate stunts or special effects sometimes require the use of special rigs, wires, ropes, or harnesses for safety on-set that cannot be hidden during filming. In these cases, visual effects teams use computer software to erase the out-of-place items and fill in the background where they once stood, so that viewers will never know they were there to begin with (see Action Steps: Wire Removal, below). Similarly, manipulating motion blur revolves around making certain types of moving images appear more organic and natural to the human eye. When objects move fast in real life, the human eye sees a modest blur of movement as the object moves from one point to another. This phenomenon is missing when computer-animated items move unless it is intentionally added, and so filmmakers now use computers to do just that.
-
Fantastical effects. This term refers to the notion of creating phenomena that do not really exist. In addition to producing fire, explosions, and various environmental effects, computer animation is the logical tool for manufacturing any magical, mystical, or fantastical effect that a filmmaker’s mind can conceive. It might be something as simple as the legendary Star Trek transporter effect or Tron’s neon-glow-hued clothes and weapons, or something more complex, such as Terminator 2’s “morphing” effect and some of the magic seen in the Harry Potter movies.
-
Visual language. Due to the physical limitations of cameras and lenses, such as weight or imperfections in lens glass, imagery contains certain visual anomalies—unwanted artifacts from the photochemical process—which the audience may or may not notice on the surface but which they are used to at a subconscious level. An example would be lens flare—the phenomenon of light scattering through lens glass in such a way as to produce multiple unplanned light reflections. This does not happen in the digital world because no physical lenses, with their imperfections, are involved. And yet the human brain and eye expect to see such “reality” at some subtle level; thus, the visual effects team is sometimes tasked with adding those anomalies to make digital footage more realistic, as though it were filmed with a real-world camera.
ACTION STEPS
Wire Removal
Wire and rig removal is an important use of visual effects because a director’s options would be severely limited if he or she could not permit wires to be captured in a shot. There are dozens of methods and tools for this kind of work, but here are the basic approaches:
 Patching. With this technique, digital artists search through photography from the set, both final shots and outtakes, to find frames showing the same background but without any wires present. Using their software, they essentially cut that piece of the background out from the extra footage, and patch or paste it over the wire or rig in the original frame. If your camera is static and there is little or no movement in your frame, this approach can be quite effective; however, this technique does not work well if there are cameras or actors moving around, since such movement causes blur, grain, and other types of anomalies. Shooting a clean plate, the set without the actors on it, can often make this task easier.
 Stabilization. For frames in which there is movement, there are software tools you can use to stabilize the image, and then “paint back” to a frame in which the wire is not present and patch it into the necessary spot.4 In this case, however, you are painting back to a frame that also had movement, and so you need to use software to massage the resulting motion blur until the difference between the two pieces is difficult to see.
 Roto cloning. This technique involves rotoscoping (see here). Certain powerful compositing tools are able to automate much of this process, whereby you cut out an accurate matte of the wire and then the software minutely shifts into that cutout a piece of the background from earlier or later in the shot, when the wire was not present. This method can usually make motion blur and lighting shifts appear seamless, but artists need to be careful about making sure sharp edges of the matte are not visible with the movement. The other difficulty with this technique is that it requires highly sophisticated and expensive compositing tools to achieve the best results.
 Background replacement. This is a method used when the nature of the shot, the amount of wires, and logistics make it hard to cut out mattes cleanly and either rotoscope or replace tiny pieces of frames, as was the case in the fantastical martial arts battles in Crouching Tiger, Hidden Dragon (2000). In such cases, filmmakers cut out actors and objects as mattes themselves, and composite them back into an entirely fresh live-action or computer-generated background without wires. This technique can work with 2D backgrounds, in which artists cut out pieces of the live-action background from any frames that were photographed without action in them, and then create a wide shot of the background into which they can insert and track their actors and action. When 2D replacement is not feasible, they can opt for a full-on 3D environment reproduction.