Previsualization
We have discussed the principles of good design; how to make a design plan; your options for finding and using locations; and planning and building sets. However, at some point during all these stages—
Thus, in filmmaking, we often use the term previs loosely—
Student filmmakers will have a hard time hiring previsualization companies or doing complex computer graphics previs work in most cases, but with affordable off-
Sketches and Storyboards
Sketching shots and designs by hand is as old as motion pictures themselves, and the term storyboards has been around since at least the 1930s, when it was popularized at Walt Disney Studios as a tool for making animated films. For decades, studio artists there and elsewhere would draw comic-book style panels depicting various scenes in animated movies, and then film them “flipbook style,” creating so-called story reels, or animatics, and even adding music, dialogue, and effects in order to create templates for filmmakers to follow as projects moved along. Over time, the concept was adopted by live-action movies.
 LOOK TO COMICS
You can make your storyboards effective by using simple comic-book techniques—speech or thought bubbles, wiggly lines for movement, pencil shading, ovals, coils, cylinders for bodies, and so on. As long as the meaning of your storyboard panels can be understood by merely looking at the pictures, you will have created useful storyboards.
Today, previs options have branched out into numerous areas, including doing everything on a computer. However, one way or another, even if you later plan to digitally previsualize shots or sequences, you will need to incorporate the idea of manually sketching out at least some key ideas into your design approach once you have done meaningful research. There is no single right way to do it, nor is there a requirement to be particularly artistically talented or detailed in your sketches. In fact, some designers warn against overloading storyboards and sketches with minute detail to the point where you’ve added more than you can feasibly execute or stifled creativity regarding other possible options. Often, professional designers prefer to go with simple hand-drawn pencil or watercolor sketches.
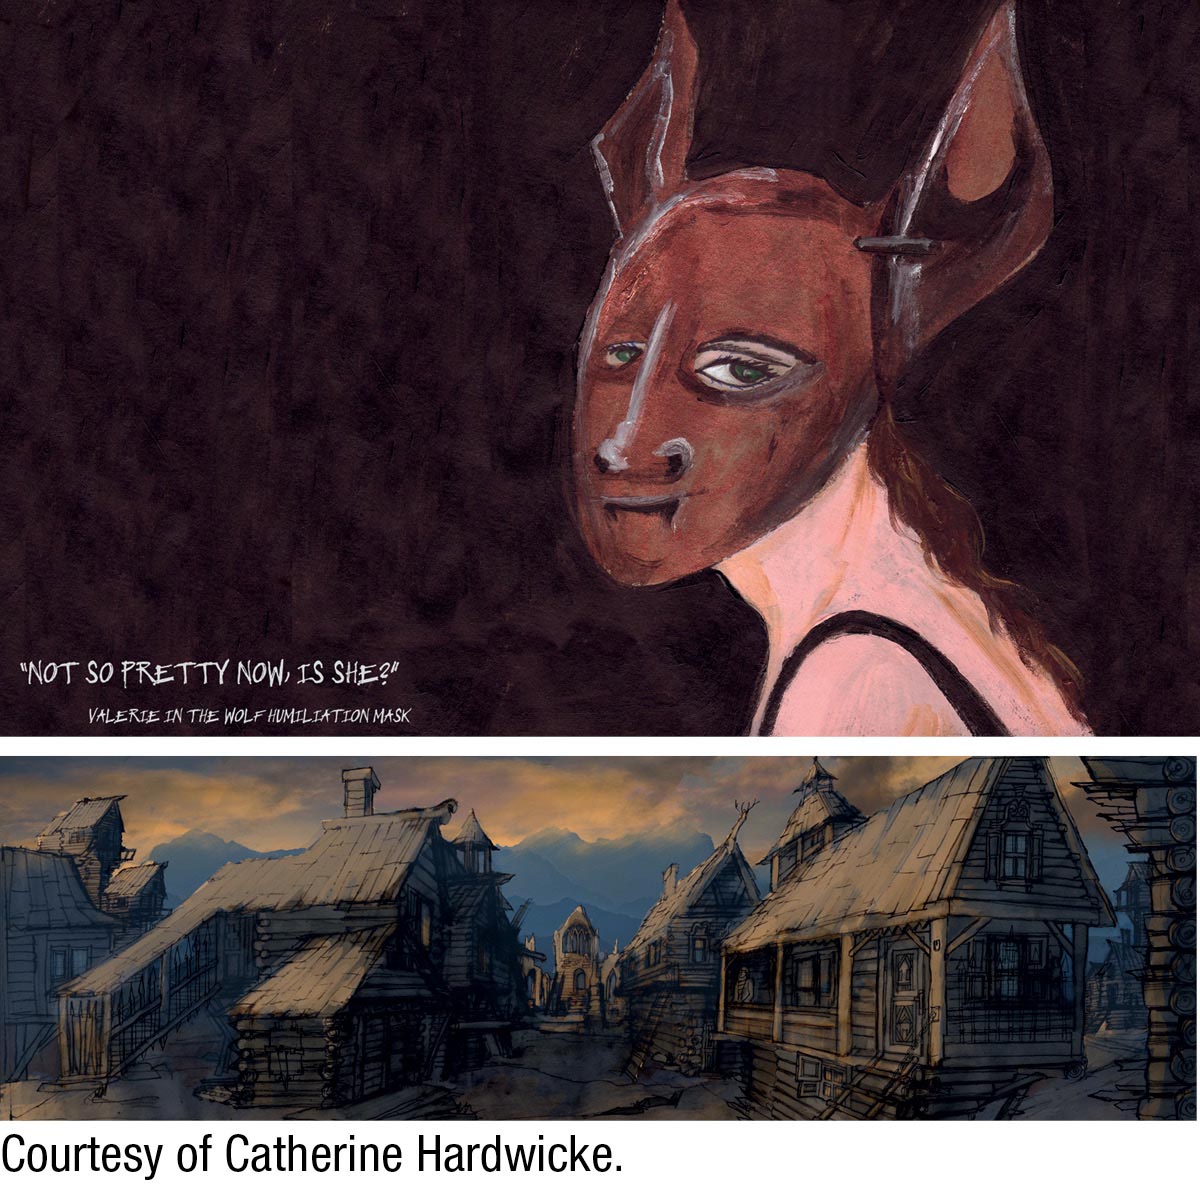
At the prime level, there are two categories of sketches that you will need to concern yourself with. The first is concept art. Basically, these are relatively detailed drawings or diagrams that you create as reference templates for costumes or sets for yourself or other artists tasked with building those elements, frequently drawn in pencil, charcoal, or marker. When feasible, create concept art for all major characters, costumes, and sets to help you design the movie more efficiently.
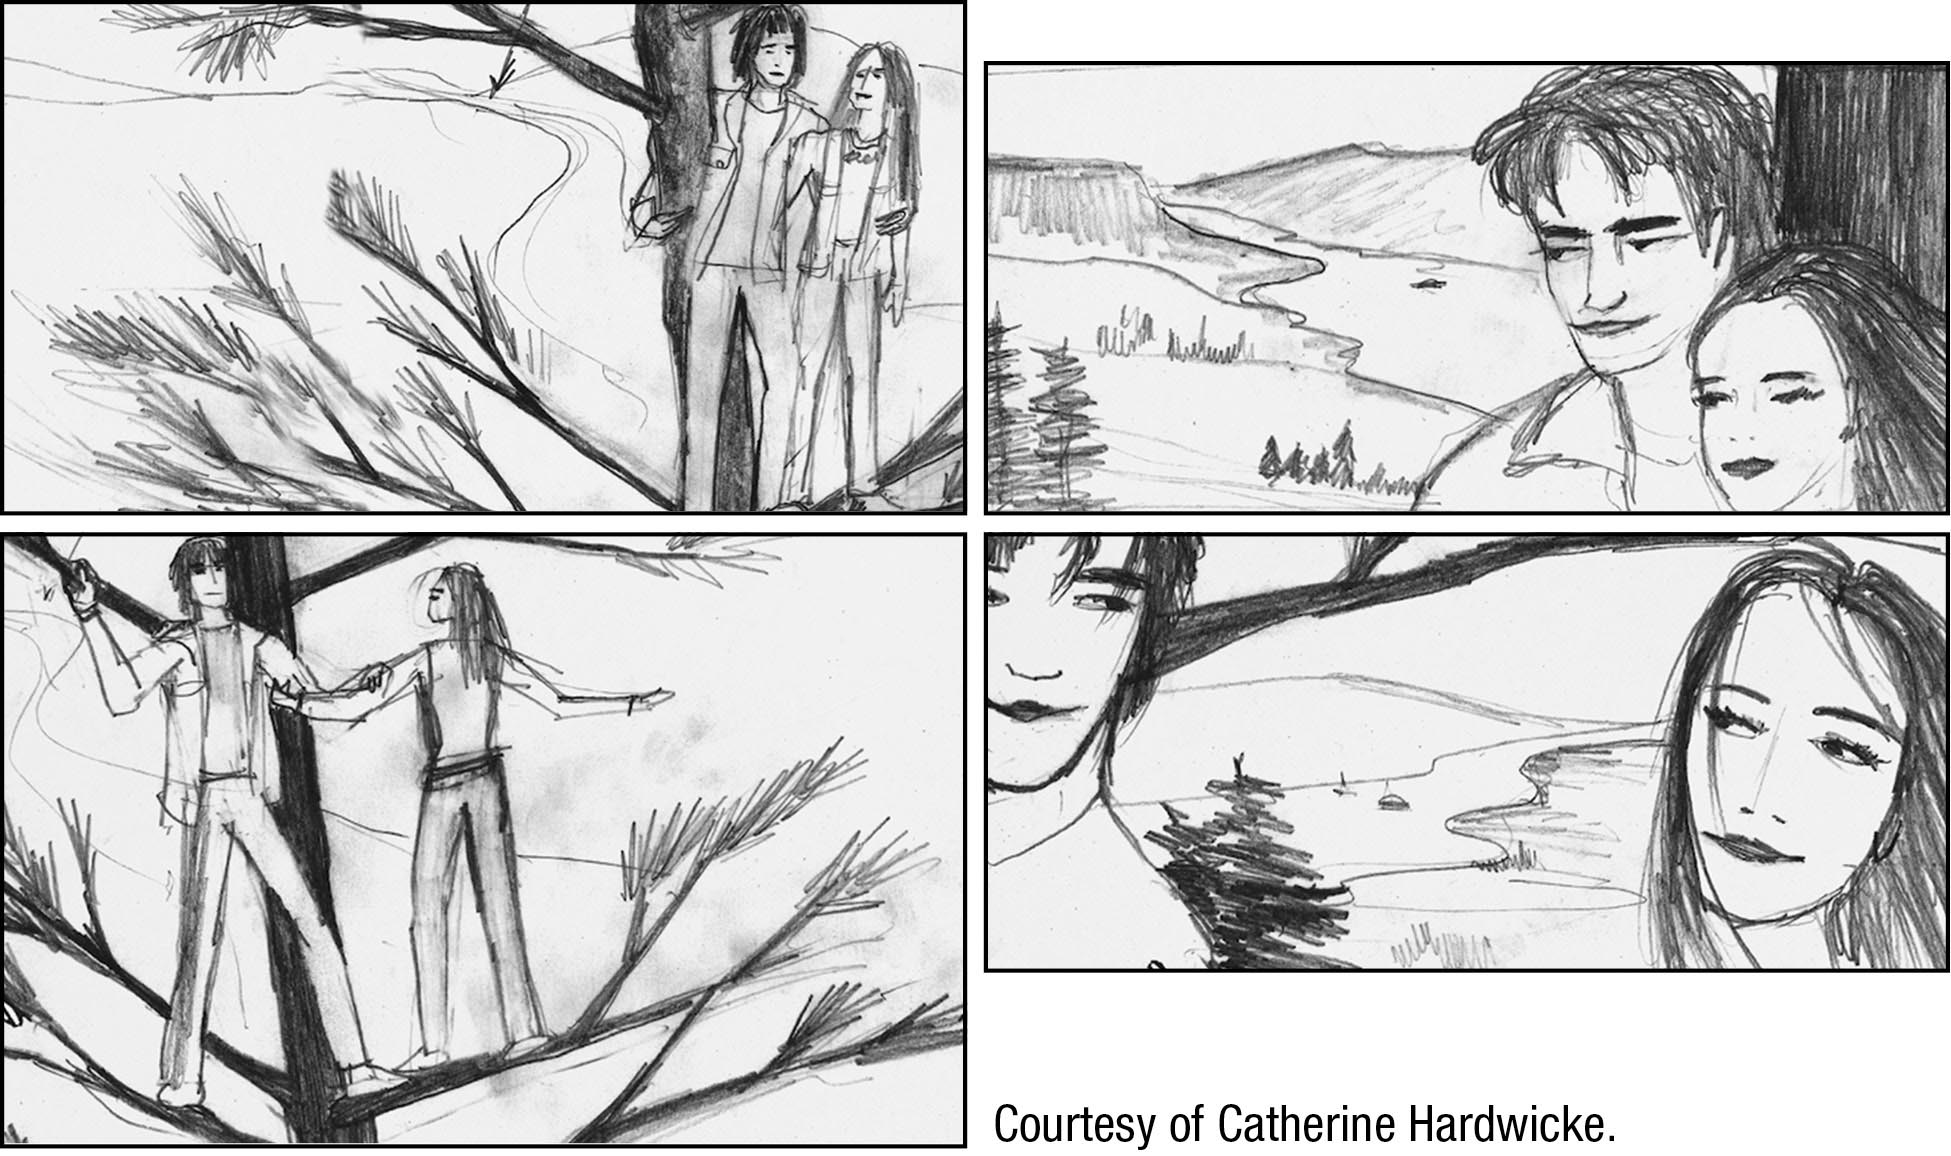
Next, you will want to create storyboards. Storyboards are often used to visualize entire films or sequences as individual frames or shots, essentially as hand-drawn panels created to resemble comic books. Depending on your skill, time, and resources, they might be extremely detailed or little more than stick figures or shapes. But either way, their goal is to illustrate how you see characters, sets, and objects interacting in particular environments. This will help you design shots and camera angles and lighting setups later, and it will make it easier to move, solidify, and organize various design ideas along the way. Storyboards will also help you understand what you will and will not actually have to create, because they let you see what area of a set and what backgrounds will be in shots, and which will not.
Ideally, after you approve your storyboards, you will be able to make even more detailed drawings or blueprints of sets based on what you’ve come to understand from your research and your analysis of your storyboards. At that point, you have guides for building sets and set pieces, when necessary. Here is a list of the various storyboard approaches:
USE MODELS
Besides using sketches, you can also benefit by using simple scale models as a previs technique, giving you a three-dimensional view of your design. You don’t need expensive materials and deep model-building experience to accomplish this. You can build rough representations of your sets out of cardboard or other readily available materials, and you can paint them to enhance the illusion.
 2D concept drawings. These are highly detailed hand drawings that specify particular elements in great detail.
-
2D storyboards. These are essentially hand-drawn, comic-book style panels, with as much detail as you need to plot out shots or sequences.
-
Animatics. This is the result of 2D storyboard panels being assembled in order and filmed; animatics provide a sense of movement and story order to your previs work.
-
Photomatics, or photo storyboards. Here, instead of drawings, you use photographs of your actors or people, places, and things that generally resemble your story ideas and assemble them together to give you an idea of designs and concepts you want to implement. You might even take friends or classmates to sets or locations and pose them in key places, photograph them, and use those rough templates as storyboards for some of your shots.
-
3D storyboards. As with 2D storyboards, these are panels created to plot out your shots and sequences, but they are created on a computer, rather than drawn by hand, and are combined with other panels on the computer.
-
3D animation. Here, you roughly animate shots or sequences with basic movements and other elements to help you better define how you might design and choreograph a scene. Some form of 3D animated previs is quite common for visual effects sequences.
In the next section, we will discuss some of these digital previsualization techniques in more detail. But for hand-drawn storyboards, even if you don’t have the artistic talent to produce compelling, professional-level sketches, the web is full of dozens of resources for learning basic drawing and storyboarding skills. Don’t let your lack of drawing skills inhibit you from eagerly pursuing concept art and storyboards. As Jack Taylor noted, even rudimentary drawings will “get your mind going” as the design process picks up steam, and that can only help your project.
Digital Previs
Digital previsualization of shots, sequences, even entire movies, has been growing in sophistication and popularity in Hollywood since it first evolved in the late 1980s out of computer-
For production design, digital previs can be particularly helpful in allowing you to reach conclusions about what elements you will be able to build and shoot practically and what elements you will need to create on the computer. Particularly for action sequences, car chases and crashes, and explosions, filmmakers have found that they can more safely and affordably create those shots digitally. But even so, they need to design each and every element—
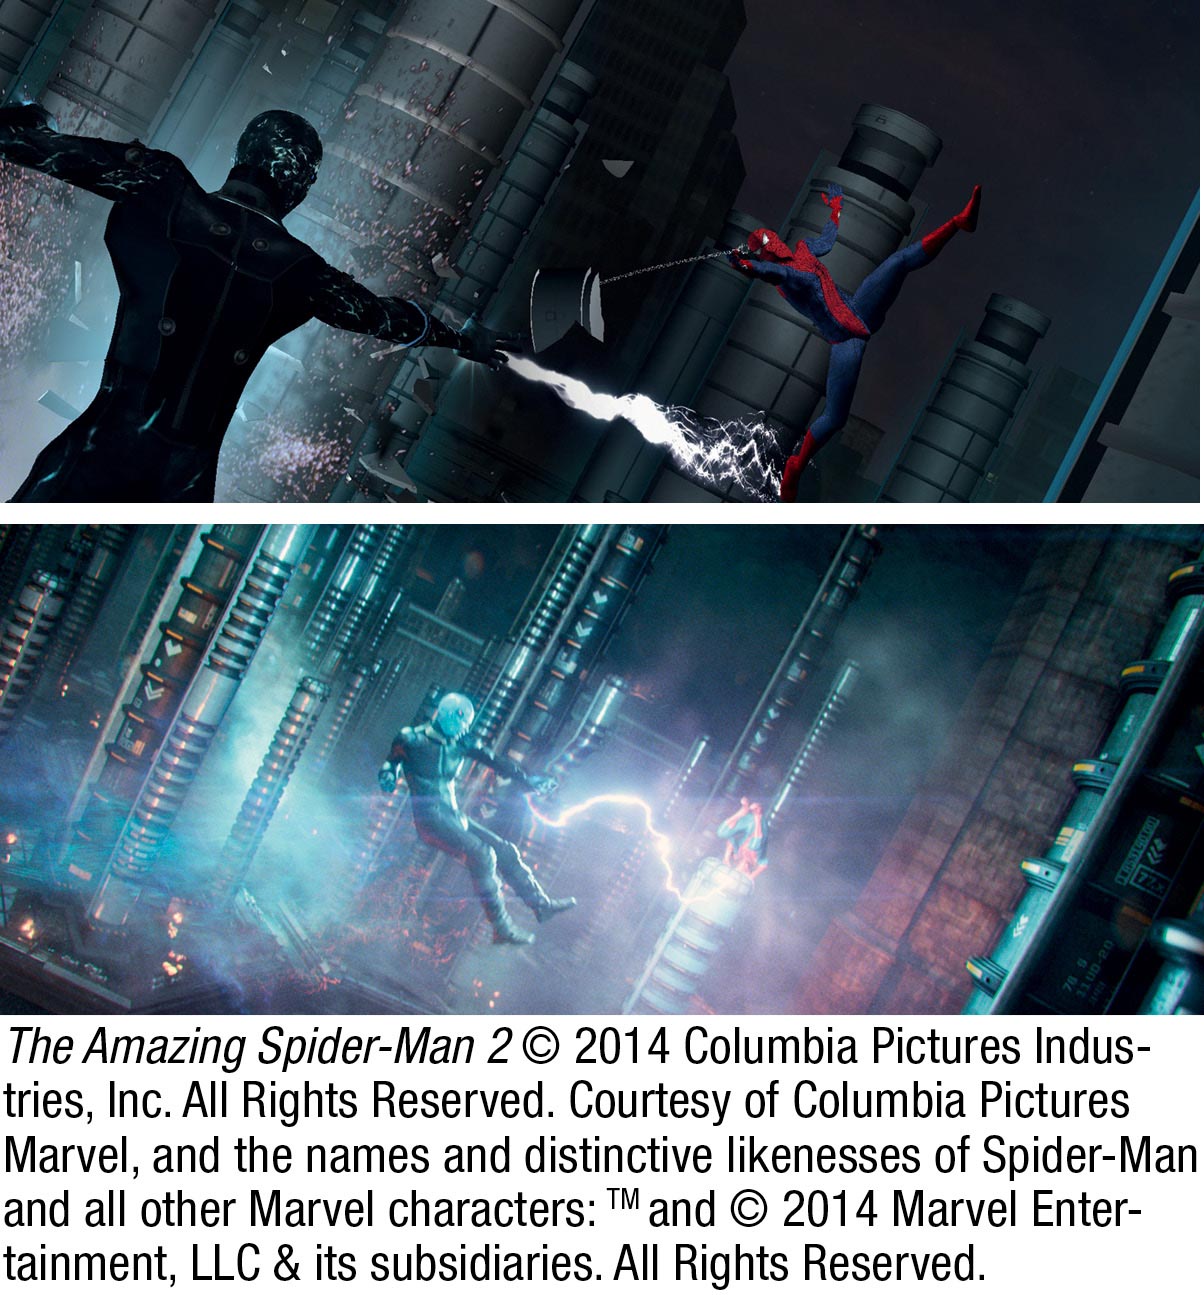
Previsualization (top) helps effects-
As we’ve noted, digital previs can also help plot camera moves and lighting placement in great detail. If, for example, you will be shooting actors in front of a green screen on-
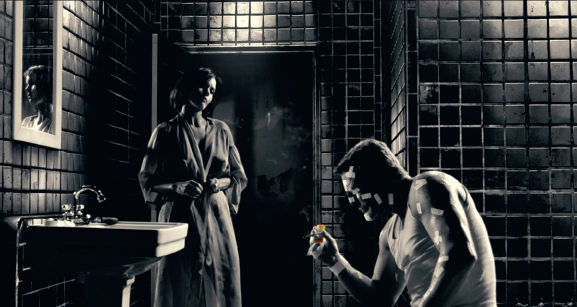
The Sin City films (2005, 2014) use an extreme version of set extension, where most of the settings, sets, and backgrounds are created digitally from bare-
Indeed, digital previs is crucial in the growing trend toward combining real-
Digital previs allows you to view the sets you are designing in three dimensions and in greater detail than a hand-
 STORYBOARD EXPERIMENT
Identify a shot or sequence from your screenplay, and using techniques discussed in this chapter and any methodology you prefer, create some storyboards or shot sketches. You can hand-
An added benefit of doing digital previs is that it involves many of the same tools and techniques as visual effects work and, in some cases, will allow you to create portions of digital assets that you will be able to build on later, when you strive to create the eventual 3D image, rather than starting over. If you previs a building, for instance, the basic wire frame and possibly other elements may serve you well when you begin doing visual effects work on the scene involving that building.
Here are the basic steps you will go through if you choose to do digital previs work on your movie:
- Create a list of scenes or shots that you intend to previsualize, with brief notes about what you need and want from each shot and its significance. If you are previsualizing the entire sequence, you will list every frame you need. If you are conceptualizing it and want to create a digital template for designing the entire scene, you might only list the most crucial shot in the sequence.
- Doing digital previs does not mean you should forgo storyboards, or at least the use of rough sketches. Start with sketches of key sequences or shots, and then use them as reference material for creating your digital previs material. Alternatively, if sketching is simply not something you feel you can accomplish, go to your locations and photograph environments and specific elements, or even have friends or fellow students roughly act out some blocking for your sequence and take pictures of that, and use those photos as storyboard equivalents.
- Similar to the process described in Chapter 13 for animation and visual effects, you will use your animation software to create a rough version of the 3D environment you are designing, and block out where characters, elements, and possibly cameras and lights should be placed. If you are previsualizing primarily for blocking and camera movement, your buildings and designs will be rudimentary at best—
perhaps even just blobs or blocks. For design specificity, you will need far more detail, but only for the particular elements you are concerned with in a shot. Therefore, you will likely not need to take all the 3D material in each shot through the traditional animation steps described in Chapter 13. - Instead, you will render out CG images as soon as you have the minimal amount of detail you need to previsualize your sequence adequately. Depending on your needs and resources, you may do a rough render and then, after making adjustments, re-
render for greater nuance, detail, or other refinements to some elements, such as costumes or architecture. The point, however, is to go only as far as you need to in order to make your design or filming decisions, rather than to pursue near- final- level quality. - Eventually, once you have the 3D previs material at the level you need, you will edit the shots together in the order you want to view and share them. But you may also wish to print all or some of them out and mount them on walls or boards in your workspace for easy reference, as is frequently done with hand-
drawn storyboards.
Tech Talk: Digital Storyboard Tools

There is now a wide range of useful and affordable computer tools designed specifically to help you create sophisticated storyboards and previsualize action, blocking, lighting, and camera moves, among other things. Here are a few popular ones:
 SketchUp (www.sketchup.com). This is a 3D drawing product with a low-
end free version, in addition to more powerful versions at reasonable prices. Sketchup is designed for you to use as if you were sketching on paper, and you can certainly do rough blocking and design with it. -
FrameForge (www.frameforge3d.com). This tool is specifically designed for moving image previsualization work, and can help you draw rough storyboards, do layout, and create rough animation and blocking, among other things.
-
StoryBoard Quick and StoryBoard Artist (www.powerproduction.com/
index.php ). These tools, from the same manufacturer, are both digital storyboard crafting tools. StoryBoard Quick is designed for simple storyboard generation, whereas StoryBoard Artist adds animation and extensive revision tools, among other things. -
Photoshop (www.photoshop.com). Long available to consumers and professionals alike, Adobe’s famous graphic design software is quite useful for manipulating scanned images, photos, and 3D images, and can be used for storyboard creation, among other design-
related tasks. -
Poser (http:/
/poser.smithmicro.com ). Poser is a well-known tool for simple design and animation of virtual characters, rather than environments.
Designer’s Emergency Kit

-
Drafting paper/sketchbook
-
Pencils and markers
-
Tape roll with different kinds of tape
-
Dulling spray and other spray paints that can darken surfaces
-
Sponges for mottling paint
-
Cleaning supplies for cleaning surfaces
-
Scissors or X-
Acto knife -
Digital still camera
-
Camcorder
-
Compass
-
Maps
-
Tape measure
-
Laptop with graphics software or CGI software installed