Lighting Gear
Now that you understand how light works, how do you actually work with lighting? You do so by using lighting instruments and different media, such as gels or filters, to change their color and intensity. Before you race to plug in the Pro-
ACTION STEPS
Lighting Safety First!
Follow these seven rules to stay safe using lights on-
 Always use gloves, and never try to feel how hot a light is by touching it. Lights get hot fast, so much so that they will burn you even if you touch them quickly or brush against them. Allow them to cool completely before packing them up. Also, never touch a lamp with your fingers. The fingerprints, even though you cannot see them, will leave a residue that will cause the lamp to overheat and potentially explode.
 Never put a lighting instrument near flammable materials, like drapery. Hot lights can cause fires.
 Always use the correct heavy-
duty extension cords and cables, as lights draw a lot of power. Always turn off and disconnect lights from the power source before moving them.
 Always steady lights by weighting their base with sandbags. Because lights are often set up on poles, they are top-
heavy and can easily fall over.  Use a screen or other diffusion media. Lights that don’t have a lens in front of them are “open faced” and need to have something in front of them to protect cast and crew in case one of the lamps explodes.
 Stay away from water. Just as you wouldn’t take a toaster into a bathtub, you shouldn’t use lights in the rain or where there is water touching the electrical equipment. If the equipment gets wet, turn lights off at the power source and protect them. Don’t use them again until they are completely dry.
Lighting Instruments
As you’ll remember from Chapter 2, screenplays always indicate if scenes are exterior or interior. One reason for this is that the lighting changes depending on where you are shooting. Following are some of the more common lighting instruments you will use in both situations:
 TURN OFF PRACTICAL LIGHTS
Practical lights are the lights you might find already on your location set—overhead fixtures, table lamps, and the like. It is your job to light the set—not to use the lights that may already be there. Therefore, if you are using a practical location, you will typically turn all practical lights off before you do your lighting setup. In some locations, a skillful lighting designer may intentionally build a scene’s light around practical lighting, or, in collaboration with the production designer, may build special film lights into practical-looking fixtures that are visible in the shot. Never leave a practical light on in the shot unless you have strategically planned to incorporate its illumination capabilities into your lighting plan.
Exterior Lights
 When you’re outdoors, the sun will always be your key daytime light. It is clear and powerful, but it can also be fickle when clouds pass over it or as its angle changes late in the day. What’s more, sensitive digital cameras can also capture enough illumination from the moon and the stars to rely on them alone on some night shoots.
-
Reflectors are lights you don’t need to plug in. They are generally made of reflective material, like flexible aluminum foil, but you can use anything as a reflector, even a white flat from the theater department or a white piece of poster board. A reflector bounces sunlight back onto a scene, and you can angle it where you want. Its light is diffuse, unlike that of direct sunlight, which is sharp.
-
HMI (hydrargyrum medium-arc iodide) lights are extremely bright and produce light that’s around 6000 K—close to the color of sunlight. They can work to supplement sunlight on a cloudy day or provide exterior fill. As with all professional lights, you can attach barn doors—four metal flaps that you can open and close to focus the light to your target area. HMIs are big, heavy, and hot, and they draw a lot of power. Although most schools don’t have them, you will see them used routinely on many professional productions.
-
Balloon lights are helium-filled balloons made of special materials that contain certain kinds of glowing lamps and can be used indoors or outdoors, with quick setup, to light large areas.
Interior Lights
Many schools will have the first four lights on the following list, and you can produce good results with them (see How Do I... Light with Minimal Tools?, below, and Business Smarts: Renting Lights, below). This list also includes other lights you may be able to access, as well as some inexpensive rigs you can make yourself (see Producer Smarts: How Much Is Enough?, below).
-
The Lowel Omni light produces hard light; it is a flexible tool that provides key- or backlight.
-
The Lowel Pro-light is a tiny, efficient powerhouse, producing clear, even light with hard edges. It works well as a fill (see Chapter 9) or as an accent light, which means you can focus it on one aspect of a scene to make it stand out more. You will use barn doors to focus the light.
-
The Westcott 500-watt constant light produces a soft general light, perfect for portraits or green-screen work. Its color temperature is 5400 K, which means it is balanced for sunlight.
-
The Westcott Spiderlite comes with a range of possibilities. It is useful for lighting backgrounds, and it features interchangeable tungsten (interior) and fluorescent (daylight-balanced) lamps. You can use it to light a background or a green screen.
-
The Fresnel spotlight is the workhorse of studio productions. It produces a bright, hard light, and with a slider, you can adjust the beam from a tightly focused spot to a widely focused flood. The difference between the intense center of this light and the light around the edges is called falloff. In spot position, the falloff is rapid; in flood position, the wider light beam is more diffused, so the falloff between the center and the edges is said to be slow.
-
Inkies are small, three-inch Fresnels. They are lightweight and easily positioned for touch-ups and accents.
-
Tungsten spotlights are spotlights powered by a tungsten lamp, which offers the highest amount of brightness in the smallest possible fixture. Tungsten lamps have been used in filmmaking for more than 50 years and burn at 3200 K, which is why interior lighting is sometimes called “tungsten balanced.”
This shot uses a fluorescent light manufactured by Kino Flo, one of the most popular providers of movie and TV lighting.
-
Floodlights cover a wide area with even light and produce little or no shadows. The most popular floodlights for filmmaking are softlights, which are small and portable. Softlights shine light indirectly—their lamp is hidden from view and pointed at a reflector, so the reflected light is cast on the scene.
-
Fluorescent lights are specially made for film and video. They come in panels and can be mounted on stands or set at floor level; they are incredibly flexible because they will fit in small spaces and cast bright, steady light, with little falloff. Fluorescents are favorites due to their ease of use and wide coverage area; plus, because they draw less power than quartz or tungsten lights, they stay cooler and don’t heat up the room. Photographic fluorescents come balanced for either indoor or sunlight temperatures.
-
China balls are spherical paper lanterns used for overall illumination. You can put indoor- or daylight-balanced lamps in them.
-
A soft box is a frame that fits around a lamp. The frame is black on all sides and has diffusion media on the front (discussed later in the chapter), making the light soft and even, with little falloff. Soft boxes are also used for overall illumination but can be more specifically directed than fluorescents or china balls. Lighting professionals will frequently build specialized soft boxes or groups of soft boxes to hold clusters of lights for particular scenes or effects on major motion picture projects.
-
Reflector umbrellas mount in front of a light; the light points to the reflective interior of the umbrella, and the open umbrella bounces the light onto your subject. The light is soft, diffuse, and even. Reflector umbrellas are a staple of portrait work.
-
Bouncers (or bounces) are anything you can bounce light off, to diffuse its sharpness and make it more even. A bouncer may be a piece of white, heavy-duty card stock mounted on a stand. You can also use a light-colored ceiling or wall as a bouncer.
Lighting LED in action
-
LED lights are not a specific type of lighting gear—they are a smart and eco-friendly alternative to quartz, tungsten, and fluorescent lamps. Most of the gear mentioned in this list can be fitted with LEDs, and LEDs can also be formed into particularly useful shapes, such as light panels that are square or rectangular. LEDs can be temperature-balanced close to sunlight or indoor light, but they cast light at a slightly different temperature than traditional lamps; therefore, once again, make sure you white-balance. LED lights first gained popularity in the live theater and are now commonly found on television and film sets. LED panels come in a variety of sizes, are relatively inexpensive, and last a long time (you won’t have to worry about replacing burnt-out bulbs). You should always test LEDs with the specific digital camera you are using. Each camera sees LED lights differently.
-
Practicals (or household fixtures) are lights that are in the shot. As mentioned earlier, you can use them for primary lighting—especially with DSLR cameras, which do very well in low-light situations—or for accent illumination. Because they are practical, they will not burn at predictable color temperatures; thus, white-balancing is a must. Practicals may include the following:
-
Lamps and ceiling lights (incandescent bulbs have a color temperature of 2800 K)
-
Cell phones
-
Computer screens
-
Streetlights and vehicle headlights
-
Christmas lights or rope lights, which can be coiled up to produce a soft, warm light that fits into a tight space
BEWARE SUDDEN BRIGHTNESS
When a tungsten or incandescent bulb suddenly gets brighter, it is about to burn out.
Don’t Blow That Circuit!

Lamps are measured in watts; power is measured in amps. Most homes and commercial buildings have circuit breakers that are rated for 15 or 20 amps, but you should always check the circuit breaker when you’re on location to see how many amps are in each circuit. How can you know when you’re drawing too much power and might blow out a circuit? Use this simple formula: WATTS ÷ VOLTS = AMPS.
Let’s use the number 100 for volts. (Household current in the United States is supposed to be 120 volts, but it can actually vary from 105 V to 120 V; in most of the rest of the world, it varies from 200 V to 240 V.) If you’re using lighting instruments that total 1500 watts, then 1500 WATTS ÷ 100 VOLTS = 15 AMPS. That’s already at the maximum capacity of most household circuits, so you’ll need to use another circuit or an external generator if you need more power. Overloading a fuse in an older building can result in a serious fire.
Renting Lights

There may be times you want more lighting equipment than your school can provide. In these cases, a local lighting rental company can come to the rescue. Many professional camera stores also rent lighting gear, along with cameras and lenses.
Rentals can be costly, but there are some tricks that can help you get a better deal.
 Develop a relationship with the rental company before you need them. You’ll usually get a better deal if you have been a consistent customer.
-
Use the equipment that’s not in demand. Professional photographers have highly specialized needs, whereas you may need only a few lights—and any lights will do. Be willing to take what’s readily available; it will be cheaper.
-
Rent on a weekend. Because most professional film crews take the weekend off, they return their rental equipment on Friday afternoon and don’t come for it again until Monday. Many rental companies will give you a two-days-for-the-price-of-one deal on the weekend, as long as you get the gear back Sunday night or very early Monday morning. And you don’t mind working on the weekend, do you?
Mounting Equipment
Lights can’t be positioned by themselves—
-
Light stands can be either straight pipes that fit into weighted bases or metal rods that have tripod legs attached. The metal rods often telescope up and down, allowing you to adjust the height. Some have casters so they can be rolled; however, when any light stand is in its permanent position, place sandbags at its base to make sure it doesn’t tip over.
-
Boom arms can be attached to many light stands and poles to extend their reach.
-
C-
stands , or century stands, come equipped with three legs for stability plus a boom arm that can be adjusted to a variety of angles. C-stands are often used to hold reflectors or bounce cards. -
C-
clamps and alligator clips secure lights to stands or pipes. C-clamps are used for heavy lights, whereas alligator clips are used for less- heavy instruments. Alligator clips also can attach bounce cards and reflectors to stands and poles. -
The lighting grid is the name for the crisscross pipes suspended above a sound stage. In a studio shoot, you will hang most of your lights from the grid.
-
Any light attached by a C-
clamp to an overhead grid must have a safety chain, or a secondary chain, around it connecting the light to the grid in case the clamp fails. Safety precautions in the mounting or suspending of lights are crucial, and those serving in the roles of lighting grips have a serious responsibility in this regard.
How Much Is Enough?
The speed of a shoot is often governed by the speed of the lighting: how long will it take the cinematographer to set up the lights, or if something unexpected comes up, is there enough extra equipment to solve the lighting problem?
Speed is an important issue for producers because it is directly related to budget. As you learned in Chapter 5, Production Planning and Management, if your shoot can stay on schedule, you can generally stay on budget. If not, you sink into budget deficit with every day you fall behind. Cinematographers try to solve this potential problem in two ways: by having an extra person or two on the crew, and by carrying supplementary equipment in case a lighting instrument breaks or the director suddenly decides to switch locations. In other words, the cinematographer should always be prepared.
But preparation, too, has its costs. An extra crew member adds to the budget in terms of salary, food, and transportation; extra equipment adds to the lighting rental budget. It is typical for the cinematographer to ask for more than may be needed, and likewise typical for the producer to try to pare things back.
What’s the solution? Find a happy medium. Luckily, you don’t have to commit to lighting equipment rentals for an entire shoot—
PRACTICAL TEMPERATURES
You can get 5500 K and 3200 K lamps that screw into conventional lighting fixtures, so that the color temperature is right if you use practicals.
Diffusers, Gels, Filters, and Cookies
Just as Johannes Vermeer used curtains to manipulate the quality of light in his studio, cinematographers use a variety of materials to change the quality and color of the light. Some of the more common lighting materials you may work with include diffusion materials, colored gels, filters, and cookies.
This effect is similar to the change that happens when clouds pass over the sun. Anything that gets between the light source and the subject can be a diffuser. Grid cloth, nets, and silks can be used to diffuse sunlight. They come in different thicknesses (full, half, and quarter), which allow lesser or greater amounts of light to pass through.
Grid cloth
Harsh sunlight on this actor’s face is being softened by a grid cloth. Because of its widely spaced weave, grid cloth is silent in the wind and won’t create sound problems.

Colored gels are sheets of plastic that change the color of light. They do not add color; rather, they absorb opposite wavelengths. For example, a red gel will absorb blue and green light and only let through red wavelengths; thus, the light will look red. Although you can use theatrical and party gels, which come in a wide variety of colors, to create extreme color effects, gels are most often used as an essential tool for changing lighting temperature when you have a mixture of indoor and outdoor light.
 USING LIGHTING GEAR
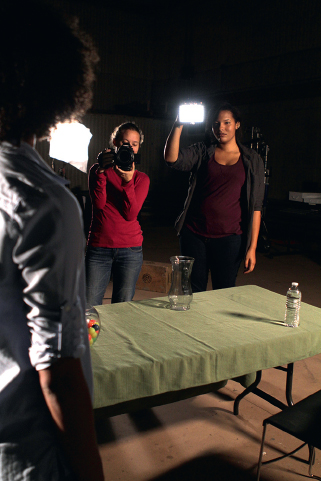
Spend some time with your school’s lighting gear. Get to know the different instruments, lamps, cables, connectors, and controls. Some instruments may run on 220-volt current instead of standard 120-volt household current. Make some combinations: which instruments can go together and not overload a single 15 amp circuit?
CTB (color temperature blue) gels raise the temperature of tungsten lights to 5500 K, the color of sunlight. CTO (color temperature orange) gels lower the temperature of sunlight to interior, or 3200 K. In the shot from Inside Llewyn Davis we looked at earlier (see here), the cinematographer would have used one or two layers of CTO gels on the window to lower the light temperature so that it balanced with the interior lighting setup.
Cookie cast
You don’t need special tools for this do-it-yourself cookie. Here, the DP has created a web of tape in front of the light (right), creating the pattern of a window frame behind the actor (left).

Filters are like diffusers or gels, except they are round pieces of glass that screw onto the front of the lens of a lighting instrument. Filters can change the visual palette by enhancing or subtracting colors, increasing or decreasing definition and contrast, or making the image sharper or hazier.
Cookies are metal panels with shapes cut out of them. The resulting light casts a pattern, just as leaves cast their shadows on the ground in a forest. Cookies are useful for creating texture and identifiable shadows, such as a window frame.
Lighting Pro’s Emergency Kit

 Extra heavy-duty extension cords
-
Leather gloves for handling hot instruments
-
A fan or hair dryer for drying out wet electrical gear before you plug it back in
-
Clothespins to attach gel and diffusion media
-
Rolls of blackwrap—heavy-duty foil that has been painted black and can be shaped around lighting instruments to focus the beam or prevent light “seepage”
-
The free color predictor app for your iPad or iPhone