Special Lighting Situations
By now you have learned how to tell the film story with basic exterior and interior setups. However, you will also encounter special circumstances that don’t precisely fit any of the standard setups. In this section, you’ll discover how to execute lighting for low-
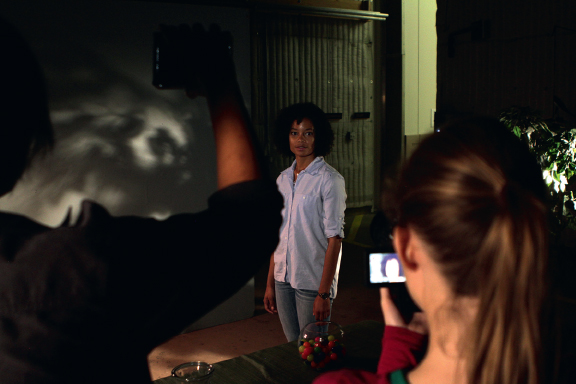
Low Light and Mixed Light
Digital cameras do an exceptional job of capturing images in low-light situations, in which there is just a small amount of available light, such as night shoots and scenes using only practical lights. These techniques will maximize the amount of light that falls on the optical sensor and improve the quality of your images:
 USE AVAILABLE LIGHT
When shooting in low-light situations with only practical light, such as headlights, matches, or computer screens, make sure you color-balance with the exact lighting that will be available when you shoot. Otherwise, your actors will turn strange colors!
 Shoot with a wide lens when possible. A wide-angle lens captures more light than a long lens captures.
-
Decrease the shutter speed to compensate for dimmer light.
-
You may be tempted to increase the gain or brightness control, but don’t—doing so will make the image grainy and noisy.
What do you do when you have both natural sunlight and artificial light in the same shot? You’ll recall from Chapter 8 that the color temperatures of sunlight and artificial light are different, and you can only white-balance for one color temperature at a time. A typical mixed-lighting situation is when you need to shoot people inside a room but next to a window. The sunlight will be 5500 K, whereas the interior light will be 3200 K. Even when you supplement the sunlight with artificial lights shooting through the window—generally a good idea if you have them, because it gives you more control—those lights will be sunlight-balanced, unlike the temperature of the room lights. If you don’t match the temperature of the lights, your colors will be incorrect. Here are the three possible solutions:
-
Cover the outside of the window with CTO gel (see Chapter 8). This will lower the sunlight to 3200 K, the temperature of interior light.
-
Put CTB gel (see Chapter 8) on the interior lighting instruments, which will raise the temperature of the tungsten lights to 5500 K.
-
Don’t use tungsten interior lights. Instead, use interior lights that are daylight-balanced to 5500 K.
GEL, THEN LIGHT METER
When working with mixed-lighting situations, do your light-meter reading after you install the gel—it will cut your f-stop by at least a full stop.
With any of these techniques, the color temperatures will match, and you will get a good-quality image.
Skin-Tone Variations
People have a wide range of skin tones, from very light to very dark. If you’re shooting a scene with actors whose skins tones are all roughly the same, the lighting in the scene can be even, and the images will look good. However, you still need to be aware of how complexion affects detail.
With a constant amount of light at the same exposure, lighter things reflect more light (Chapter 8) and therefore show more detail than darker things. This is true of people as well as objects. Therefore, if you are shooting a scene with lighter-
Similarly, if you are shooting a scene with darker-
The situation becomes more complicated when you have lighter-
Lighting for Movement
Sometimes the director wants to accomplish a lot of action in a single take, with the camera moving along with the actor across a large area. Good advance communication is essential—
Even in this low-
The best solution when time and budget are tight is to use a few instruments that disperse light over a wide area. You can overlap the lights from each side of your lighting triangle, so, for example, as the actor moves, the key light in the first position becomes the backlight in the second position. Another solution is to use fluorescents or LED strips that cover a large location with only a few instruments.
Lighting for VFX and Animation
Visual effects (VFX) were once the exclusive province of expensive productions; however, you will find you can do compelling VFX yourself if you learn the right techniques. You will learn about green screen, compositing, and other effects and techniques in Chapter 13. Most of these effects will involve two parts—the live-action element and the digital element that will be added later. Green screen and plate work are the most common lighting situations you’ll need to master for the live-action part of your VFX shots.
 SPECIAL LIGHTING SITUATIONS
This section contains four special lighting situations: low light and mixed light, skin tone variations, movement, and visual effects. Select one and practice shooting it.
When shooting elements for VFX work, always keep a record of the lighting so that you can match it later. Your notes on color temperature and lighting ratios will help ensure the effect is as seamless as possible; the best effects don’t look like effects at all.
- Using a green screen. A green screen is a background that is colored green; during postproduction, the green screen is substituted for another color or background. When lighting a green screen, the background must be even and well illuminated, so that the green field is all the same color for compositing later; fluorescents are especially effective for this purpose. When lighting an actor against a green screen, it’s important to match the lighting to that of the final designed image, which means you need to know what you want in advance. Don’t overlight a green screen, or you will get green spill—green light reflected back on the actor. To minimize green spill, you can also move the actor farther away from the green screen.
- Using plates. Plates are shots of any location—practical or virtual—to be used in later compositing. It is typical to shoot plates of principal locations as reference material and in case some scenes need to be composited later, even if they were not part of the original plan. A plate should be shot with a locked-off camera and with the highest resolution possible. A plate should be lit exactly as you would light the scene if actors were present, and your record of lighting measurements will be essential when actors are composited into the scene later.
- Virtual lighting. Keep in mind that many VFX shots include light that has been manufactured, added, or augmented digitally using computer software, as we will discuss further in Chapter 13. When doing that kind of work, on a computer-animated film, for example, all of the principles we have discussed here apply. The difference is that the software will ask you what lighting style, tool, and position to choose, and you will apply it via the computer rather than using a real-world lighting instrument. But the aesthetic outcome is intended to be exactly the same. Indeed, a growing industry trend is to have traditional live-action cinematographers and gaffers participate in designing, executing, or consulting for the lighting of animated films. Acclaimed DP Roger Deakins, for example, has consulted on lighting in recent years for award-winning animated features like WALL-E (2008) and the How to Train Your Dragon series (2010, 2014).
Lighting Pro’s Emergency Kit

 A camera sling bag, which gives you easy access to lenses, filters, and other light equipment when you are on the go
-
A neutral density 0.9 filter (ND9), which reduces the amount of light entering the lens, allowing sensors to cope with bright conditions. An ND9 is also useful for looking at clouds to predict their movement—which affects lighting—without getting blinded. (You should never look directly at the sun, even if the sky is cloudy.)
-
Gaffer’s tape. It can do almost anything.
-
A warm-weather hoodie for when you are doing night shoots