Finishing
After you put a cut together, you will screen the material, get input, and recut it until you arrive at a final product you are satisfied with. But even then, you are not quite finished, because your “final product” isn’t really final per se if you edited in offline mode—
Native Editing

On page 269 we discuss the basic issues involved in using an offline/online editing workflow process—
This is often also referred to as native editing, because you conduct the process using original elements in their native high-
The option of using a native online workflow therefore presents a question: is a student filmmaker with limited resources better off adopting this approach or using a traditional offline/online methodology, as many professional productions still do today?
The answer frequently is that it will make the most sense for students to use an online workflow, since they will likely not have the resources to bring their movie to a mastering facility later. Many modern NLE systems have made this feasible for students because they are usually able to handle high-
However, if you captured imagery at a much higher resolution, if you have lots of complex visual effects and other ancillary elements, or if you are lucky enough to have theatrical exhibition possibilities lurking in the wings, then an online workflow approach may not be best. In that case, you will likely need to offline first and then figure out a specific online methodology that best serves your exhibition plans for the material.
But even if you skipped the offline method and used an online workflow (see Tech Talk: Native Editing, above) all the way through the editing phase, as opposed to an offline/online methodology, you may still not be totally done in that you may need to add or tweak finished visual effects, sounds, music, color, credits, or other finishing touches. Keep in mind that you will be dealing with the creation of some of these elements, such as titles and color correction, at some point during your editing process, as we discuss later in this chapter (see Action Steps: Adding Titles and Graphics, below, and here for more on color correction). Others, such as sound and visual effects, entail separate creative processes, as we discuss in Chapters 10 and 13, respectively. But all of these elements need to eventually be brought together and incorporated into your final version so that, after everything is finished, you can finally output the whole thing to your mastering media (see here). As students, you will likely be building a basic mastered version of the movie on tape, Blu-
At the professional level, all of these finishing processes are typically done by separate artists and facilities. But at the student level, you will need to execute them yourself before you can consider yourself finished with the editing phase. Although it is true that these processes are not considered “creative” editing chores in the same way as are the techniques we discuss in Chapter 12, they do involve improving the overall quality of your product—
ACTION STEPS
Adding Titles and Graphics
Text is a radically unsung but hugely important component in movie making at all levels, for titles, subtitles, credits, and more. The methods for creating text and placing it over, under, or next to your images are almost unlimited if you have the right tools, resources, and experience. Here are some important tips about the most fundamental concepts to keep in mind as they relate to text:
 Use Basic Tools. For much of your student work, most modern NLE systems have basic graphics and text-
generator tools that will be sufficient, and they can usually even help you animate graphics or create 3D text. NLEs will often have a title tool that allows you to easily choose fonts, size, color, position, character leading, point size, and justification controls.  Get Web Help. Many editors also routinely find and download for free or low cost even more font options and graphics tools online. Such options are readily available across the web, but make sure such downloaded fonts are compatible with your particular NLE system.
 Don’t Get Fancy. If you get carried away with titles or credit sequences, or make them too bright, you may regret it. Although they give awards for stylized graphics and credits in the professional world, you need to understand that adding anything on top of video imagery means you will have more layers to combine—
which translates to more work and more technical complications. Thick fonts usually work better than scripted or heavily stylized fonts.  Be Careful Beneath Text. Frequently, text placed over imagery needs some kind of graphic treatment or drop shadow inserted underneath it to prevent an overblending of text with the background image. Editors sometimes blur backgrounds underneath titles for this reason.
 Stay Consistent. It is safest to build graphics in the same aspect ratio and resolution as the rest of your project. For sophisticated text or graphics, artists sometimes use software programs beyond their NLE that you may already be familiar with, like Adobe’s Photoshop—
tools that can create graphics for you to import into your NLE. However, you need to be careful; older NLEs may not be able to handle the color space and pixel aspect ratio of files created by some of those programs. Check your manual to learn what formats are compatible with your system.
Offline/Online Workflow
Now that we’ve discussed using an entirely native online workflow, let’s examine the basics behind the other approach—
When you cut offline, you need to decide what lower-
In terms of file formats, since files with lower data rates take up less storage on your computer, you will want to convert files to a format that is of low enough quality so as not to strain your computer’s speed and efficiency, and yet of good enough quality to be able to view your imagery so that you can make good editing decisions. Therefore, if you are working offline, you want to have your NLE copy original files to more compressed versions and edit using those.
Once you start offlining, your NLE will build the all-
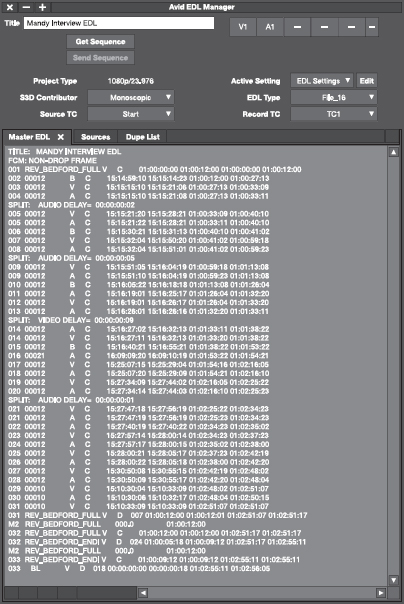
On modern NLEs, after an offline edit, your online edit can often be largely a matter of linking low-
Color Correction
Whichever workflow you choose for editing and then conforming your movie, you will have to transition into a color-
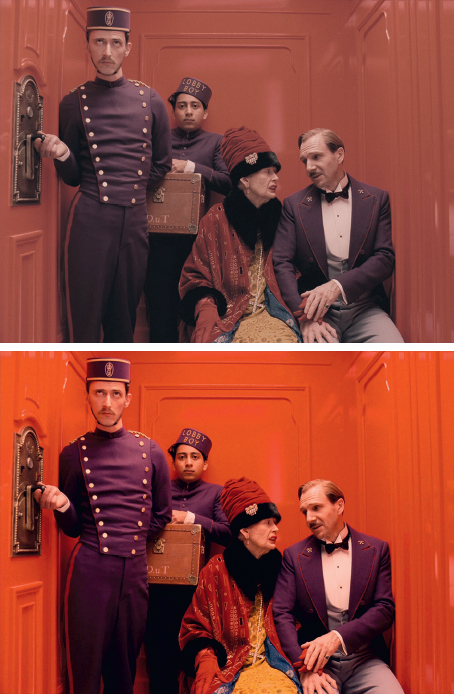
Broadly, the goal of color correction is to make your imagery look consistent throughout, so that the viewer is not distracted by sharp changes or unevenness in color tone. The caveat to that, of course, is that changes can be made with strategic creative reasons in mind. A few other basic tips regarding your color-
- Flesh tones on actors are crucial—
they impact how viewers perceive, accept, and relate to actors. Generally speaking, warmer flesh tones are preferred, but you need to be careful with light- skinned actors— if you go too warm, their skin can look red or flushed. Cooler flesh tones are typically preferred when you want to make someone look darker or more sinister. Many vectorscopes— circular charts that give you visual color displays to examine color hue and other characteristics (see Chapter 8)—within modern NLEs feature what is called the flesh line, which is a tool that helps you set proper skin- tone color more accurately. - You can increase saturation in images to make color more radiant or bold, or desaturate images for more muted colors. Indeed, many leading filmmakers play extensively with saturation and desaturation to create different looks—
for example, extensive desaturation is used to make images look almost monochrome, akin to black and white in some extreme cases. - Keep in mind the concept of primary and secondary color correction. Primary color correction represents the work done to impact color throughout the entire frame, whereas secondary color correction refers to adjustments made to specific colors in specific parts of the image.
Color correction to achieve these kinds of things, and much more, can be a complex endeavor, and many of its nuances take years of practice to perfect. In fact, in the professional world, the final color-
Color-
Your most important color-
On many systems, you can also set certain color controls to suit you, from fairly simple to complex. Like other aspects of nonlinear editing, color-
 Color-
balance controls for efficiently adjusting predefined color- tone ranges in imagery -
Curves, a control to help you adjust particular tonal ranges on any single color channel you choose, “bending” color in that specific area without impacting color above or below it
-
Hue controls for adjusting other specific attributes and the range of those attributes for a particular color
-
Levels, a control for adjusting luminance
-
Saturation controls for adjusting how intense particular colors are—
sharper or more faded -
Lift, gamma, and gain controls for adjusting black levels (lift); adjusting midtones, which represent the subtle color range between shadows and highlights (gamma); and white-
level highlights (gain). (Many NLEs use these terms, but nomenclature may vary on certain systems.) -
Mask controls for creating vignettes and other types of image alterations done with color shifts in specific viewing areas
-
Windows, a control for defining a specific area within a larger image for color adjustments
Outputting a Master File
When you are done finalizing your movie, you must then export it as a master file to whatever media you have chosen. Typically, modern NLEs can automatically export files in different formats fairly simply, but you need to think about how you will be exhibiting your movie to guide your decision. Keep in mind there are all sorts of files and formats, and image quality will vary depending on which format you use. That choice, in turn, depends on your resources and what your end goal is for showing the movie. But generally, it’s always a good idea to master your project at the highest possible resolution. You never know what potential exhibition opportunities will come your way, and you want a quality level that will allow you to exhibit in any possible environment or platform.
Here are some issues to consider about what kind of mastering file to create, how to create it, and what kind of media you may want to export your movie to. This can evolve into particularly technical areas at the high end of the industry, and you will need to learn more about those areas as you move forward in your filmmaking education, but for now, you will benefit from a general awareness of the following issues:
-
If you offlined the movie, upgrade to original-
resolution material before you output the file. -
If you used an online workflow but with a modestly compressed codec for increased efficiency, output your master with as little compression as possible. The visible quality change in doing this will be minimal, but if you think your project might get remastered for different types of exhibition in the future and thus experience future compression cycles, improving the original file makes it more robust during those cycles.
-
Consider outputting a full-
resolution master file with no compression at all. The difficulty of doing this is that the file size will be very large and you will need lots of storage media to hold and work with the material. On the other hand, if no compression is involved, anyone can play and view the movie on just about any kind of system in the future. -
Although the industry has largely moved to file-
based workflows, videotape remains an option for distribution purposes. If you need to output to tape, be aware that depending on the videotape recorder (VTR) you are using and how it connects to and interacts with your NLE, there could be some minor reediting involved, although not to the extent of traditional tape- to- tape editing. Generally, it will usually be fairly easy to connect the VTR to your NLE and simply copy the movie from the NLE to digital videotape. The easiest way to do this is to connect the NLE and VTR, play back your movie from your NLE timeline, and crash- record to the tape deck, which is not controlled by your NLE. You simply hit record, play your sequence, and the movie is copied to tape. It is usually preferred, however, to have the NLE actually control the tape deck. In that scenario, the NLE will have a command function called print to tape, export to tape, or some variation thereof. In that case, you need to use a VTR that supports timecode, and you will have greater control during the recording process. -
However, if you want to create a high-
quality master on videotape for possible broadcast or theatrical exhibition, you will need to rent a digital tape deck for the purpose of making sure elements are positioned correctly by timecode and that any minor flaws can be rectified. Often, you will want to use the tape deck to create an assemble- edit recording for this kind of work. Assemble- edit recording involves recording all video, audio, and timecode to videotape neatly. If your entire movie is in good shape, this is a simple process if you have access to a VTR. If you start and stop recording, however, there will be gaps or breaks on the tape between shots. In that case, you need to remember to roll back to the end of the previous shot every time you resume recording. -
If you are creating a tape master for possible broadcast, it is a good idea to include color bars and tone, or a slate, at the beginning of the tape. Bars and tone allow a broadcaster to make sure that they show the material matching the colors and audio levels you set. If you do add such elements, you should create them and, using the NLE, connect them to the start of your program, so that they are part of the finished product. (You can exclude them from your master if it turns out they are not needed by selecting the movie after that leader material and exporting without it.)
-
If you want to master your movie to physical media, you will frequently choose DVD or Blu-
ray disc. With a separate DVD disc recorder or a disc burner on your NLE computer, you can fairly simply, in most cases, compress and burn a copy of your master digital file onto a recordable disc. Essentially, that is a DVD duplication process, and nothing more. Keep in mind that if you want to author the DVD— meaning you want to add menus, extras, chapter lists, and so on— then you will need to use an authoring software application, of which there are dozens available for all computer platforms.
Editor’s Emergency Kit

 Uninterruptible power supply (UPS) system
-
Stable and secure high-
speed Internet connection -
Off-
board hard drive -
DVD burner
-
Membership in online user groups, particularly for Avid, Final Cut Pro, and Adobe editing-
related tools -
Registration for full technical support from the manufacturer of your NLE system
-
Readily accessible manual for your NLE system, monitors, and any other important hardware